
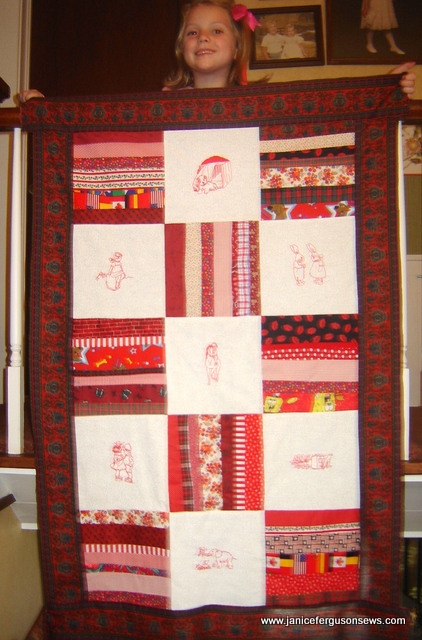
Laurel with finished quilt top
Laurel is so eager to finish her quilt. Even though she hasn’t taken a nap for 3 1/2 years, she declares that she needs one now and wants her quilt for a cover.   So we are rushing to finish this project so the poor child can get some rest.
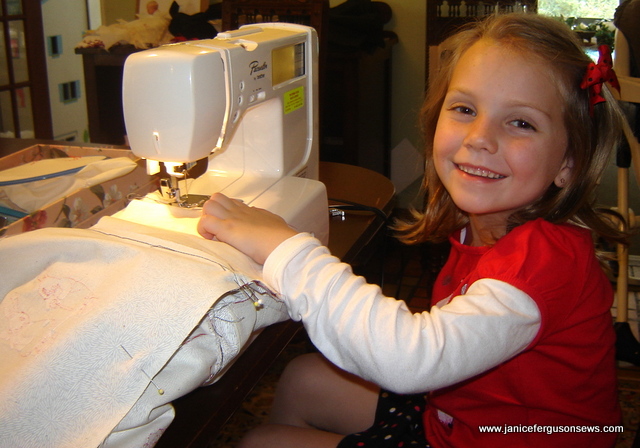
Yesterday, she finished joining all the blocks together and today managed to sew on the borders. She is sewing on a wonderful little Brother machine, a Pacesetter 300S. The machine is probably 10 years old but it is a honey.
This petite sweet thing weighs only 11 pounds, making it very portable. It has an embroidery unit with a 4 x 4 field, several built in alphabets, more than 70 built in designs and more than 30 stitches, including a pin stitch and other heirloom favorites.  The original suggested manufacturer’s retail price was $2500, and worth every penny. Recently I saw the new and improved version at WalMart with built in Disney designs for just $450! If I didn’t have this one in perfect working order, I’d be tempted to snatch up this bargain.  It is just a great little machine.
The quilt design I came up with works so well for children or beginning quilters. With 7 machine embroidered redwork designs and 8 foundation pieced blocks stitched on 10″ squares, it was easy to cut them down to 9″. Had there been any major mistakes, they could have been selectively reduced to 7″ or 8″.  Â
The border fabric is a vertical stripe, fussy cut for ease in application. The fabric was cut so that with the raw edge of the fabric running along the edge of the presser foot, a red line in the stripe fell exactly under the needle. This made it much easier for Laurel to guide the fabric with some degree of accuracy.
It looks rather dark in this photo, but I’ve been on a fabric diet for some time now and was determined that none would be purchased for quilts. The advantage of this particular stripe with the built in seam line was just one more reason to make do with it.
Years ago I taught several series of quilting classes for children, but I have picked up a few new tips while working with Laurel. In the past, I required that the students be at least 7 years old.   With a group of 7 or 8 girls, they needed at least that level of maturity. But when sewing with only one child, I find that a 6-year old may be more than ready.
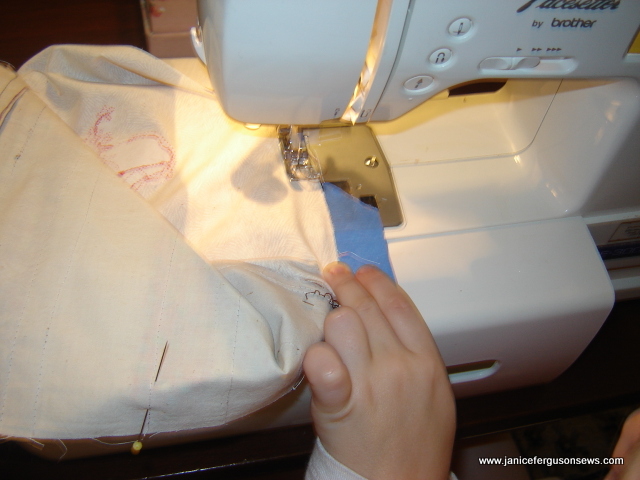
It also helped to put blue painter’s masking tape along the throat plate. Without it and with relative success, Laurel had been guiding the fabric under the presser foot with the edge of the foot even with the raw edge of the seam. But when assembling the longer strips, she found that the weight of the hanging rows made it much more difficult to control the fabric and get a straight, even seam. The blue tape allowed her to guide the fabric at a greater distance from the presser foot and achieve greater accuracy.
Here are some basic tips for junior stitchers.
-  If possible, assign your junior quilter to a machine which has a speed control. Eager as she is to finish this quilt, she wants no part of a speed beyond slow.
- Another useful feature for children is a needle down button. As the machine always stops with needle up, she has learned to push the needle down button before lifting the presser foot to realign her fabric.
- With quilting pins, pin extensively for the child. I’ve always been partial to fine, Iris pins, popular for heirloom sewing. But Laurel was unable to grab the tiny head on those pins. Frequent encounters with pins forces the child to stop and evaluate or realign the raw edge of the seam allowance.
-  Elevate the foot pedal. We have an old wooden kitchen step to which I attached a velcro strip, with a matching strip on the foot pedal. This holds the foot pedal in place while making it easily accessible to short legs.
- Position a pin cushion next to the machine so newly removed pins can be safely put away. It is also helpful to set up a box of sewing supplies for the child, with her own scissors, blue marking pen, machine needles, stabilizer, glue stick, seam gauge, seam ripper and other necessities. Everything should be handy and in good working order.
Laurel sewed every seam, but, of course, all rotary cutting and pressing was done for her. She selected the redwork designs, picked the fabrics from my stash and arranged the sequence in which they were sewn. It surprised me that her favorite fabric is the novelty print with needles and threads.  With Sponge Bob, Scooby Doo and lipstick prints, I was a more than a little pleased.
At our next sewing session, she will embroider a quilt label on the backing, make the “quilt sandwich” which consists of backing, pieced top and batting then baste it together. Next she will sew around the perimeter. Finally, she will turn the quilt right side out and tie every 8″ with perle cotton. She can hardly wait. Neither can I.
