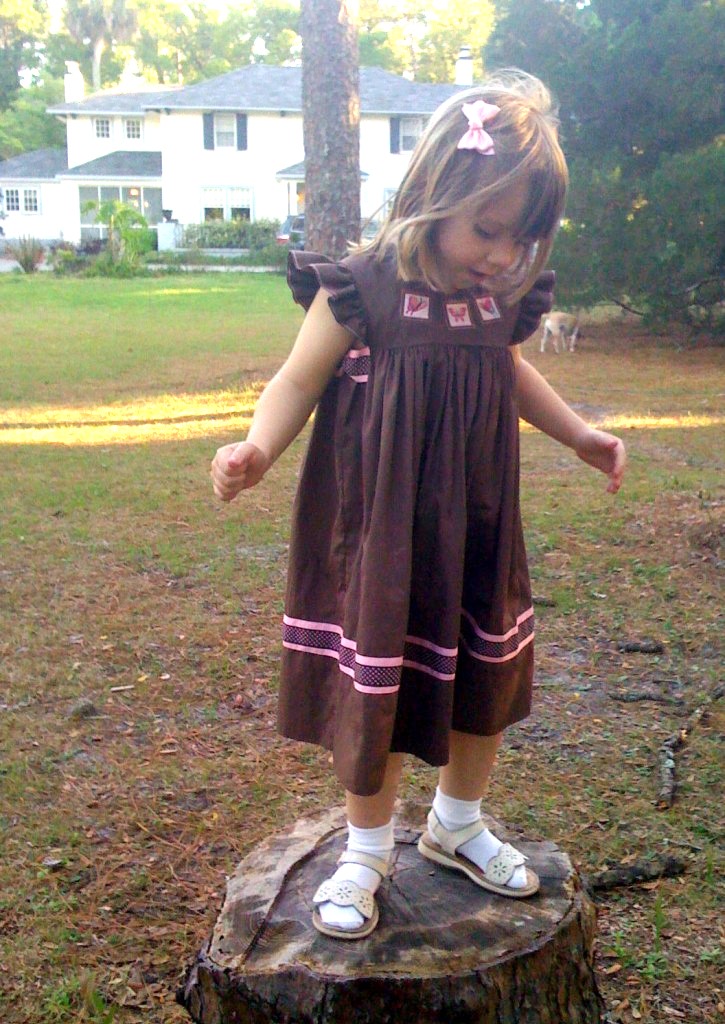
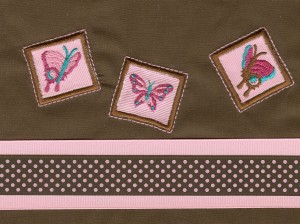
 This is one of Laurel’s favorite dresses. She loves the butterfly “stamps” and I like the versatility of the sundress/jumper pattern, Hanna, from Collars, Etc. It can be smocked or not.

Laurel in stamps dress, Robert in rocket shirt. He thinks he got the better deal. A strip of that same ribbon, measuring the exact width of the armhole, has been stitched down at either end of the casing. The ribbon is simply whipped with thread in the center, mimicking the knot of a bow, and tacked through the elastic and casing. This gives the illusion of a bow.
Made from brown Imperial broadcloth, the neckline and shoulder ruffle are edge stitched with pink thread. Stitched to wide pink grosgrain ribbon is a brown grosgrain with pink polka dots.
The design concept of “stamps” came from Dianne Boney, associate editor and contributor to Creative Needle magazine.
Intrigued by a baby dress she had purchased, her creative juices began to flow. The bodice of the dress featured little appliqué squares, literally the size of postage stamps, embroidered with even tinier little flowers. These were scattered on the bodice of the newborn size frock.
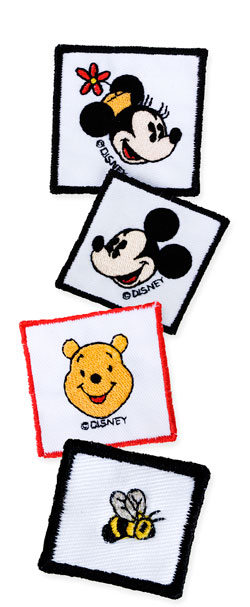
Laurel’s brown dress and a few other projects were stitched for a Creative Needle article, inspired by Dianne, written by me and the bulk of which is included below. If you would like to try some stamps, I would be happy to e-mail the design files mentioned in the article (3 sizes of applique’ frames and bumble bee). Just send your request in the comment section.Â
Standard machine appliqué techniques can be used when embroidering the stamp on a garment that is either under construction or ready made. Free standing stamp patches can also be made, much like Girl Scout patches. These can later be sewn onto garments with a simple zig zag stitch.
How To Select a Design
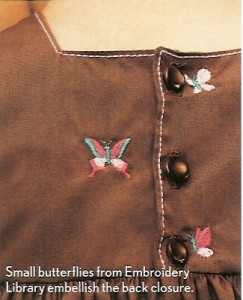
Collections of miniature designs are available from many sources. Those used on the butterfly stamp dress are from Embroidery Library’s (www.emblibrary.com)    “Things with Wings” miniature collection.
- #1 appliqué straight stitch outline on stabilizer
- #2 appliqué placement, straight stitched over appliqué fabric
- #3 repeat of #2, appliqué placement, after which fabric is trimmed
- #4 satin stitch frame
- #5 triple straight stitch around satin stitch frame.
Simply import the selected design into the best fitting stamp file between color stop #2 and #3. With the addition of the miniature design, the stamp file numbers will change.
Two stamp techniques are detailed below.
A. appliqué stamps machine embroidered directly onto garment
Using the available by request design files, embroider the stamp as any appliqué.
-
1. Iron on a stabilizer such as Firm Hold. Hoop fabric. If the item is difficult or impossible to hoop due to its size or shape, hoop a sticky stabilizer. Place the item to be embroidered on the stabilizer and proceed as if it were hoped.
- 2. Stitch color #1, a square outline, which indicates placement for the appliqué fabric. Use thread that matches the appliqué’ fabric.
- 3. Place appliqué’ fabric over outline. Stitch color #2, which repeats the outline of color #1.
- 4. Proceed to the first color of the miniature design. Complete the design.
- 5. Stitch color #3 of the stamp file using thread that matches the appliqué fabric . This will stitch out the original outline of the square. There may be a discrepancy between the two lines due to distortion from the embroidery
- 6. Remove hoop from machine but do not remove the stabilizer and fabric from the hoop. Place hoop on flat surface and trim excess fabric to the color #3 outline. NOTE: Cutting the fabric to the color #2 outline might put the raw edge inside the frame. Repeating this outline with color #3 after the miniature design is embroidered insures that the trimmed, raw edge of the appliqué’ fabric will fall inside the satin stitch frame.
- 7. Return hoop to machine and stitch color #4, the satin stitch square.
- 8. Stitch color #5, a triple stitch surrounding the satin stitch square. This mimics the perforations of a stamp.
-
1. Hoop two layers of a very sturdy water soluble stabilizer, such as Sulky’s Ultra Solvy.
-
2. Stitch color #1, appliqué placement, on stabilizer only. Use thread to match the color of the foundation fabric (top layer if using two).
-
3. Place foundation fabric over stitched outline. With same thread, stitch color #2 through fabric and stabilizer.
-
4. Proceed to the first color of the imported miniature design. Complete the miniature design.
-
5. Stitch color #3 of the stamp file. This will repeat the original outline of the square. There may be a discrepancy between the two outlines due to distortion from the embroidery.
-
6. Remove hoop from machine but do not remove the stabilizer and fabric from the hoop. Place hoop on flat surface and trim excess fabric to the color #3 outline. NOTE: Cutting the fabric to the color #2 outline might leave the raw edge exposed inside the frame, rather than enclosed in the satin stitch. Repeating that outline with color #3 after the miniature design is embroidered insures that the trimmed, raw edge of the appliqué fabric will fall inside the satin stitch.
-
7. Return hoop to machine and stitch color #4, the satin stitch square. Omit color #5, the triple stitch around the satin stitch square.
The free standing stamp/patch is now complete. Gently tear away from water soluble stabilizer and attach with zig zag stitch (L 1.0 W. 3.5) using matching or monofilament thread.
For the perforation effect of color #5, a triple straight stitch can be worked around the newly attached stamp. On the Brother Innov-is 4500D Duetta, use stitch #105, L. 3.0.


4 responses to “Stamps”