

When Laurel and Robert arrived for a two day visit, my little granddaughter was wearing the ladybug dress I made recently. While she was here, we made a matching “purse.”
This is a nice little sewing project for a child, as the purse foundation can be a ready made handkerchief requiring just 4 lines of straight stitch to be finished.  Or it can be more elaborate, like a square with lace edging or bias binding and machine embroidery. Note: I attached the bias binding but Laurel did the remainder of the sewing.
Regardless of your choice, you begin with a finished square. Large squares make large purses, smaller squares make smaller purses. Nothing tricky here.
Laurel’s purse began with a 16″ square of sturdy white cotton, bound with black bias, to mimic the pockets on her ladybug dress.
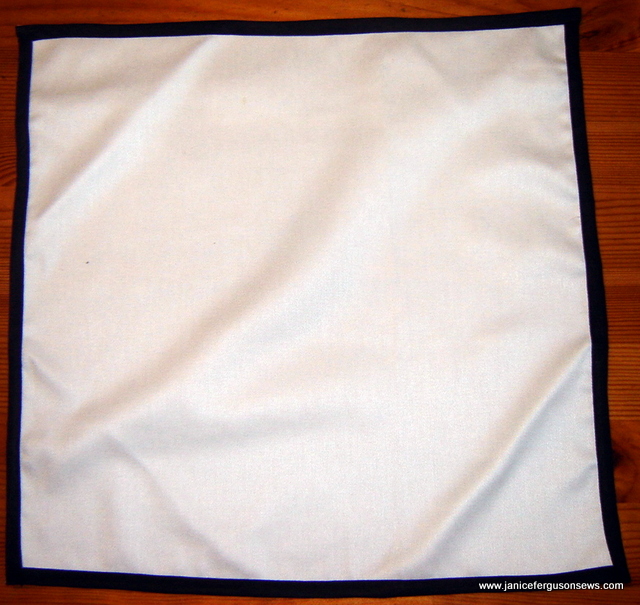
Step #1–16″ square with finished edges
Next, embroider one or more corners.  Be sure to embroider on the “right” side of the square. The “wrong” side of the fabric will be the outside of the purse. The folded corners, with or without embroidery, will be the attractive feature. The “wrong” side outer surface of the purse will be covered, mostly, with the folded corners.
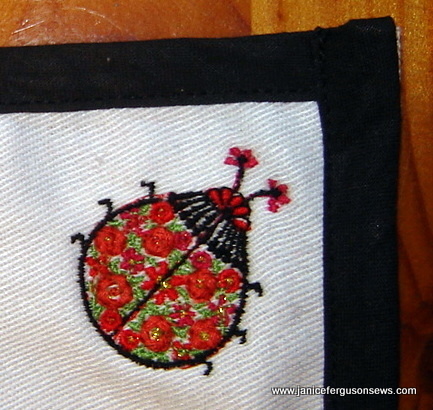
Step #2–embroider one or more corners
This single ladybug was extracted from a design of three in Zundt Design’s Pissaro Collection. Though it was the smallest of three, it was still too large. So it was reduced in BuzzSize by 30% and then stitched with 50 wt. DMC machine embroidery thread to compensate for the drastic reduction.  Even minimized,  this big bug still looks like a major player in the garden.
The square was placed flat on a table, wrong side up. Then the four corners were folded toward the center. There is no magic number or measurement. Just try to keep the newly formed corner triangles the same size.  Larger corner triangles mean smaller purse storage area. Don’t be surprised when a handkerchief is not exactly square and the triangles seem irregular.

Step #3–draw stitching line with washaway marker
Draw a stitching line for the casing with a water soluble marker. It is helpful to extend the line beyond the triangle edge so beginners can lineup the foot more easily.
Consider the ribbon width when determining the casing size. Especially when sewing on the bias, it is helpful to a child to have both a line and more pins than are shown here.
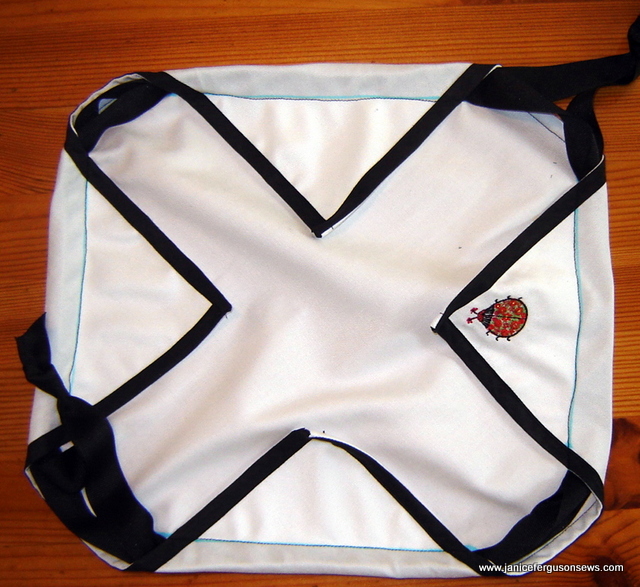
Step #4–straight stitch along marked lines to create a casing. Step #5–insert 2 lengths of ribbon through the casing.
Stitch on the drawn line to make the ribbon casing.   Use two ribbons, with diagonally opposite entrance and exit corners. Be sure to make the ribbon long enough that the purse can be flattened for ironing after being laundered.
Note the two corners which served as entrance and exit for the two ribbons.
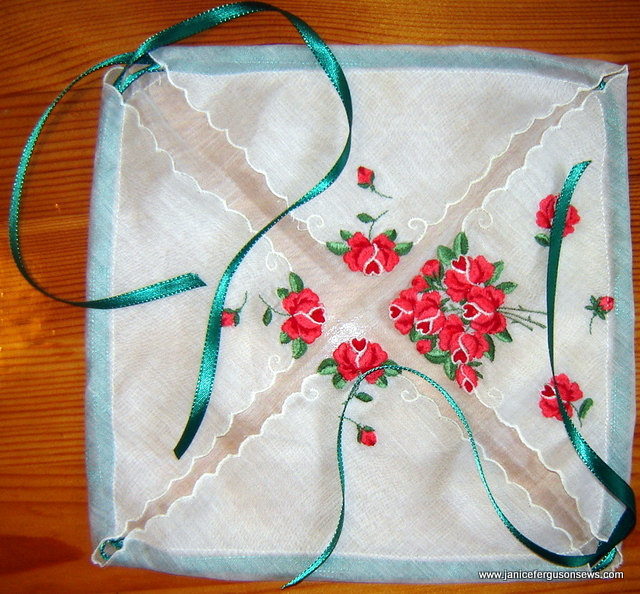
Laurel’s second project shows this more clearly. I wish I had taken more pictures of this hanky purse to compare, side by side, with the ladybug purse. But this is not complicated. I’m sure you can figure it out.
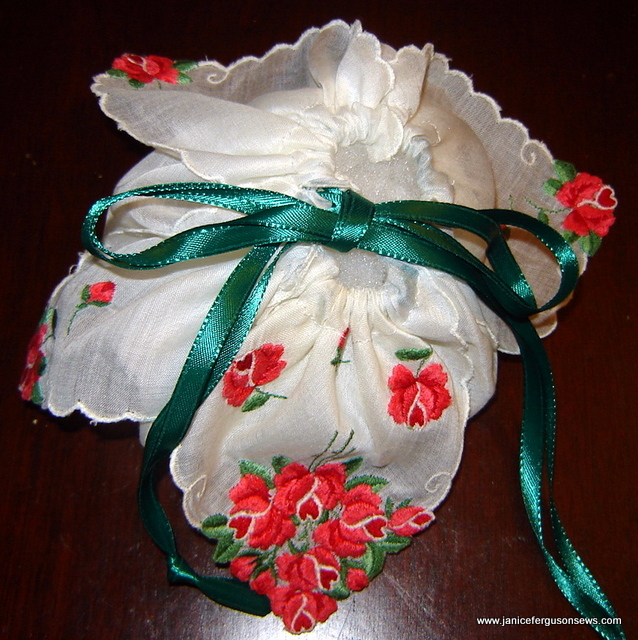
Pull up the drawstring ribbons to form a pouch.
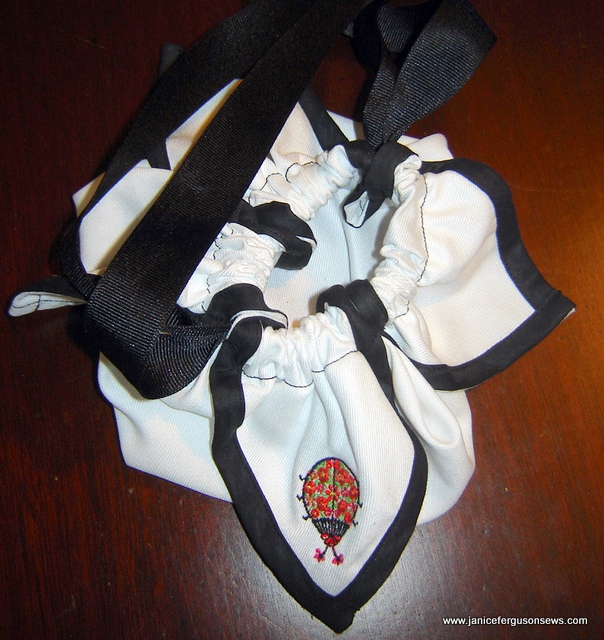
The ladybug purse was made to match a dress. The easier hanky purse could be a sweet little present for the big sister of a new baby who is being showered with gifts. Beginner kid “sewists” could make them up for friends or for birthdays.
If you have any thoughts of teaching a child to sew, this is a perfect beginner project.

4 responses to “Make a Girl’s Pouch Purse”