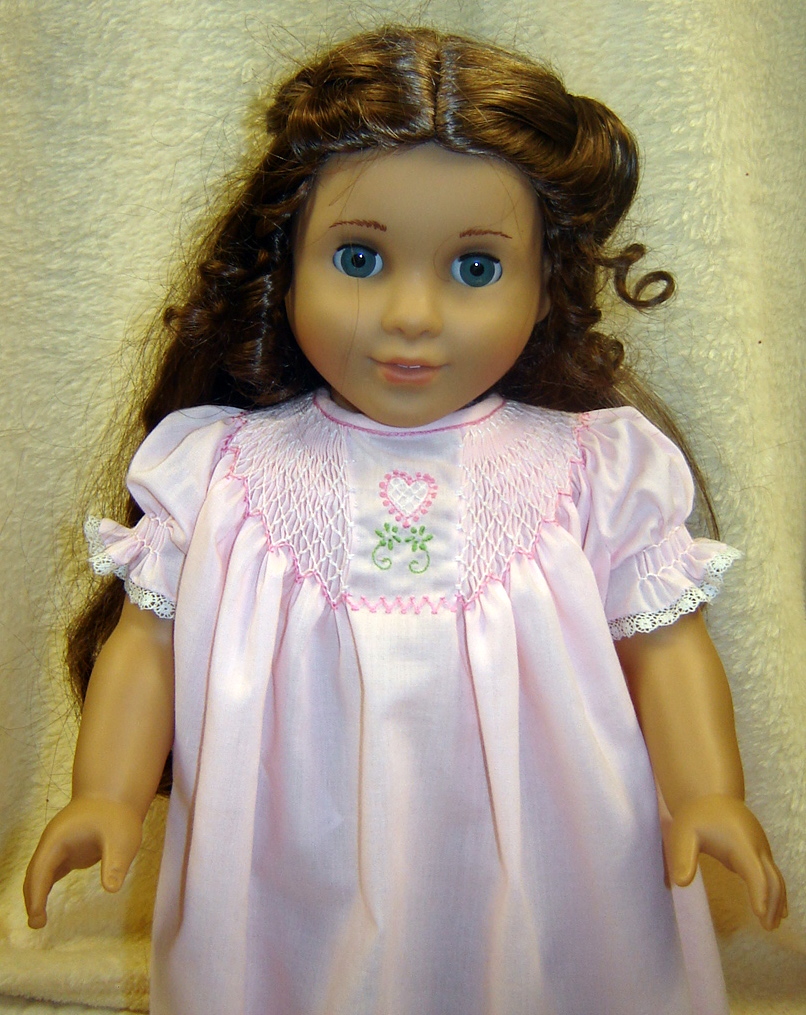
For Valentine’s Day, I am making my 7 year-old granddaughter a smocked bishop nightgown and this matching one for her American Girl doll. If these hadn’t been cut out and pleated up before I got Custom Keepsakes Sweet Dreams collection, I would be making nighties from that set. But these have to be finished.
I wanted something a little more interesting than a standard bishop and decided centered embroidery would be a fresh look. More than once, I have flattened the pleats at center front for embroidery or a tab and never found it to neither difficult nor problematic.
Doing this on a doll sized bishop gave me some unexpected disappointments. I’d like to share with you what I learned on this little project.
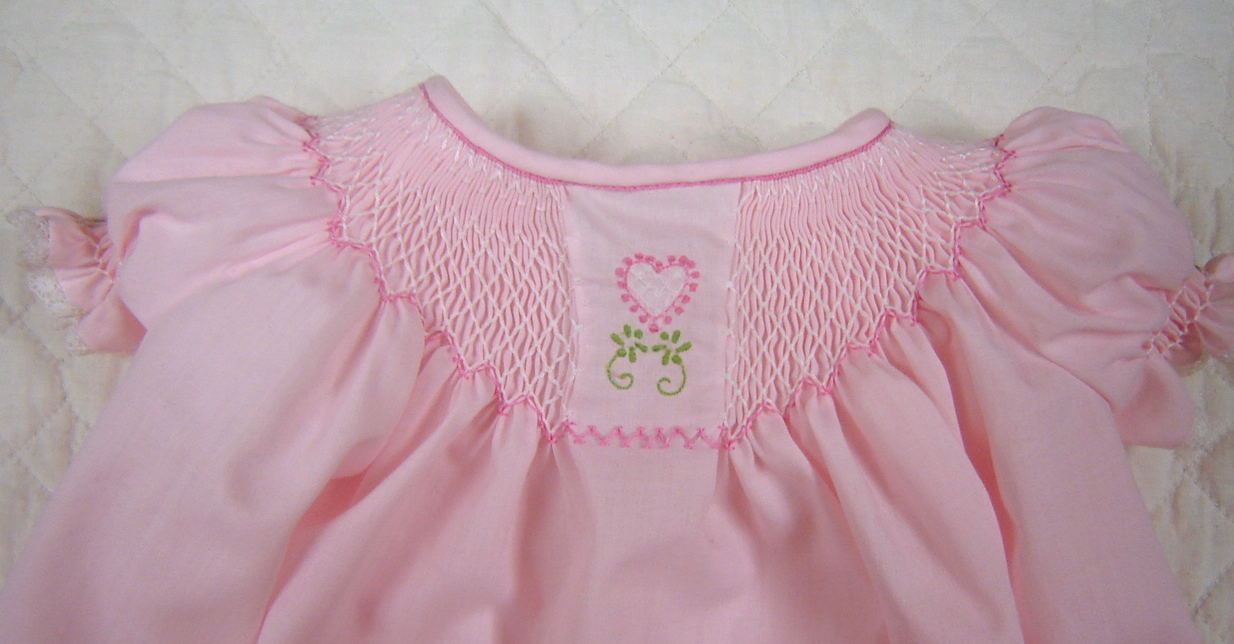
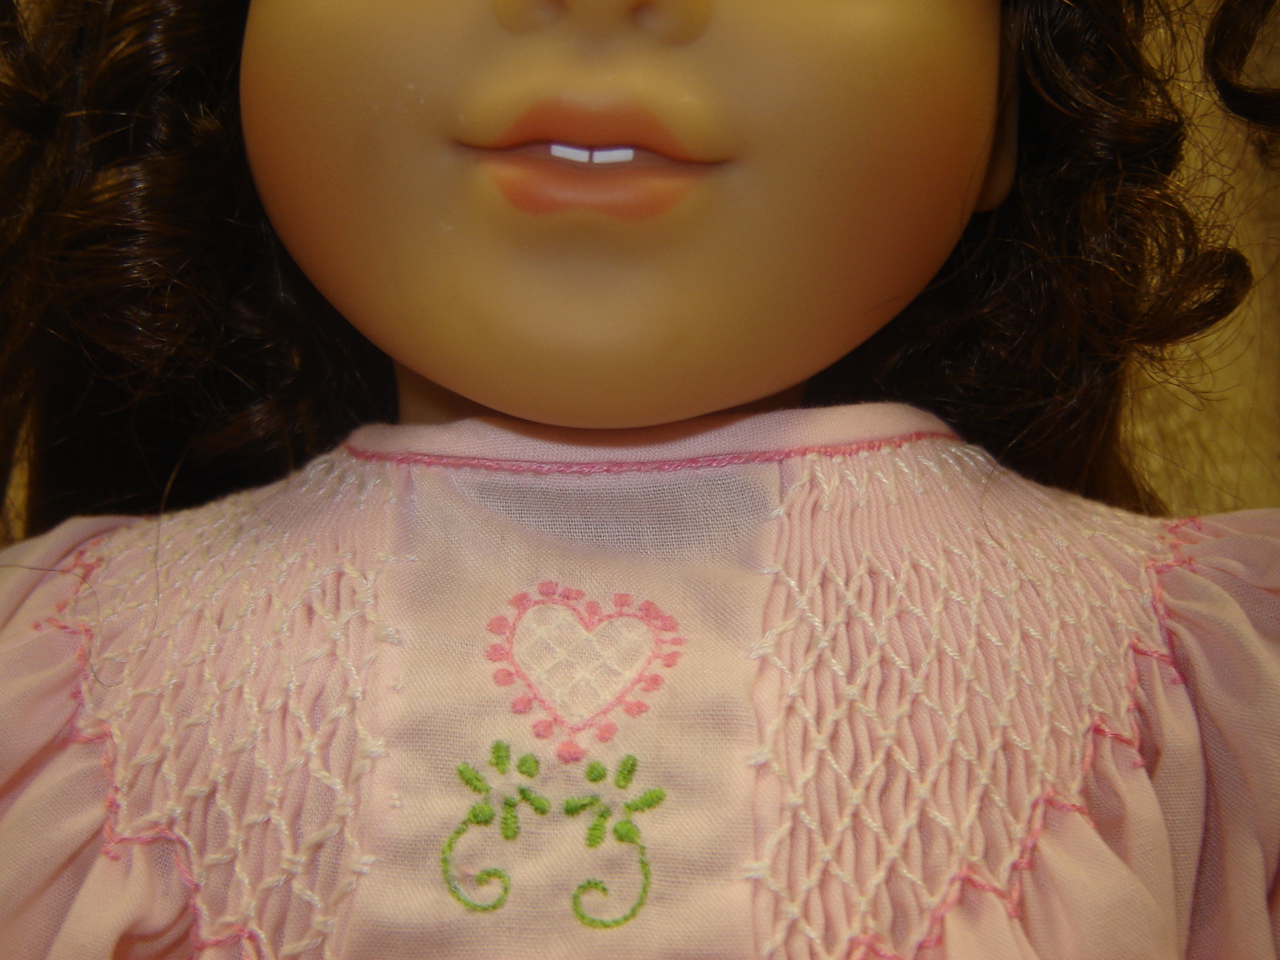
But here are the particulars of the nightie. The smocking is a design I just made up as I went along, the fabric is Imperial batiste and the pattern is one I drafted. The embroidery is from Martha Pullen’s Little Pleasures collection, though it is slightly rearranged. Laurel’s gown will have the fil tire’ heart for embroidery.
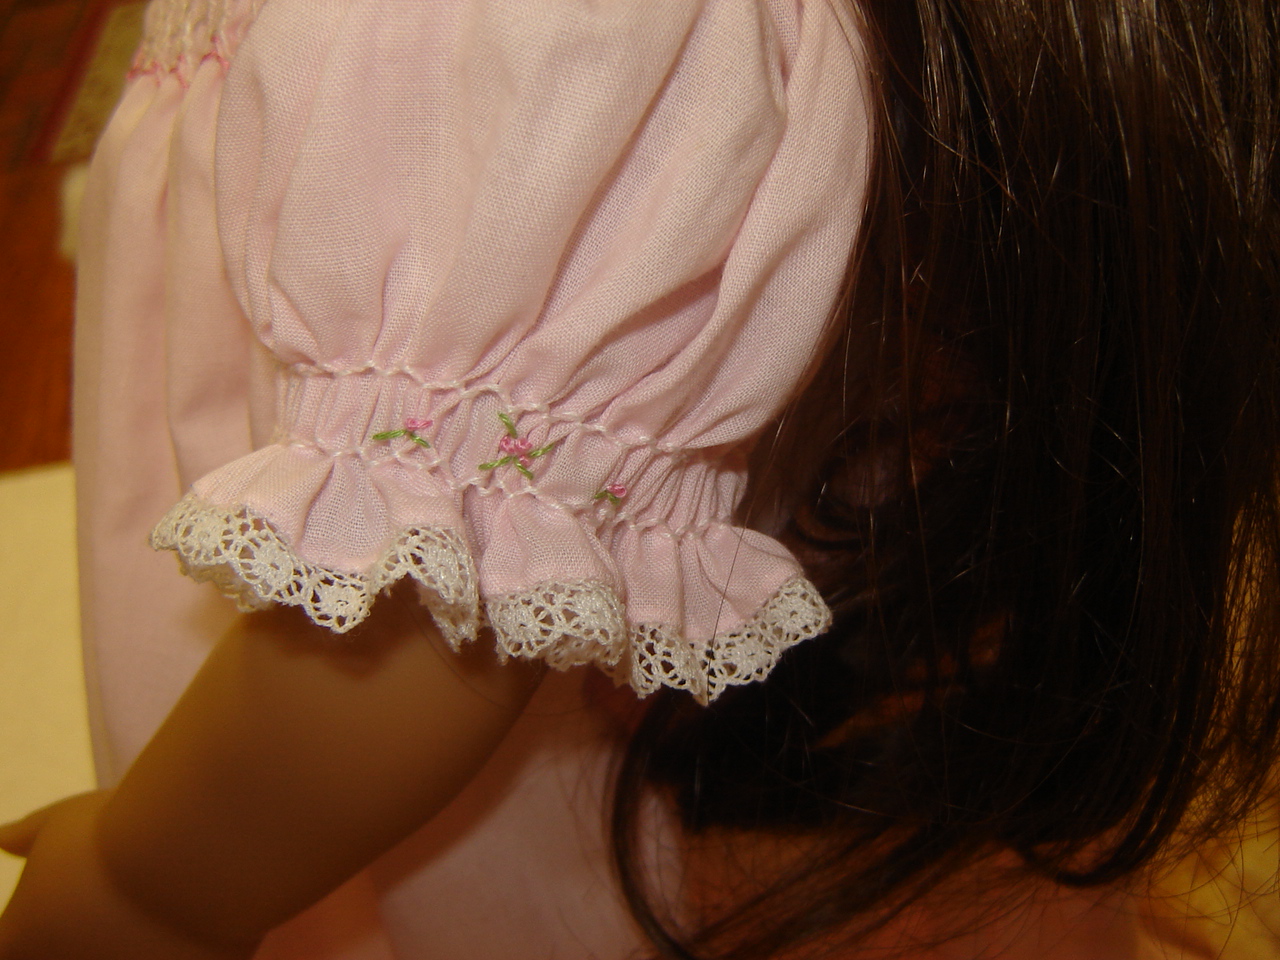
The smocked sleeves were trimmed with French lace and embellished with French knot flowers, a cluster of three in the center and a single knot on either side.
Frankly, this is all nit-picky stuff and probably isn’t worth worrying about on a doll nightgown. But I wanted to figure out just what went wrong. If you don’t care, take a quick look at the pictures and move on! The internet is full of fabulous blogs with interesting, fun posts.
First, in response to Jo’s question, just how do you prepare a bishop with center front embroidery?
- Pleat the bishop as usual, but with extra long threads and with the center front marked.
- Pull up each pleating thread at that center mark and cut. Be sure to pull up enough thread that you can easily tie a hefty knot.
- Remove the threads from enough pleats to accommodate the embroidery design.
- Knot each of these cut ends.
- See a flat center with a vertical row of knots on either side.
The problem I ran into was the neckline and binding. First, in order to correct the inevitable dip in the hemline at center front, I always draft (or use patterns) with a straight neckline. Here is how I do it and then you will see what I should have considered for a doll pattern. FYI, I always use 1/2″ seam allowance at the neckline which I adjust on patterns that have a smaller seam allowance.
- Â After cutting out the pieces, I fold the front in half, with the fold running down the center front from neckline to hem.
- Then I mark a dot 1/2″ below the top edge on the fold.
- With a rotary ruler and cutter, I cut from the dot on the fold to the seam line of the front shoulder. This removes a folded wedge from the neckline, making it 1/2″ shorter at center front. The gentle taper causes no difficulty with pleating.
- After sewing the pieces together, I run a machine sewn 3.0 length gathering stitch 1/4-3/8″ from the raw edge.
- The bishop is pleated with the first pleating thread 1/2″ below the neck edge, which puts it right on the seam line.
So far, so good. Then for center embroidery, I remove the pleating threads from that area as detailed above.
So what is the problem? The neckline.
1. The flat, embroidered section, 1-1/4″ wide has very little curve to it. If there had been pleats there, the slight taper of neckline would have been greater at the center front.
As I thought about it, I recalled that approximately 3″ of flat fabric pleats up to 1″. So the center 1-1/4″ of binding would have used up 3-3/4″ of fabric that had been tapered. That leaves the center front much straighter.
I’ll have to check with my husband, the engineer, to figure out just how that could be corrected. But I know it should have been a deeper curve.
2. The flat, embroidered section has no bulk to fill the bias binding. I don’t recall this being a problem with earlier flat center bishops, but maybe I wasn’t as picky then.
As I was applying the binding and came to the flat section, I discovered that I had two choices, neither of which I liked. The first was to fold the bias over just as I had on the smocked section. That left the bias much wider, because it had nothing to wrap around.
The same amount of bias could wrap around thick pleats and measure 3/16″ in width while the flat section had nothing to fill it and measured 1/4″. Does that make sense to anyone who has plowed through this minutiae?
The other option, was to wrap the bias over the same distance, and then stitch the excess width further down on. But it shadowed through. I chose this option as the lesser of two evils. In retrospect, I probably could have just twisted a narrow strip of batiste to use as filling.
Well, I could go on about how I wish I had lowered the embroidery and/or smocked fewer rows in the front, but this is more than anyone wants to read. And it’s more than I want to write about. I still have Laurel’s nightie to smock so I will move on to that.
Are you sewing/smocking/embroidering any Valentine’s gifts? Tell us about it.
This is my post for Freckled Laundry and Pink Saturday.


10 responses to “AG Doll Bishop with Centered Embroidery”