

My grandchildren love having special holiday pillowcases. My personal favorite for bed linens is pima cotton, so I normally use pima for the pillowcase body and a seasonal or novelty cotton print for the contrasting hem.
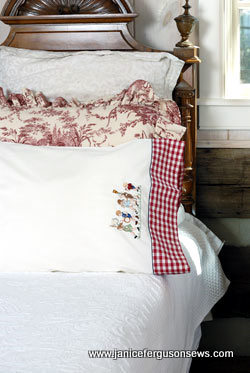
Photo courtesy of Creative Needle magazine
A pillowcase is not a difficult project, but it took me a lot longer to add the decorative hem before I learned this quick and easy technique.

photo courtesy of Creative Needle magazine
After discovering this neat method, I wrote an article for Creative Needle magazine. The bedroom scenario pictures are from that article.
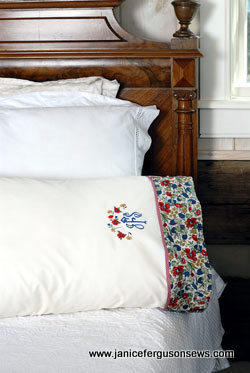
Photo courtesy of Creative Needle magazine
So now it is a breeze to make contrasting hem pillowcases and I have begun using it for less juvenile projects as well as those for Robert and Laurel.
For an adult look, combine a favorite fabric, an embroidery design that mimics the print and a monogram.
The University of Utah has a really good .pdf file on this. Just go to
But if you are in a hurry, here are the basics.
- 1. Prepare your pillowcase body with or without embroidery, with or without piping or a trim along the hem edge, like the gingham on the monogrammed pillow or the piping on the children’s parade. The standard finished size is 20″ x 26″. But I usually make it a little longer so the embroidered portion hangs off the edge of the pillow and doesn’t irritate the face, and a little wider to accommodate a nice plump pillow. Without embroidery, I would make it the standard size. But I rarely do that and usually cut the pima cotton 42″ x 26″.
- 2. Cut the contrasting hem fabric 9″ x 42″, the same width as the pillowcase body.
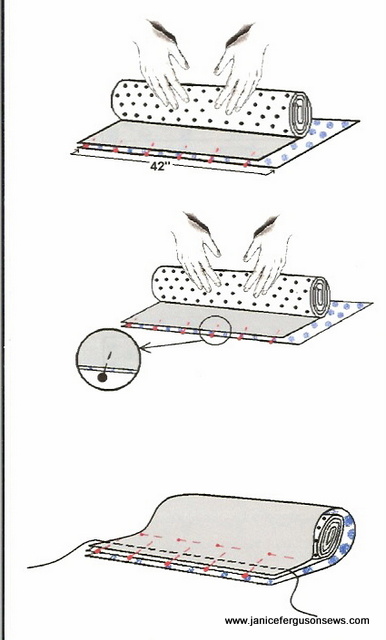
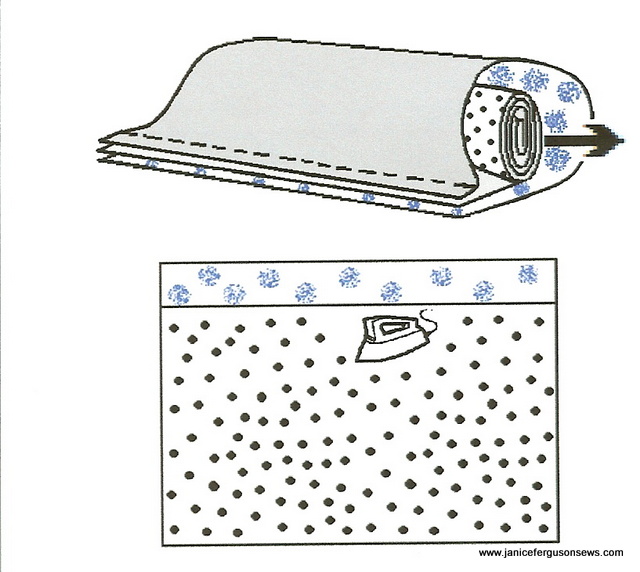
- 3. With right sides together and pima on top, pin the 42″ contrasting hem fabric to the 42″ pima cotton. Then roll up the pima until it fits like a sausage in the contrasting hem. Now it should look like an open hot dog bun with the weiner in place. The diagram below is not proportional. The roll and the hem would be much wider.
- 4. Bring the other raw edge of contrasting hem fabric up over the pima roll and pin. Then sew the pinned together ends with the inside roll of pima. I find it easier to sew from the other side, so I can see the stitching line from my piping or other inserted trim. Then I stitch a needle’s width or one needle position toward the roll parallel to the existing stitching line.
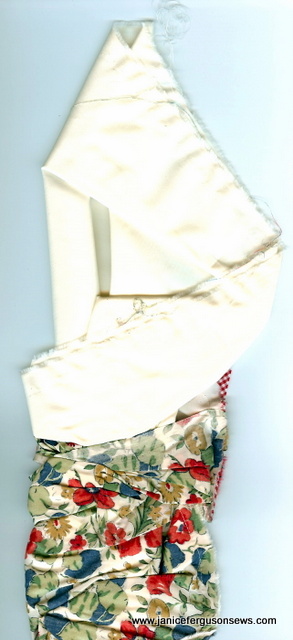
- 5. The last step is hard to describe, hard to diagram and hard to understand until you just do it. Reach into one of the open ends of the contrasting hem and pull the pima (pillowcase body) through that opening. Voila!
- 6. Finally, you press it, seam the sides and short end. While I really like French seams, with this technique, it is just too bulky. So I usually serge the raw edges.
I’m pulling out some seasonal fabrics tonight to work up fall pillowcases for Robert and Laurel. Here in Florida, they surely can’t look out over the landscape to see the leaves change. The only chance they get to see the fall colors is when we go to our cabin in North Carolina mountains. So I like to give them a visual reminder of what this season is about.

6 responses to “Turn Tube Pillowcase Hem”