
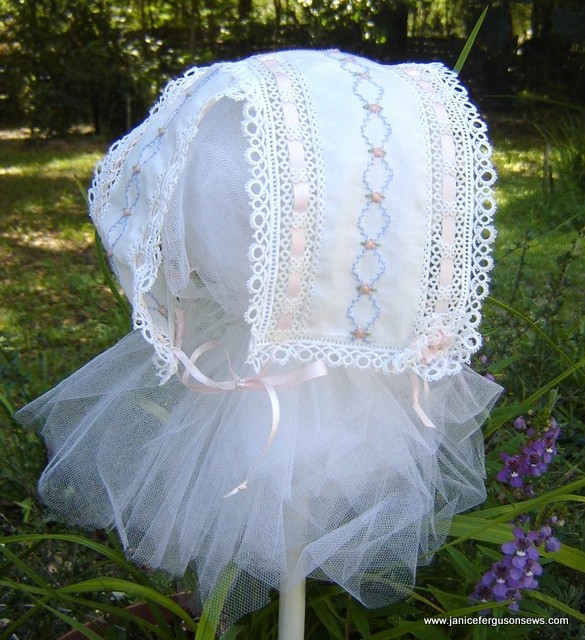
Just before Laurel was born, I made this T bonnet for her.  Is there any sweeter sight than a baby in a bonnet? And she did look absolutely precious in it. Why I have no picture of her wearing it, I don’t know. I suppose I was so overcome with the emotion of holding my first grandchild that I missed many photo opportunities.
Like so many of my projects, this T-bonnet incorporates two of  my favorite techniques, heirloom sewing and machine embroidery. A genuine classic, the T-bonnet is named for it’s shape rather than an occasion suitable for its wear.
It is obvious from my previous posts that I love feather stitching.  And while the sewing side of many machines come with a built in feather stitch, turning the corner is very iffy business.
Not only must you know exactly where in the stitch pattern to pivot, but also you must be at the precise location of the desired pivot when you reach that point.  But I love the look of a zig zag feather stitch down the front of a yoke or a little boy’s dress shirt so I was motivated to figure out a way to do this more easily and more accurately.
So I decided to try out the My Custom Stitch feature on my Brother ULT 2003D sewing machine. I thought if I could take the time to design a feather stitch with one turn, I could just repeat it for a zig zag pattern. All top of the line Brother machines, beginning with the ULT series, has this feature which enables you to design your own decorative stitch. I’m sure other machines have similar programs. So I created one feather stitch pattern, one half of the diamond shown below, and then sewed it continuously, making a zig zag.
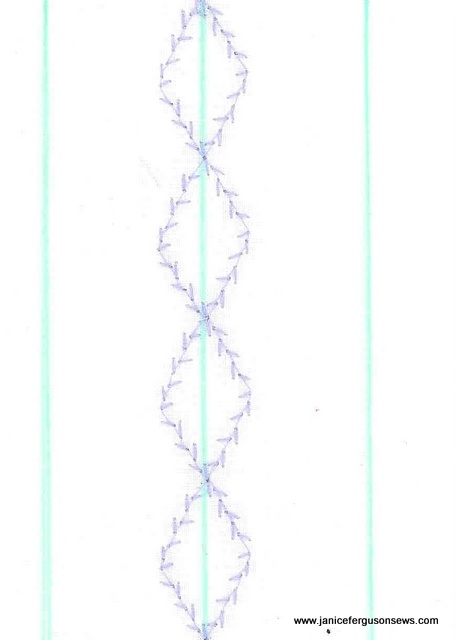
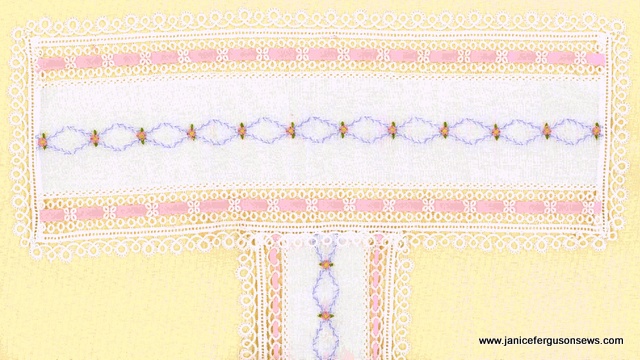
From there, creating a diamond was an easy next step. So on this T-bonnet, I stitched one side of the zig zag feather and then went down the other side, matching centers.
This must be stitched on heavily starched fabric (I used cotton batiste) with a very light weight stabilizer . My favorite is the 3″ wide Stitch’nDitch. Still, unless your tension is carefully adjusted, the joining points might not match up perfectly.

So I placed a machine embroidered flower over each of those intersections. But if the match up is pretty good, you might choose to embroider a flower at alternate intersections. The flower shown is from Fil Tire’ and Fancywork Elements, a collection by my good friend Suzanne Sawko and me.
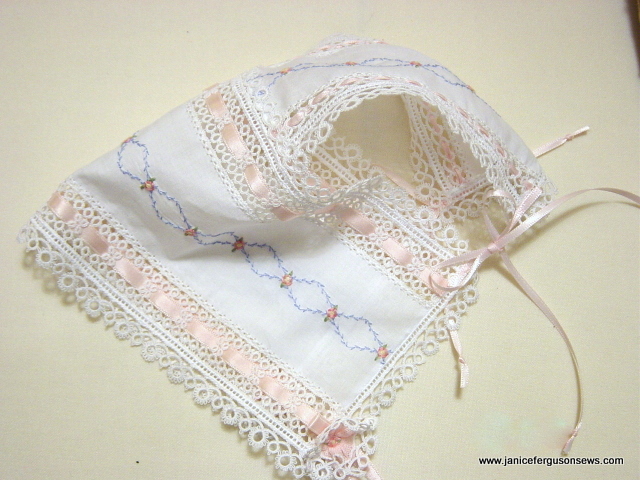
A T-bonnet is very versatile.  It can be very tailored for a boy or very frilly for a girl. Just make two sections of fabric, one 12 1/2″ x 4″ to reach from ear lobe to ear lobe and another 6″ x 3″, to reach from the crown to the neck and embellish as you like. Then add ties, one on each finished corner.

Pingback: Feather Stitched Bows – Janice Ferguson Sews