
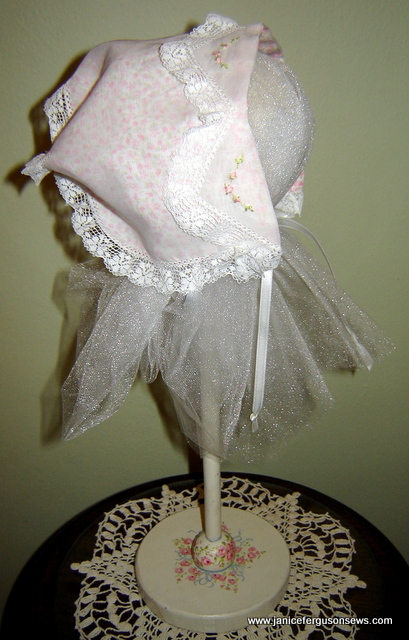
Another class project for Sewing at the Beach is finished along with the kits and handouts. This Swiss organdy zig zag bonnet is a summer version of the Swiss flannel bonnet featured in an earlier post. Appearing in Creative Needle magazine many years ago, the 1920’s pattern has always intrigued me.  That recreation was made of a single layer of Swiss batiste.
Working with the organdy was such a pleasure. Having modified the pattern to include a lining, I was pleased to see the delicate lawn print peeking through the organdy. It is much more visible than it is through the Swiss flannel. Additionally, the organdy required no starch before hemstitching. This is a bonus in a classroom situation.
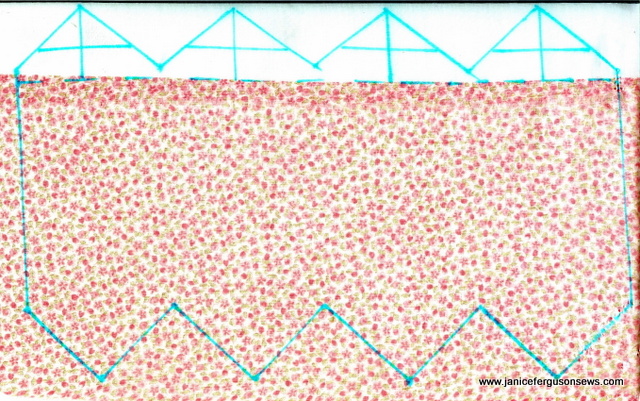

Basically, the pattern consists of a single piece of batiste 15″ X 9″ with deep zig zags along the front and back. This measurement allows a little excess around the edges for hemstitching.
I was not surprised at how difficult it was to trace the pattern onto the organdy. It would have taken too much time in class, so I used a technique that has worked on other projects that require tracing.
First, I taped the paper pattern to the cutting board. Then, a sheet of quilting template plastic was placed over that and also taped to the cutting board. Next, several lengths of double sided tape (my absolute favorite, must-have non-sewing notion) were placed around the perimeter of the pattern and through the center. Finally, the organdy was pressed against the tape and smoothed flat.
Not only does this prevent shifting of shifty fabric, but it also prevents the possibility of transferring some of the ink from the pattern onto the fabric when the marking pen traces over it. And it is so much more accurate than tracing over unruly fabric.
If you would like this wide V floral machine embroidery design, post your request as a comment below.
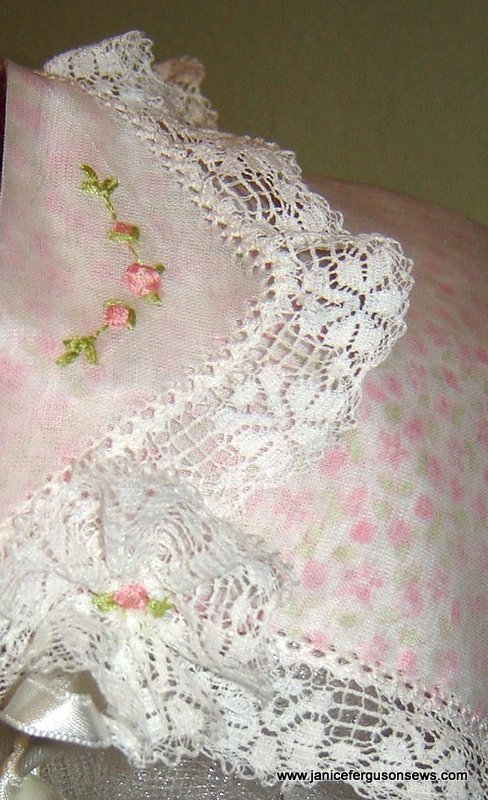
The machine embroidery within the front points is from Fil Tire’ and Fancywork Combinations collection. Lining is joined to the organdy with spray adhesive up to the brim fold line.
Machine made entredeux outlines the perimeter and slightly gathered English lace edging is butted up to it.  Lace edging is joined all around.
The embroidered points are folded back to serve as a brim and the back zig zags are tacked together. Ribbons can be attached quite simply at the sides.   Machine embroidered lace rosettes to cover the ribbon stitching takes a little more time but I was pleased with the results.
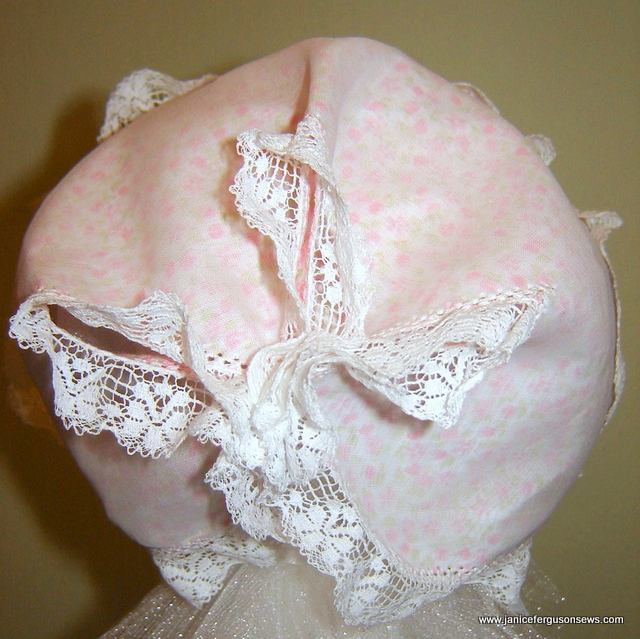
Five inches of 3/4″ edging was machine zig zagged together. By pulling the gathering thread from both ends, I had more than 2″ of sturdy header thread to knot off, holding the rosette’s gathers. Still, there is a small hole in the center.
Water soluble stabilizer was hooped in my smallest embroidery frame. With spray adhesive, a scrap of white lace was placed against the rosette, over the hole. Then, with another application of spray adhesive, the lace rosette was placed on the stabilizer. The carefully selected design was sized to reach beyond the little hole in the center of the rosette.
I love baby bonnets. What is your favorite bonnet pattern?

10 responses to “Zig Zag Bonnet II”