
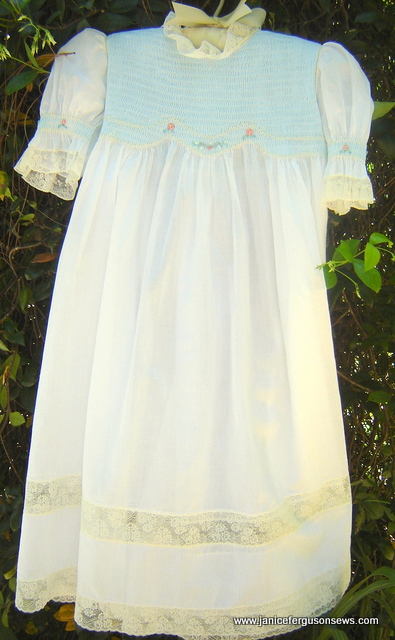
My granddaughter’s shadow smocked Easter dress was inspired by Kay Guiles’ article in Sew Beautiful, Easter, 1998. In fact, the dress is nearly identical to one of the sample garments shown in that article. I take no credit whatsoever for the design or technique.
The only changes made to Laurel’s dress are the addition of lace insertion in the skirt and the substitution of a different embroidery design that included both silk ribbon and DMC floss.
Shadow smocking is a very unique technique and not at all difficult. But I learned a lot that I would like to share with anyone considering such a project.
First let me summarize the technique. Think of it as shadow applique’ but smocked. Just like shadow applique’, the outer fabric (white on this dress) must be sheer enough for the applique’d fabric (aqua) to shadow through. Additionally, the aqua shadow fabric must be sheer enough that when applied to the white outer fabric, both fabrics can be pleated together.  For example, I would not try white batiste and aqua broadcloth. This dress is made of white Nelona Swiss batiste with Finella or “Fairy” Swiss batiste blue fabric for the shadow.
Now for the particulars and my tips.
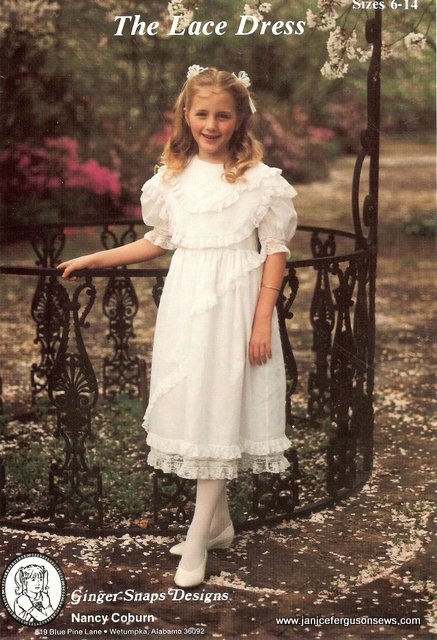
1. SELECTING THE PATTERN: For smaller sizes, any yoke pattern will do. But if you want the smocking to come below the armscye, select a pattern that has a longer bodice. I used one of my favorite big girl patterns, Ginger Snaps Lace Dress. The slightly raised waistline is just right for older girls, like my almost 8 year old granddaughter. A very versatile pattern, it also has several variations, includes shadow work designs and more.
Ever popular Children’s Corner Margaret would work just as well.
Children’s Corner Margaret
But The Lace Dress was already on my cutting table. I had just used it for Laurel’s baptismal dress.
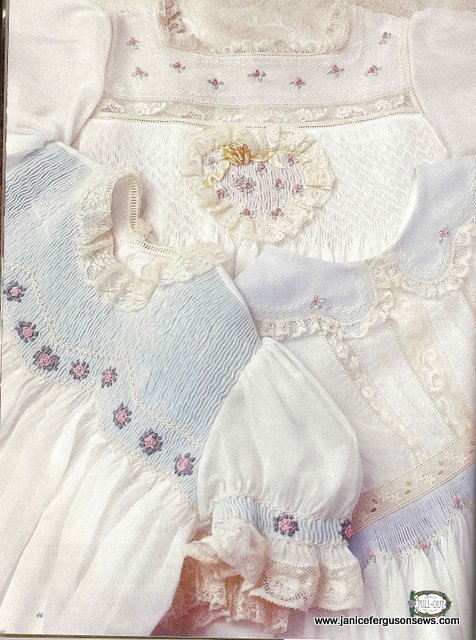
2. CREATING THE SCALLOP TEMPLATE: Two scallop templates are included in the Sew Beautiful article, one which creates the design shown and the other which is just a simple, soft, wide curve. If you have no access to that issue, you could draw your own, but keep in mind that the pleats will condense the horizontal shape. I suggest you “audition” a scallop shape by tracing it with heavy line made by a blue washaway marker on a piece of scrap fabric. Pleat that up, study the shape of the blue line, and redraw until you are satisfied with the shape. Draw a second line parallel to and 1″ above the scallop. This is for the feather stitch which comes later. Note that this technique would also work with a straight across yoke minus the scallop, but the curve is very pleasing.
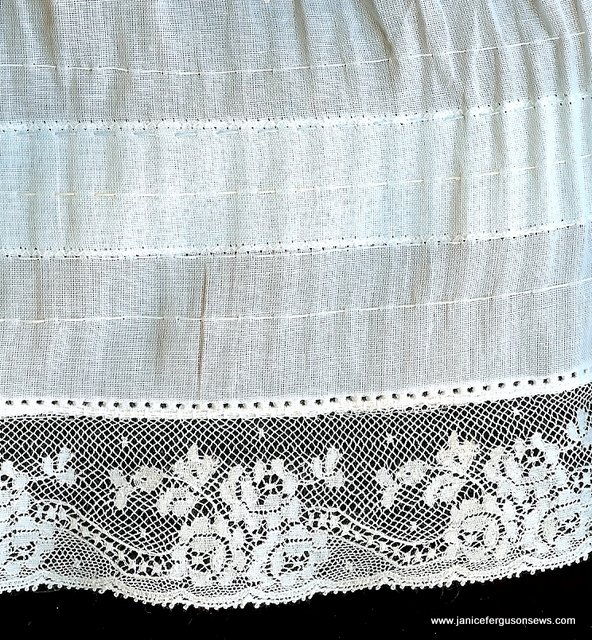
3. MEASURING THE FABRICS: A full 45″ width was used for each of the two fabrics.
- aqua fabric:  A rectangle of aqua fabric was cut 45″ wide and 2″ longer than the depth of the smocking.  The depth of the “shadow” aqua fabric must be determined by measuring your bodice pattern piece from the highest point at the neckline to the desired depth. Make sure you have enough rows on your pleater to reach that depth. Then I suggest that you add 2″, with one inch extra above and below the desired depth of smocking. There should be one pleated row below the shadow smocked portion.
- white fabric: Add 2″ to the planned finished length. This allows you some wiggle room for placing the bodice pattern piece.
TIP: If a full 16 or 24 rows of smocking is desired, I suggest you plan to hand pleat the top two rows after the bodice is pleated with the pleater. Those top rows at the neckline have very few stitches.  I would like to have had more shadow depth but ran out of pleater rows. It was disappointing to see that the top two rows were almost wasted when using just a few pleats.
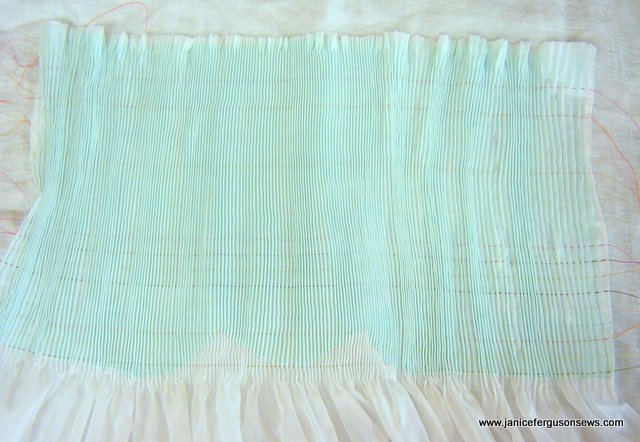
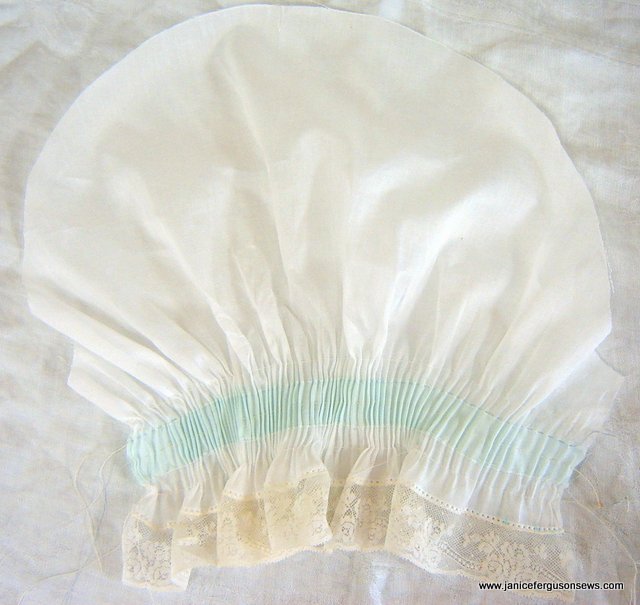
4. JOINING THE TWO FABRICS: The template shape was traced onto the rectangle of aqua fabric with a blue marker. Spray adhesive was applied to the white fabric and the aqua fabric was smoothed over it. This lightly bonded the two layers. Several earlier attempts at basting the layers proved unsuccessful, but the spray adhesive worked very well.
With white 80 wt. Madeira cotona, a tiny zig zag (W. 1.5 ~L. 2.0) was worked over the lower blue line with the aqua fabric facing up. Aqua fabric below the zig zag was trimmed away.
5. PLEATING THE BODICE: Roll the fabric onto a dowel and pleat as usual. Make certain that one pleating row falls below the aqua shadow fabric. If you are adding more rows by hand toward the shoulder, do so at this time.
6. MARKING THE CENTER FRONT: With contrasting thread, baste the vertical center.
7. STARCHING THE PLEATED FRONT: Measure bodice width and draw pleats up to that measurement. With glass head pins, pin to lace shaping board or gridded ironing board. Use the grid to keep pleats straight and center front line perfectly vertical. Tie off pleating threads. Spray with starch and allow to dry overnight.
8. TRANSFERRING THE PATTERN TO BODICE:  Trace bodice pattern (omit bottom yoke line where skirt would be attached) with marked center front to freezer paper. Press onto right side of pleated dress front while it is still on lace shaping board.
9. SECURING THE YOKE SHAPE: Gently remove pleated dress front from lace shaping board. Stitch on freezer paper pattern cutting lines with tiny zig zag stitch, from side seam to armscye, shoulder seam, neckline and around to the other side seam.
TIP: Leave freezer paper in place. This helps maintain the proper tension as you backsock, just as a smocking board does.
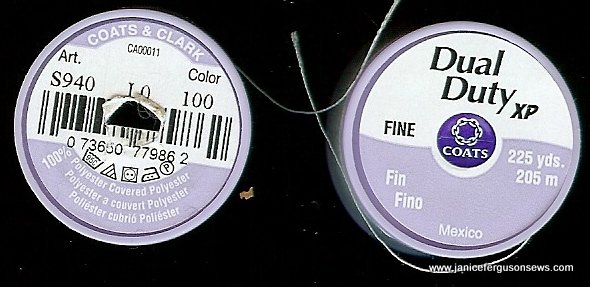
10. BACKSMOCKING THE BODICE: Backsmock only within the bodice pattern shape. I used Coats & Clark Dual Duty Fine thread. When I used two strands of white floss, the stitches showed between the pleats. With no smocking stitches worked on the right side of the bodice to distract, these little bits of cable were obvious. By using the fine white thread, the back smocking stitches are nearly impossible to see from the front. Remove the freezer paper when you have finished backsmocking.
11. FEATHERSTITCHING THE SCALLOPS: DMC A Broder #25 was used for the featherstitching over the tiny zig zag that joined the two pieces of fabric together. But floche, #12 perle cotton or two strands of floss would work. I just happened to have a hank of this #25 on hand and decided to use it. A second row of featherstitch was worked on the drawn line 1″above the bottom of the aqua shadow fabric. I drew another line 1″ above the straight across back yokes and featherstitched them. I found it to be harder to work the stitch on flat fabric.
TIP #1: I have done very little featherstitching and this was hard for me. But Vaune Pierce gave me a great tip. If you plan ahead so that you can complete the entire length of stitching in one sitting, you will develop a rhythm. Also, your stitches will be more uniform. This was a great help with featherstitching on the front.
Notice the fairly nice top row of featherstitch. The bottom row is not so good–the holes did not show up as well through gathers and three layers of seam allowance.
TIP #2: Debbie Glenn suggested that I machine stitch a feather stitch pattern with no thread in the needle. By starching and pressing the fabric, the holes are easily visible and give the stitches perfect placement. I had done that years ago on my Elna Diva, but since then, all my machines required thread to sew–or at least I did not know how to disable this feature. But I found it on my beloved Brother Quattro and it worked perfectly. Great tips.
12. EMBROIDERING THE SILK RIBBON DESIGN: I have 11 thumbs on each hand when I try to do silk ribbon embroidery. If I ever make this pattern again, I will just stitch bullion roses and traditional hand embroidery. But whatever you use, the time for this embroidery is now.
13. PREPARING THE SLEEVES: Cut a strip of aqua batiste 2″ x width of sleeve. Mark two lines 1″ apart across the width of this strip. Again using spray adhesive, center this piece over the area to be smocked. Tiny zig zag over the marked lines then trim away the excess.
Pleat the sleeve with threads long enough to lay the sleeve flat. Add lace. Work feather stitch over the blue lines from side to side. I stitched only over the pleats, leaving zig zag stitches in the unsmocked outer section exposed. What was I thinking?
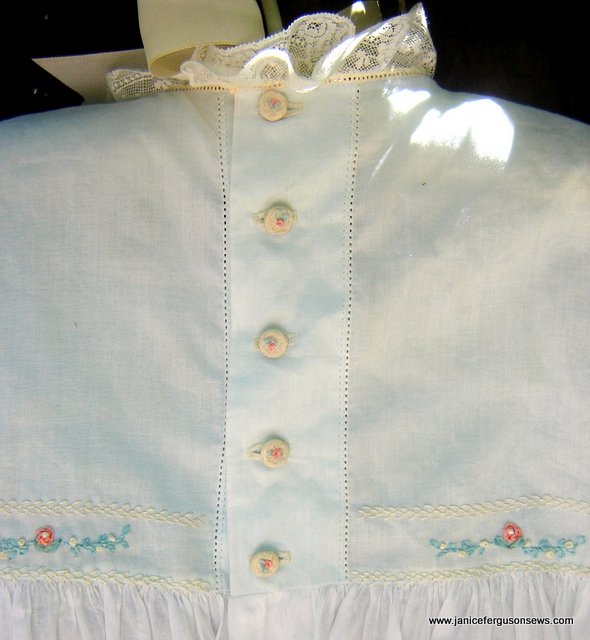
From here, you construct as usual. I chose to shadow the back bodice as well. Basically, that was just a simple matter of bonding the two fabrics together and cutting out the backs.
TIP: When the center back facing is folded back, the shadow would be more intense if two layers of aqua shadowed through. To prevent this, the aqua fabric was placed so that it did not extend beyond that fold line. So the fabric “sandwich” at the folded edge with buttons and buttonholes has white, aqua and then white folded behind the aqua. This makes the intensity of the shadow consistent.
This may be more than you ever wanted to know about shadow smocking. But it you have plowed through to the end of this lengthy post, I hope you find the information helpful.
I can’t wait to tell you about the very special buttons and the options they presented for embroidery. That will be the next post.

14 responses to “Shadow Smocking How-to”