Author Archives: Janice

DIY Get Well Card

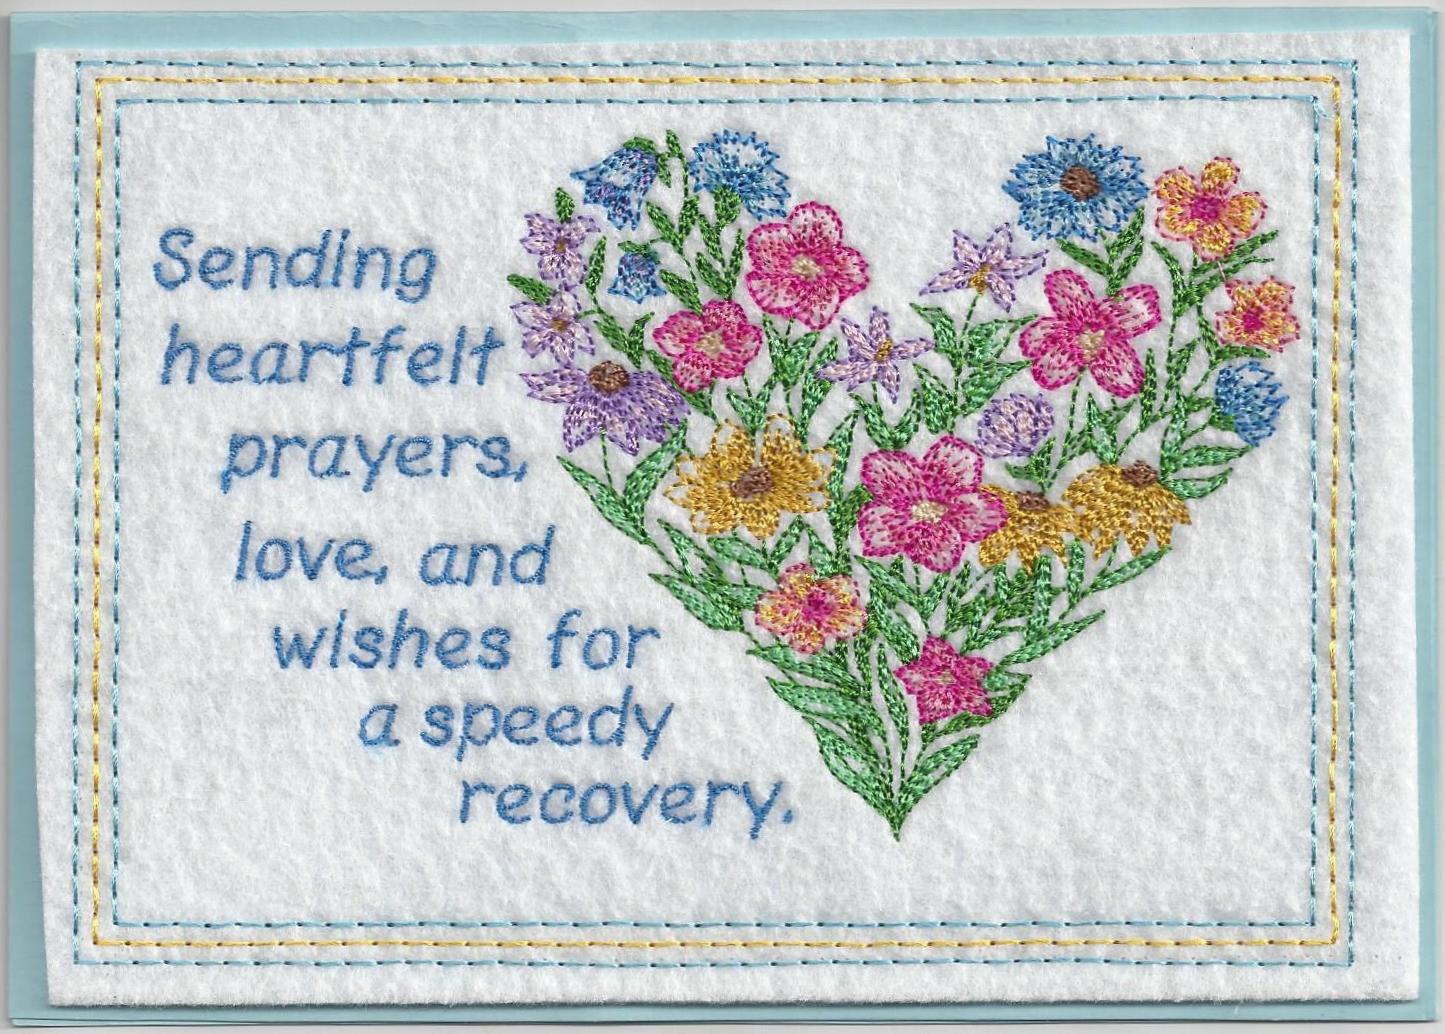
Design from Embroidery Library but appears to be no longer available. Text added on PE-Design. This was stitched on my Brother Dream 2 machine.

Sending a get well card to an ailing friend is always a thoughtful and meaningful gesture. Making a personalized card card is even more meaningful.

This was made for a dear friend who recently had shoulder replacement surgery.  The card opens to a personalized message on printer paper, cut out and attached to the card stock with double sided tape.

At a time when we are encouraged to stay home, making a get well, birthday, anniversary or thinking of you card is a wise alternative to making a trip to the store to purchase a ready made card.

There are so many ways to embroider cards–directly on card stock, on fabric which is stitched onto card stock or as shown above, onto felt which is stitched onto card stock.

They truly are fun and almost addictive to make. I’ve stitched Christmas cards,

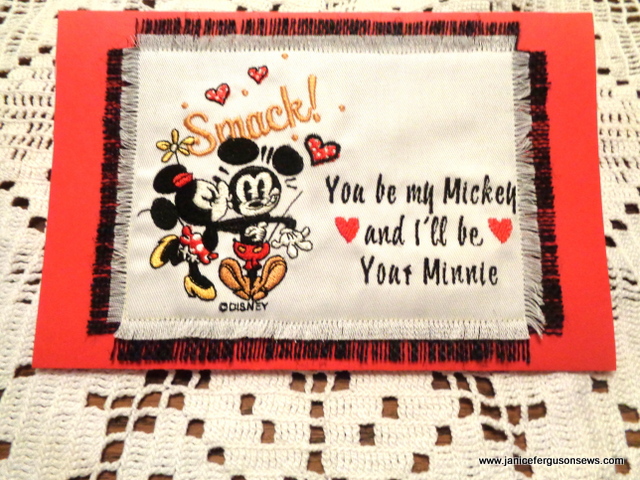
Valentines

and other get well cards, all which have been very well received.

All you need to get started is some card stock, rotary cutter, cutaway stabilizer and double sided tape. Instructions are detailed in an earlier blog post here.

Required disclaimer: I am a paid Brother Ambassador sewing specialist. Not required: I LOVE my Brother sewing machines.

Christmas 2020

Not exactly a Griswold house, but it was enough to please us. And there is more in the back around the pool. Bob really wanted to please the children with all the lights. Lighted reindeer are perched on the garage roof, 4 snowflakes hang in front of the breakfast porch, candles are in the windows and my sewing room on the right is lighted up like an airport runway. Should have turned that off before Bob snapped this shot.

This is our 46th Christmas in this house and it seems each one gets better as all of our dreams have come true.

Well, the Most Wonderful Time of the Year has come and gone and it was a glorious time. For at least a few days of the week both of our children and  their families were with us and the house was filled with laughter, music, good food, dogs, and chaos.

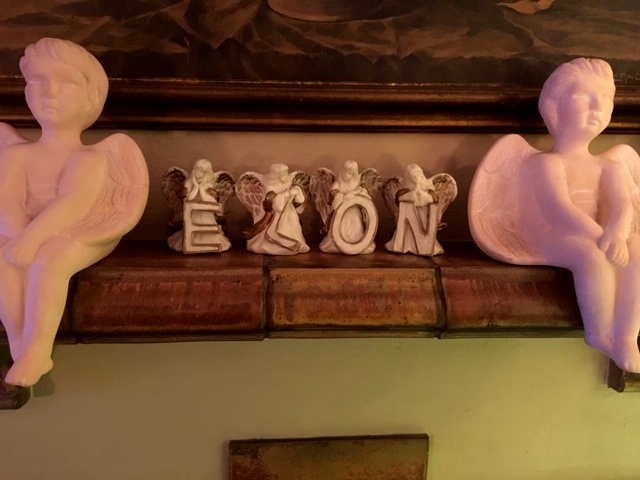
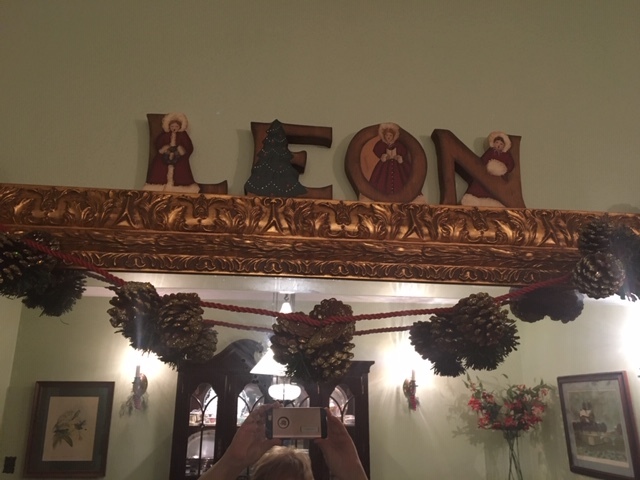
Since our son was about 10, the Noel proclamation has been mysteriously rearranged on the mantel with our boy neither pleading nor looking guilty, offering only an innocent smile.  Now his son Robert has taken up the gauntlet and another Noel has fallen victim to the prank.

We never know what the mantel or the mirror will proclaim.  Some days it’s NOLE or OLEO, though LEON seems to be favored–you just never know.  Some speculate that it’s  the work of the Elf on the Shelf.

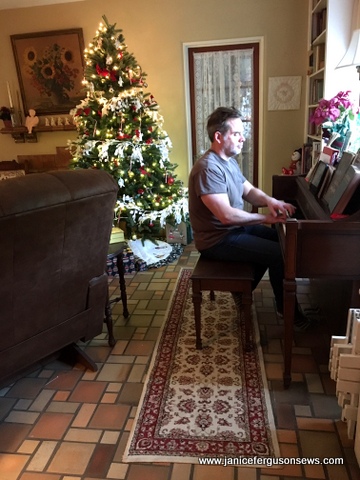
Meanwhile, the piano seems to be playing non-stop, whether it be Ryan, Laurel or Robert at the keyboard, with only cookie breaks in the music.  When Ryan was a child, his job was to play after dinner as Rebecca and I cleaned the kitchen.  It made her want piano lessons.

My boy loves music as do his children.

Sweet, sweet memories.

It was to be a great puzzle. 11 yo Alastair grins at his success, while mama Rebecca holds well-behaved Mendel and Robert FINALLY gave in to have his picture taken.

We worked on a Christmas puzzle on the back porch in 80 degree weather. Then in one brief, unsupervised moment, Sebastian, our 1 year old Pyrenees pup, nicknamed The White Devil,  pulled the unfinished puzzle off the table and chewed up several pieces.  Oh well.

Gingerbread houses were built and decorated, basketball was played in the driveway, football games were watched,  driving lessons were given to 15 yo Robert,  eggnog was chugged, stories were told, cats and dogs were played with and loved on, church was zoomed and life was merry at the Ferguson home.

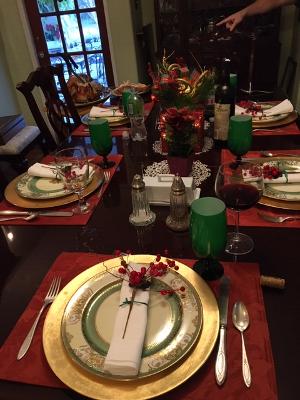
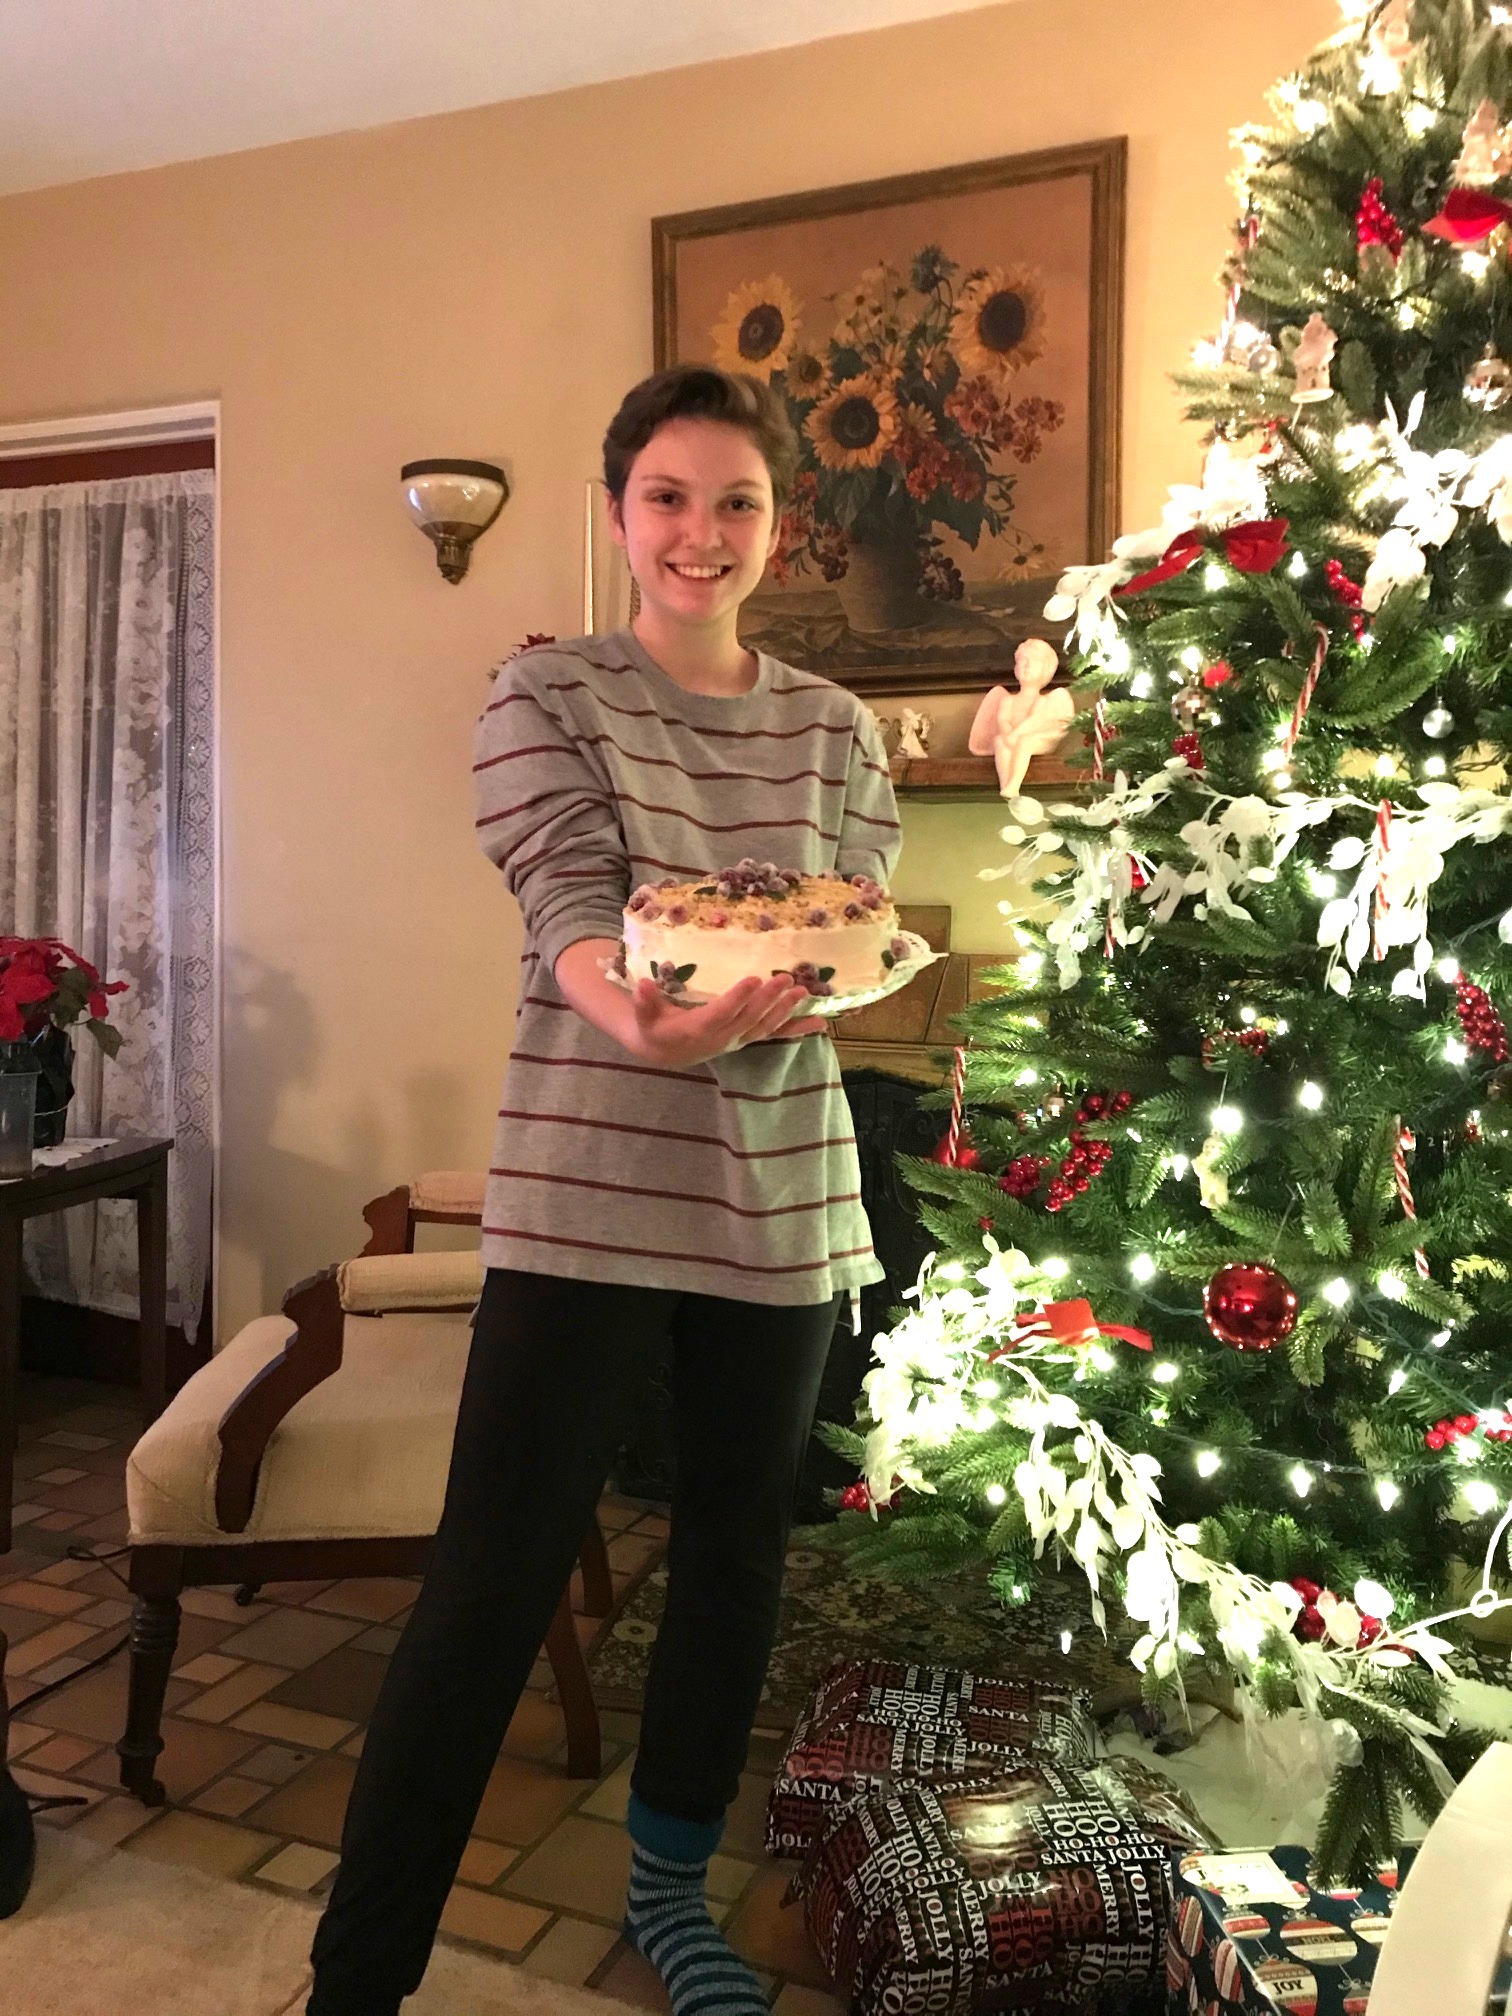
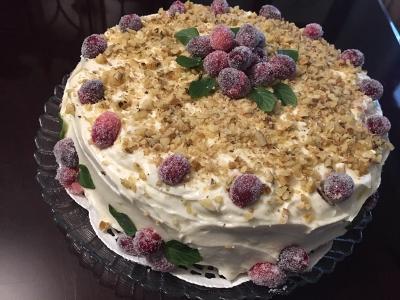
Our dinner table was festive, set with the traditional Christmas menu.  Along with pumpkin pie, Laurel made a divine cranberry cake, with cream cheese frosting sprinkled with chopped walnuts, decorated with candied cranberries.

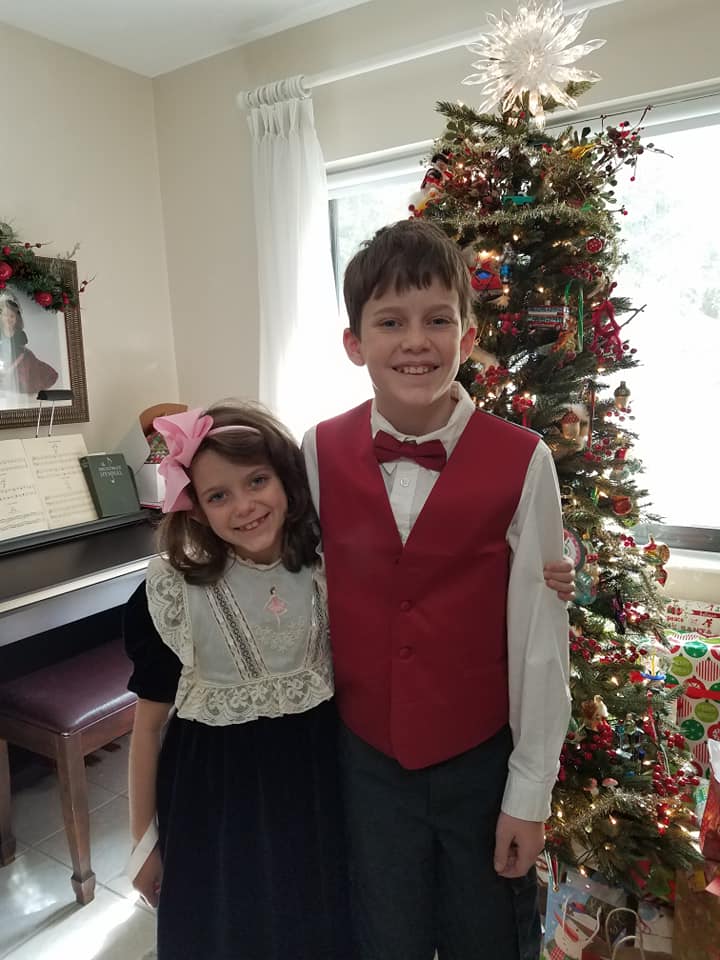
As expected, Vivian’s white lace Christmas dress was too big, so she wore cousin Laurel’s 10 yo black velveteen Sugar Plum Fairy Christmas dress which had been hanging in  the nursery closet waiting for her to grow into it. Finally she did. Brother Alastair was dashing, as usual, in his  holiday finery.

I wish I had taken more pictures, but I got so wrapped up in the wonder of it all.  My wish is that you all had a joyous Christmas and celebrated the reason of the season.

From our house to yours, I wish you a happy and healthy 2021.

2021 Christmas Dress..Oh Well

Are you all set for Christmas?  Cards sent, house decorated, gifts wrapped and sent, sewing finished?  Congratulations if you’ve answered yes to more than one of these questions.

My cards are sent and some house decorating is done, but my greatest accomplishment is finishing my granddaughter’s Christmas dress.

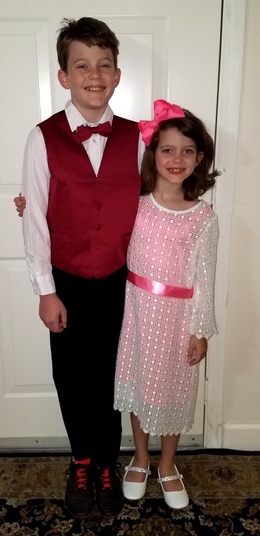
The white lace dress pattern included in the latest Classic Sewing magazine was  made for almost 8 yo granddaughter Vivian Rose.  It is lovely but was just waaaaay too big for her.  She is tiny, though her mother declared she wears a size 8 and I went with it. Big mistake. Even with the accurate and current measurements I had for her, the lace has some stretch.  I should have taken that into account. The silver lining for this disappointment is that now her Christmas dress for 2021 is already finished! I’ve never been ahead of the game like this!

Here she is with the shoulder seams falling off her shoulders, with her handsome 11 yo brother.  He’s had such a growth spurt that his mother just discovered that the only dark shoes that fit his newly enormous feet are his soccer cleats.  So that’s what he wore for this picture. Fortunately, the shoe laces match his vest.  With any luck, Amazon will deliver his new black dress shoes this week.

My two younger grandchildren in their Christmas clothes. It’s likely they will only be worn for at home Christmas dinner with grandparents in their bubble. But they will look spectacular, especially if Vivian has a monumental growth spurt or wears her soon-to-arrive Sugar Plum Fairy dress (see below).


Farmhouse Fabrics, as always, came through with the white lace fabric. I ordered a few hours after their on-line Gab and Gush featured this lace and at that time  there were only 6 yards left!  The ever-helpful staff matched up ribbon for the sash with the satiny rose slip fabric I chose.  The hairbow, also ordered on line,  was a perfect match.  Of course, I ordered 3 bows hoping one would match and it did!

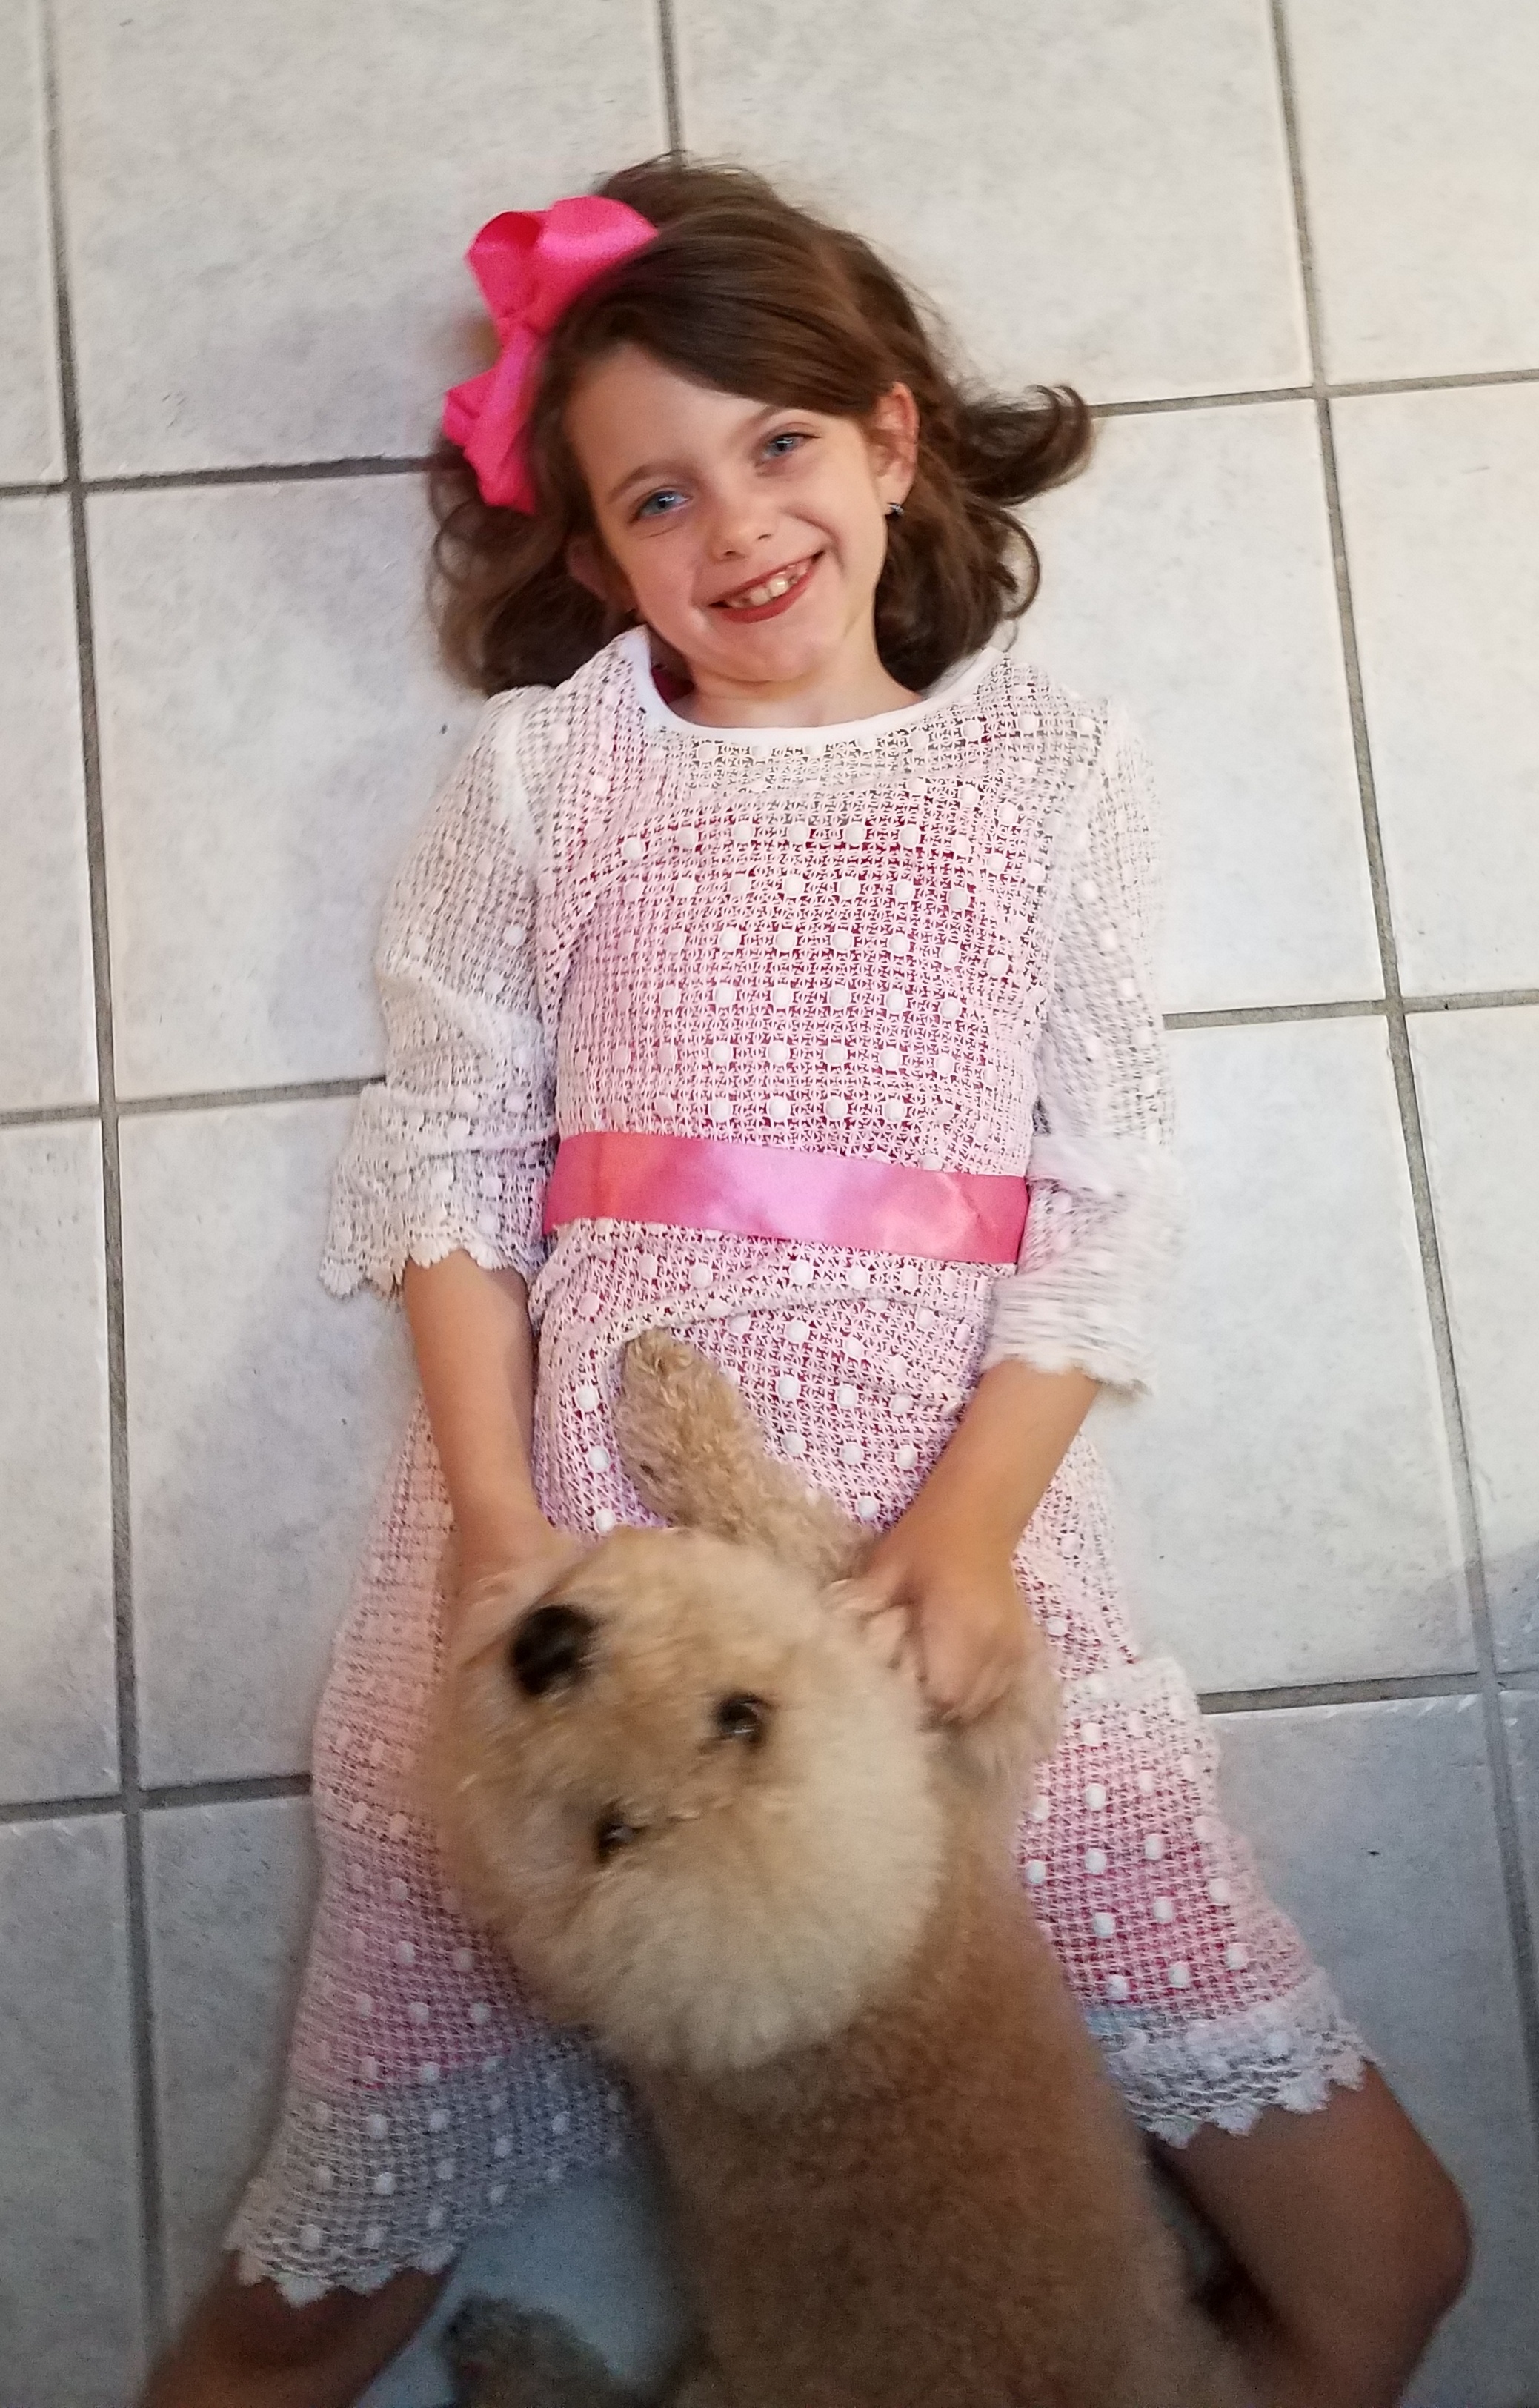
Vivian Rose with her beloved rescue dog, Mendel.

This dress was relatively quick and easy to make, with 4-thread serged seams and a Swiss batiste bound neckline.  There was no hemming at the sleeves or on the skirt. In the Farmhouse Live video Sally suggested a crocheted thread loop at the shoulders, attached with a snap to secure the slip shoulders. That was a great tip, especially when the dress turned out to be too big.  That slip would have fallen off the child’s shoulders and annoyed her all day. Another set of crocheted loops was added to the waistline for the optional ribbon sash. Continue reading

Masked Santa Towel


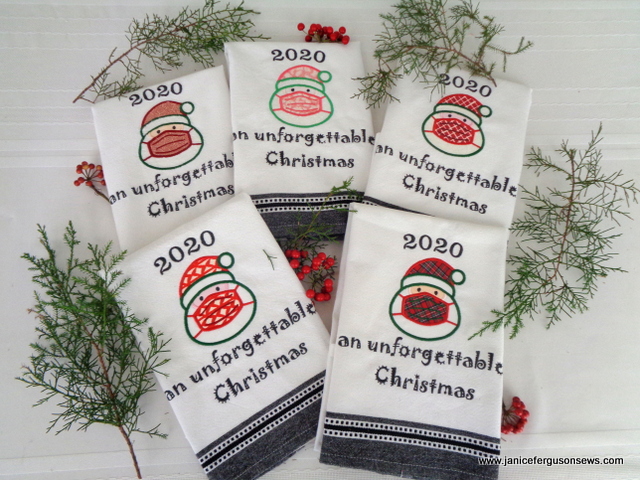
The season of Christmas 2020 has been like no other.  With all our social limitations, the celebration of the reason for the season remains unchanged.  But that doesn’t mean we can’t acknowledge the uniqueness of this year’s holiday.

Dishtowels have long been a favorite small gift of mine.  It fits everyone, needs no interior decoration coordination, and implies no obligatory reciprocation.  It just conveys the message of caring at this season of love.

After an extensive search, I found just the design I was looking for here at Rivermill Embroidery. It comes in 4 sizes and a variety of formats. With the addition of the text, the applique’d masked Santa on a black bordered towel perfectly reflected my sentiments of the season. I’ve long been a fan and happy customer of AllAboutBlanks.com where I found  these towels.

The addition of the text to the 4×4 applique’ required my 8×8″ Brother Quattro frame.  Another font or text could easily be arranged in a 5 x 7 frame.  Whatever.  I think it’s a perfect design and a lasting remembrance for this season.

If you would like the text “an unforgettable Christmas” sent in .pes format, just leave your request as a comment at the end of this post.

Wishing you all the real joy of this Christmas season.

Required disclaimer: I am a paid Brother Brand Ambassador.  Not required:  I LOVE my Brother machines.


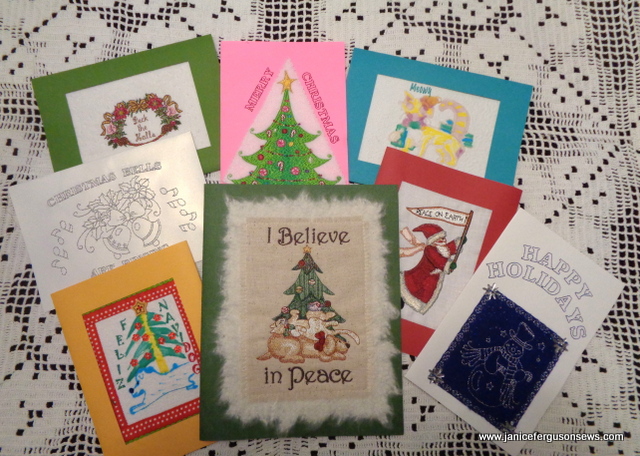
Embroidered Christmas Cards

It’s been forever since a new post has been put up here at Janice Ferguson Sews and I can’t say just why. Everyone thinks we should have so much time being pretty much shut down with the pandemic but I seem to be busier than ever! I did get a new hip and the therapy seemed to eat up all my energy and a huge amount of time. And it did help.

But back to blogging…….these embroidered holiday cards are my latest tutorial for Brother’s blog Stitching Sewcial and I LOVED making them. Were it not for the drudgery of laundry, cooking, cleaning, and the weeds that NEVER stop growing in Florida, etc. I’d make a hundred! They are so much fun! Check out the how-to tutorial here.

The tri-fold cards I ordered ordered are just wonderful They came with a variety of colors with optional oval or rectangular shapes. I highly recommend this vendor, though I have no connection other than that of a satisfied customer.

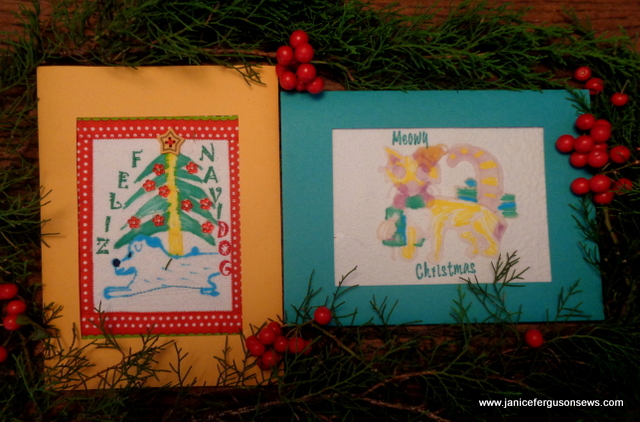
You might notice that there are two drawings on fabric by children (my grands) which were then placed over a thin layer of batting, free-motion outlined then stippled before inserted into tri-fold cards. Details are in the Brother blog tutorial.

Alastair drew his dog and cat lover Vivian, of course, drew a cat. It took a little creative text to pull it all together. Some grandparents, I’m sure, will be delighted.

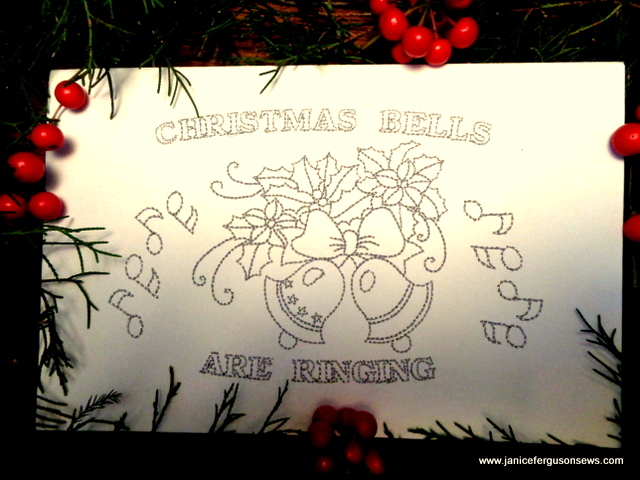
Trifold cards are not necessary. Several cards were made with plain cardstock while others were made from larger, fancy cardstock from craft stores like Michaels. Some were made with simple text on cardstock.

With the addition of felt, buttons, ribbon and whatever, you can just go crazy.

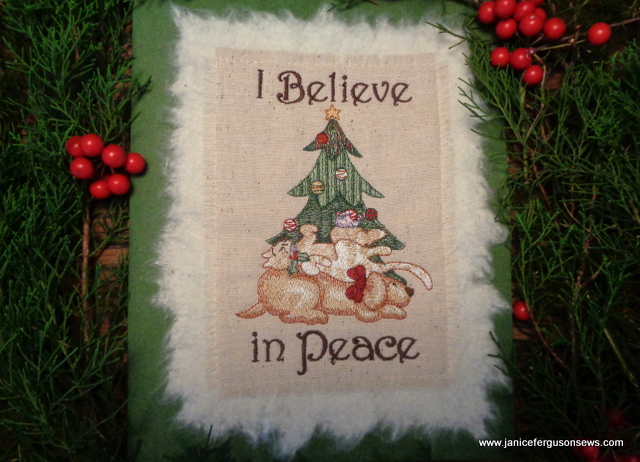
One of my favorite cards was made with this design from Embroidery Online’s I Believe in Santa Collection. This is a gorgeous set, marked down to $25, but each design is available individually for just $1. Other designs include I Believe in Hope, In Harmony, In Giving, In Family and so much more. Just a beautiful collection.

So these homemade cards are my recommendation for some lockdown holiday fun.  The recipients will love them and you will have a big time making them.

Merry Christmas to all!

P.S. I’m looking forward to showing you granddaughter Vivian Rose in her Christmas dress, the white lace dress from Sew Classic. Lovely as it is on a child, at least in the magazine, it hangs a little limp on a hangar so I am waiting for her to model it. When it arrived her mother said Vivi’s mouth was purple (she didn’t know why) and and the little urchin was dirty, dirty, dirty.  So trying it on her would have to wait.  I’m waiting.

What have you sewn for the holidays?

Required disclaimer: I am a paid Brother Ambassador. Not required: I LOVE my Brother machines.

Fast and Fun Halloween Projects

With so many schools relegated to virtual on-line computer classes and Halloween activities being cancelled, it seems more important than ever for our children to have some fall festival fun. These projects are fun to make and fun to share.

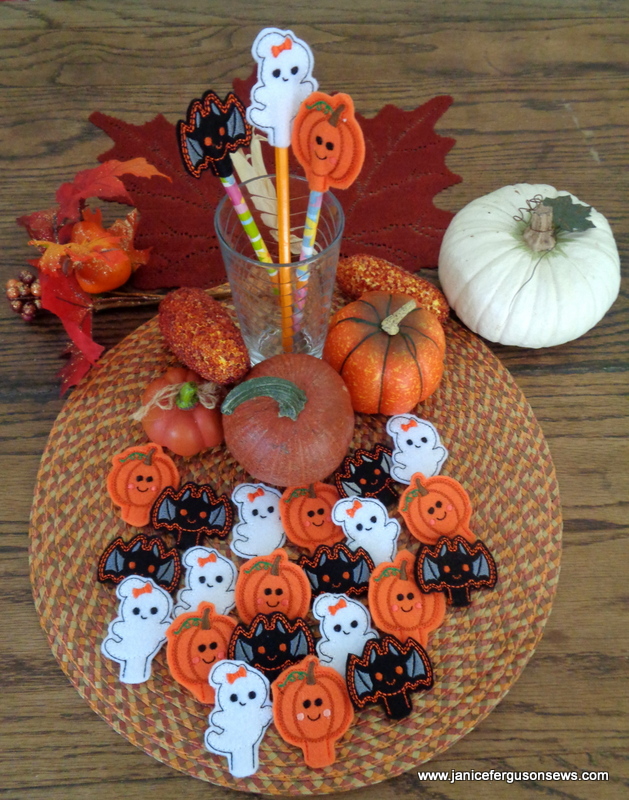
These darling pencil toppers were just sent to my younger grands to share with their classmates, by mailing them to their friends. Did you know that Halloween is the most popular secular holiday in the USA? Just ask my grandchildren. They are crazy for this time of year. Last month, 6 yo Vivian Rose told me she was counting the days until Oct. 1 so she could start wearing her Halloween clothes.

This is a bit of a joke, as she is required to wear a uniform to school–when she went off to school. But still she dresses for “class” at her computer desk at home. So hairbows, headbands and pencil toppers are her extra Halloween expressions for the school day.

These pencil toppers from GG Designs are just a joy to stitch out. They come as a single design or “sorted” with four pumpkins or ghosts or bats in a single 4×4 hoop. I combined 2 sorted sets of pumpkins into a larger hoop, did another color sort and stitched 8 pencil toppers in just a few minutes. This was repeated with the ghosts and then with the bats. It takes longer to cut out the felt designs than it did the stitch them. Now the set is on sale for only $4.13.

What a sweet little gift this would be to a favorite elementary teacher to share with her in-house students. There are so many who would be happy to receive these slightly spooky pencil toppers.

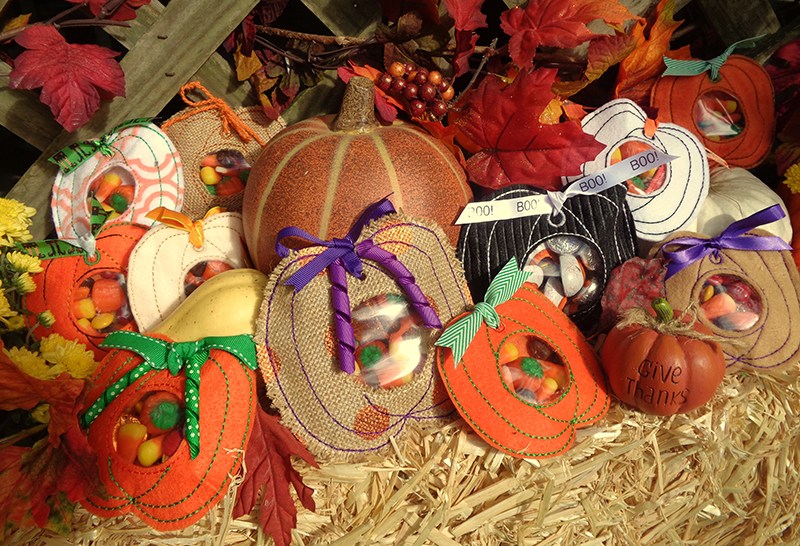
GG Designs Embroidery was the inspiration for another Halloween favorite which was sent to my grandchildren last Halloween. This was digitized and also stitched for the children at church, making me one of the more popular church Nanas!

As a paid Brother Ambassador (required disclosure), the project was posted at Brother’s blog, Stitching Sewcial and includes a step-by-step photo tutorial, as well as a FREE download of the file for the pumpkin.

There is still plenty of time to whip up these cuties. For your children, grands, neighbors, church children or for nursing home patients, these pumpkin treat bags are sure to bring a smile.

Fun Bug Bag

Summer is not yet over, and for some of us, it seems it never will end! As entertaining the children becomes more and more challenging, sometimes just getting them out of the house for a while is a worthy goal.

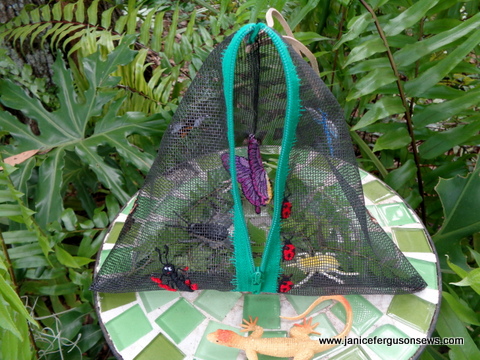
Whip up this quick and easy bug bag and they will be kept busy prowling the bushes and grass. Make it plain or make it fancy. Honestly, it takes longer to read the instructions than to make the basic bag.Whether the prey be creepy crawlies or fireflies, the adventure is a child’s version of a jungle safari. Work this into a lesson into entomology and identify some of these yard beasties and it becomes an educational adventure.

This fiberglass screen wire teepee bag (the name suggested by its shape) is a perfect accessory and holding pen. Use insect designs from design library to embellish the outside. Your Brother embroidery machine and most others will handle the screen wire effortlessly. The stand-alone butterfly swaying inside the bag will intrigue the children and send them racing out the door into nature.

Let’s make a bug bag!

Requirements:

    • sewing/embroidery machine
    • open toe foot, basic sewing foot
    • 4—4 or 5—7 frame to embroider more than one design in the same frame
    • Fiberglass screen wire: 18 x 26″ for bag embroidery and another large piece for stitch rehearsal of each potential design.
    • Utility scissors for cutting screen wire and zipper
    • Notions: zipper at least 18″ or with plastic teeth. Longer is fine. It will be cut to size during construction; 8-10″ cord or ribbon; monofilament, sewing and embroidery thread, seam sealant
    • Extra heavy water-soluble stabilizer (wss)
    • Download both left and right files below and piece together.

layout template left and layout template right (request below in comments and they will be emailed to you)Preparation

1. Print pattern/design templates. It is broken into two parts because my scanner bed is too small for the entire template. Print both the left and right templates and tape them together.
2. Print template of each design you plan to use. If deemed appropriate, resize to be proportional to the bag.
3. Cut 18 x 26″ screen wire. This large size makes hooping easier.
4. Tape completed template to white surface or pin to padded surface.

Note: It may be necessary to trace over the lines with a wide black marking pen for better visibility.

5. Center screen wire over template and tape or pin corners to hold in place.
6. Trace section placement lines onto screen wire with child’s school chalk. These lines show each section of the finished bag for suitable embroidery placement.

Note 1: To make the necessary marks, neither a sliver of soap, chalk marker or washout marker could be seen on the screen wire. Only white chalk, like that used on school black or green boards worked. Hmmm…were you ever in a classroom with a chalkboard? If so, you must be a grandmother like me.
Note 2: The screen wire will slip if not well secured when placed over the template. The red slashes show where it slipped and the line had to be redrawn after pinning it more securely to a padded surface.

7. Place templates of selected embroidery designs in chosen location within the section.

Note: It is helpful to take a picture with your phone so you can refer to it as you embroider.

8. Wind bobbin in each thread color used in the designs.

Embroidery

9. Select one or two designs to embroider on one large side and load into machine.
10. Hoop screen wire and heavy-duty water-soluble stabilizer (wss). Puckering occurred when the screen wire was simply basted to the wss.

NOTE: If you are blessed with a Brother embroidery machine with a camera capability, detailed instructions are posted at Brother’s blog, Stitching Sewcial here. Otherwise, proceed as you will.

13. After embroidery, do not remove wss.14. Continue hooping and embroidering each section. The wss is still in place on the back. Do NOT embroider the ladybugs now.

Note: To create the illusion of the ladybugs trailing up the green zipper they must be embroidered after the zipper insertion.

Construction

Insert the zipper in this unorthodox manner, stitched flat on the top side of the screen wire. This is done so the ladybugs could be embroidered along the zipper edge.

15. Attach open toe foot. The zipper is placed on top of the screen wire.
16. Open the zipper, place the top of the tape at the top of the bag’s marked cutting, right side up with the teeth at the edge of the left marked bag side.

17. Straight stitch 1/8-1/4″ from zipper teeth, with open toe foot positioned along the edge of the teeth. Needle position is in far right.
18. Open the zipper as far as possible. Repeat on the opposite side. WSS is still in place.
19. Stitch “grass” for ladybug’s home. On my Dream Machine that was stitch #7-12, width 6.5, length 4.0. Or select a similar stitch.

    • Return to Embroidery

      20. Open ladybugs design. Hoop with zipper near center of frame. Position design. Embroider.

21. Hoop 2 layers of wss in 4X4 frame. Embroider butterfly. This one was resized up to 2.56 x 2.55″. Be sure to use matching thread in the bobbin.

22. Remove as much wss as possible then soak in tepid water until the edges are clean. What remains between the layers will give the free flying butterfly stability. Pat with paper towels to help it dry.
When almost dry, shape it with wings spread as if to fly. The antennae are just loose threads. Applying a bit of seam sealant gives them some body.

Return to Construction

23. Cut screen wire to 8″-16″, along marked chalk lines but do not cut zipper. Best to remeasure for exact sizing. Leave zipper open to its greatest length.
24. Remove as much wss as possible. Trim screen wire and wss from teeth edges to first line of stitching.

25. Immerse bag in tepid water to dissolve wss.
26. Lie flat on a towel and roll the towel around it, like a burrito. Squeeze out excess moisture and hang to dry. If you are in a rush, a blow dryer speeds up the process of drying the zipper tape.

27. Stitch a folded 8-10″ cord or grosgrain ribbon to the top edge within the ¼” seam allowance. The loop should hang down with raw edges extended a little beyond the seam allowance. This creates a loop handle.

28. Close zipper a few inches above the bottom raw edge. Fold the bag inside out with the closed zipper in the center of the seam line. Stitch with ¼” seam allowance right over zipper.

29. Cut excess zipper-finally! Use utility scissors.

30. Fold top in half with zipper at one side. Begin stitching at zipper just above the first tooth. Back stitch for reinforcement. Angle up to ¼” seam line. The open toe foot gives best visibility for those first stitches.

31. Fold top in half with zipper at one side. Begin stitching at zipper just above the first tooth. Back stitch for reinforcement. Angle up to ¼” seam line. The open toe foot gives best visibility for those first stitches.

Does this make you want to hunt bugs or to sew a bug bag?

Pooh’s Book Pillow

Hello-0-0-0! If there are any readers left out there, I’m still here! Neither the virus nor lethargy has kept me quiet, just the hurry-up of life, even while in lockdown!

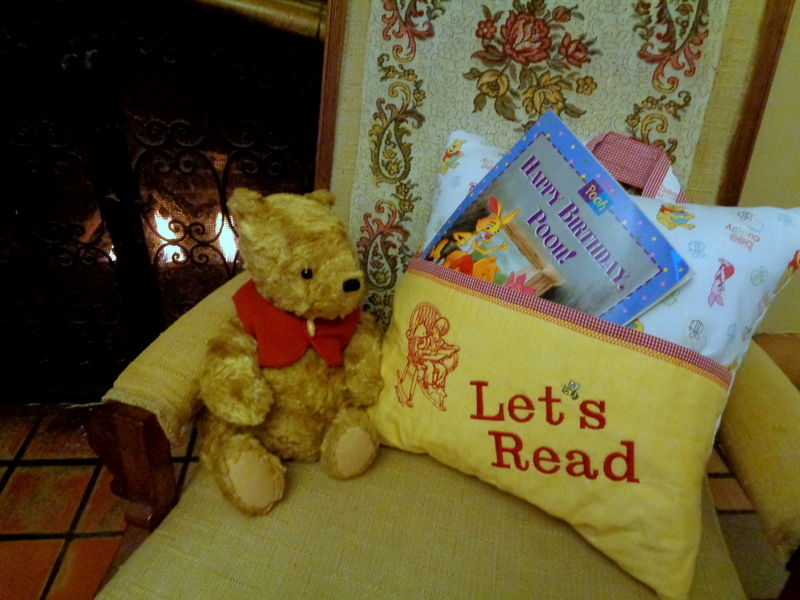
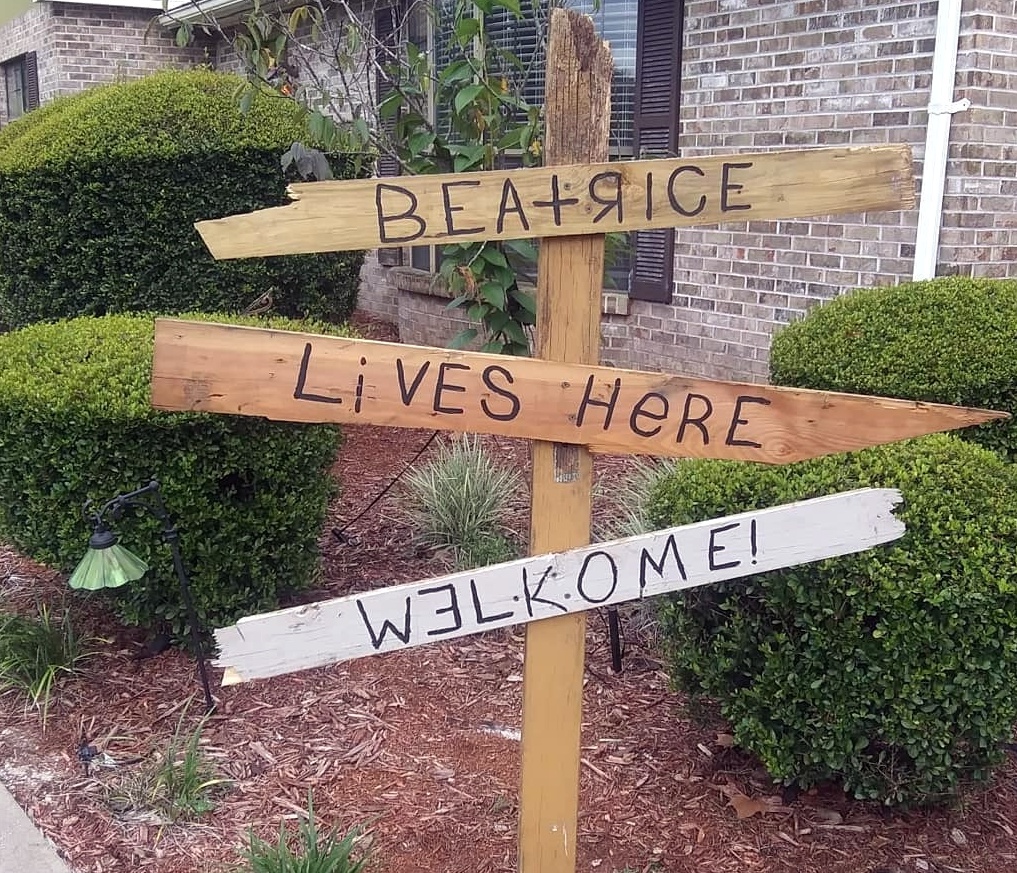
This is a fun little project that was done for precious little Beatrice, #1 fan of Winnie the Pooh.

The book pillow was also done for Brother’s Stitching Sewcial blog to celebrate Pooh’s birthday, hence the included book. Finding that little paperback required determination and skills worthy of Sherlock Holmes, but I was driven once I knew such a publication existed, though long out of print.

Book pillows have surged in popularity and not just for children. Who wouldn’t want to curl up with a good book and a soft pillow? With the recent stay at home call, this is a soothing antidote to what might be seen as isolation.

Why not make one today, for a child, for a friend, for a shut in, for yourself, for anyone! The instructions are for the Winnie the Pooh pillow shown, but any fabric, any embroidery design may be substituted.

NOTE: This pillow was made on my Brother Dream Machine. Some instructions are specific to that. Greater details can be found on Brother’s blog Stitching Sewcial here. Continue reading

Birthday Tea at Sea and Free Designs

I’m sorry it has been sooo long since a new blog has been posted. Hip replacement, shingles and husband’s shoulder surgery has kept me too busy. Now, at last, I can share this bit of Nana fun with you.~~~~

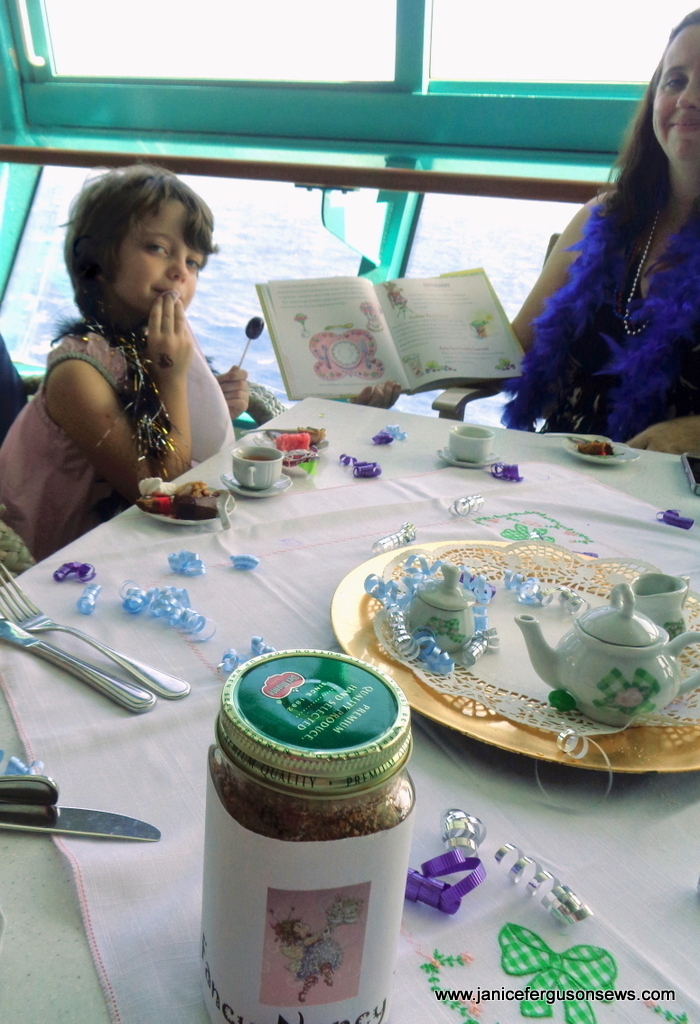
Grandchildren are just sooo much fun! Fun is what we had recently on a cruise to Cozumel with our daughter and her family, including 10 yo Alastair and Vivian Rose. The occasion was to celebrate Vivi’s 7th birthday.

There, on board and overlooking the aqua blue Caribbean, she was the guest of honor at a genuine Fancy Nancy afternoon tea. It was pure delight!

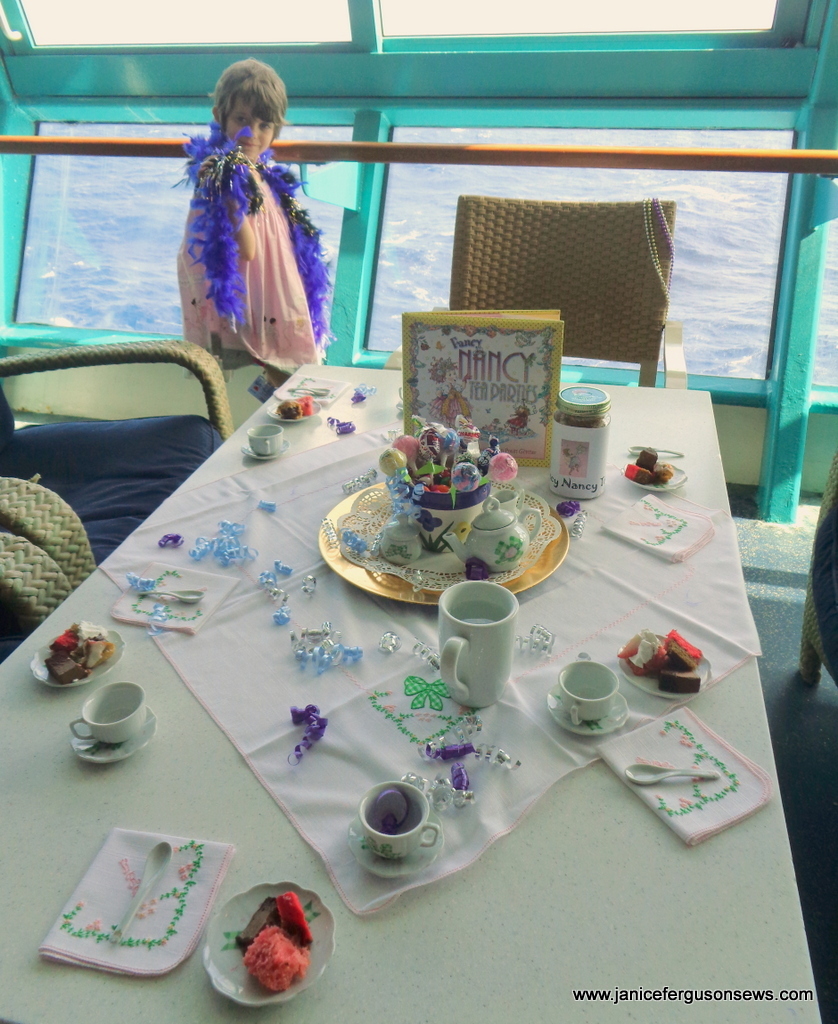
Vivian Rose, wearing her smocked Ode to Joy dress (Maggie B pattern) and flaunting a purple boa, looks on the tea table set for the celebration. Note the lollipop centerpiece.

The birthday tea was a huge success. Refreshments included pastries and dessert treats from the ship’s buffet accompanied with Fancy Nancy Tea. Feather boas and a chest of costume jewelry added to the elegance of the fete.

We had a fine time, or, as was often said so many years ago in the Glenwood News column of our tiny local newspaper, “a good time was had by all.” Several other ship passengers as well as servers stopped by to ask about the gala affair and offer Vivi birthday congratulations.

The tea also offered several opportunities to teach proper, ladylike behavior.

Vivian delicately wipes her mouth with her napkin–with no reminder!

She learned that it is impolite to discuss politics, religion or her health at a tea party or in any “polite” company.

“What’s politics?” she asked. “Don’t worry about that now. Just don’t talk about it when you find out.” “Okay,” she obediently replied. What a good girl!

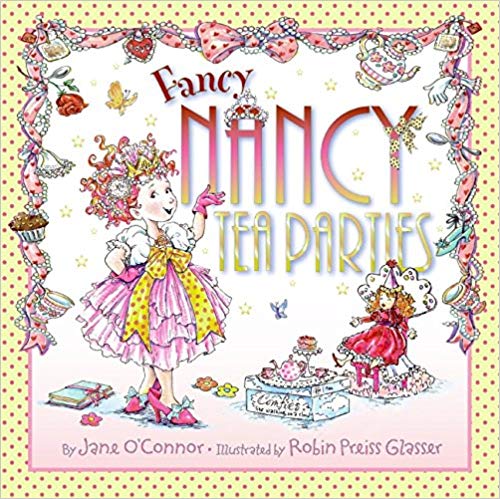
She listened attentively as her mother read Vivi’s new Fancy Nancy’s Tea Party book. Little did we know she was already planning to soon host her own little tea party.

As her mother read, Vivian listened raptly to her new Fancy Nancy Tea Party book.

The idea for this event came about during her latest visit to our home. We had been rummaging through boxes of my treasures in the garage when she came across a few doll size tea sets. She was enchanted and asked if she could keep one. We promptly had an impromptu tea party with her mother’s old Cabbage Patch doll (wearing a smocked dress) and a teddy. Of course, she went home with the doll set, but I had this another in mind for her.

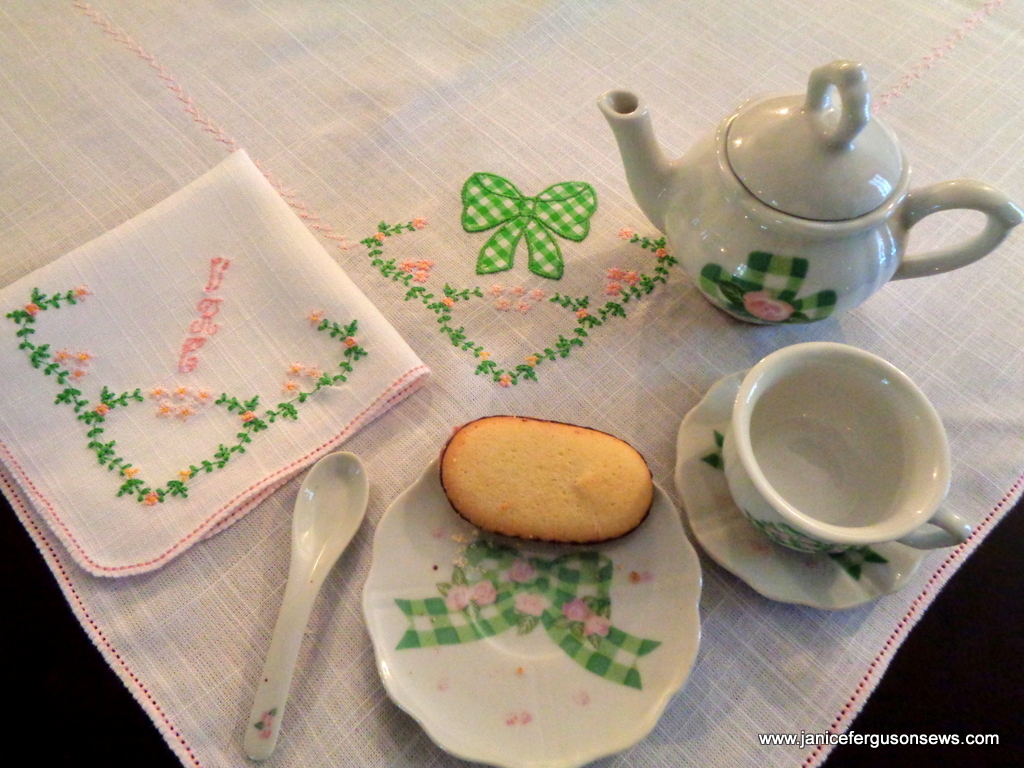
Having put aside this little porcelain set for her years ago, I presented it to her for her birthday at sea. At the tea party she saw it for the first time. To me it has a distinctive Mary Engelbreit look.

Several years ago, Cousin Laurel was presented with the identical set and put it to use for several tea parties. At her Second Annual Tea Party, guests were invited to bring their dolls. It added a whole new dimension to the festivities.

To accompany Vivian’s service for 6, I made coordinating tea linens with monogrammed napkins. The centerpiece is a painted flower pot loaded with jelly beans and lollipops. Card stock leaves were added to the sticks to create a sugar illusion of a pot of sugary flowers..

Even before I was blessed with the grandchildren of my dreams, this tea set was the inspiration for a class I taught many times around the country. Detailed instructions and the recipe for the Kindergarten Tea (now renamed Fancy Nancy Tea) are included in this post http://www.janicefergusonsews.com/blog/2009/08/30/tea-party-time/

The perfect machine applique’d bow design was ever so kindly digitized by Mary Alice Smith of Alabama.The hand-look embroidered napkin corners are part of a set digitized by my dear friend, Suzanne Sawko. If you would like the free tea linen designs (available only in .pes), please leave your request as a comment below.

Just hours after returning home from the port, Vivian insisted on hosting an impromptu tea party in her yard under the Florida sunshine. I asked my daughter if she had reminded Vivi about forbidden conversation topics.

She replied, “I didn’t have to. Vivi firmly instructed her guests what not to talk about.”Her previously informed too cool brother, attending only for the Oreos and banana slices, just rolled his eyes.

Autumn Burlap Pillow

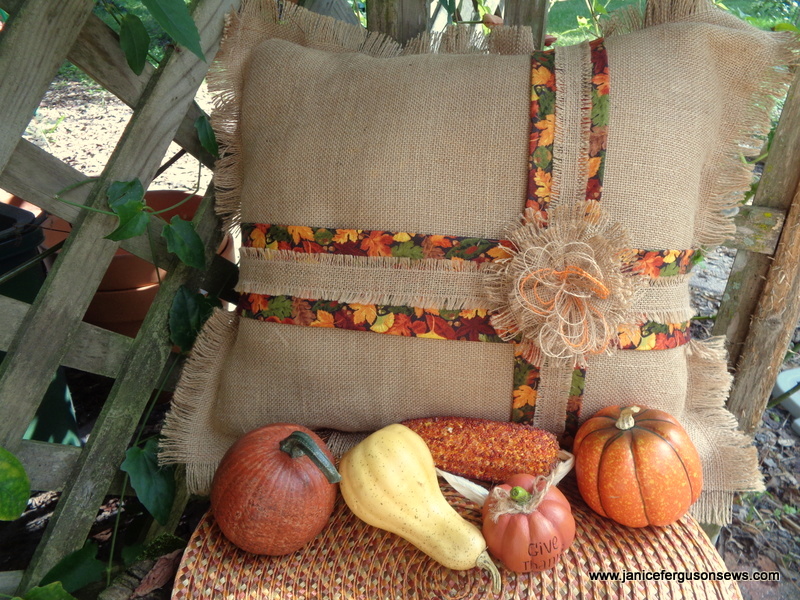
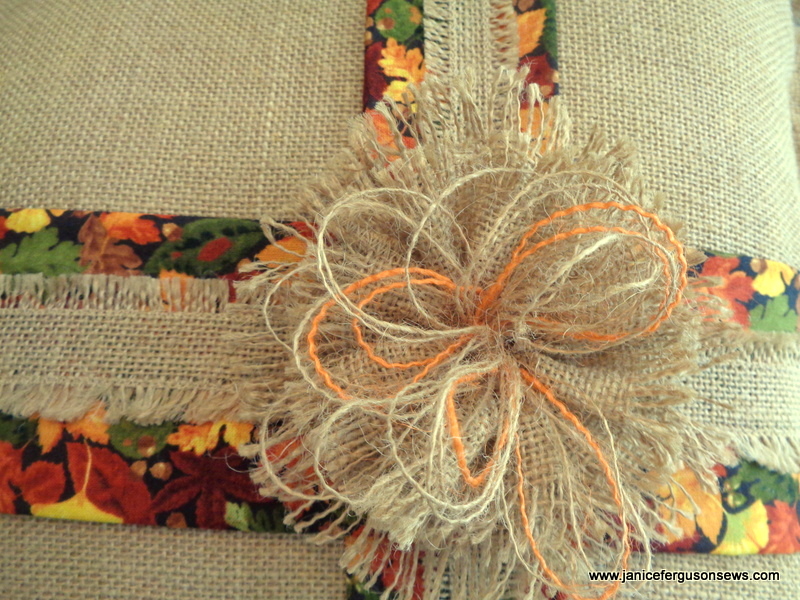
Get a detailed tutorial for this pillow at http://blog.brothersews.com/home-decor/harvest-time-pillow

This fall pillow gives you all the colors of autumn, even if you live in Florida, as I do. The fabric selection for this season is just remarkable! A trip down the aisles of my favorite sewing store reminds me of our drives down the Blue Ridge Parkway in October. I can almost smell piles of leaves burning.

You can make this pillow in a very short time. Working with burlap is a drastic change in gears from heirloom and the burlap rose was fun. Every burlap flower I researched online required hot glue and I did not want that. So this is my version of a no-glue posy. Detailed instructions are in the post at Brother’s Stitching Sewcial blog.

This sturdy pillow can bring fall colors to the outdoors as shown above or it can enrich the colors in your home. By changing the print fabric on the sash, you could make this a Halloween pillow. Then swap the sash to fall fabric after Oct. 31.

It reminds me of Halloweens past with my children’s and grandchildren’s goofy costumes, of huge Thanksgiving dinners with family and friends, of fall festivals at church, of tailgating Gator football games, and fall festivals. So many memories of this season…..

Required disclosure: I am a paid Brother Ambassador/sewing expert. Not required: I love my Brother Dream Machine 2!

Check out the tutorial here and leave a comment if you like it. I would really appreciate it.

http://blog.brothersews.com/home-decor/harvest-time-pillow/