Category Archives: Tutorials

Pinstitch~~What’s it all about?

monogrammed-birthday-pc3A

pin stitched Madeira pillowcase hem

Just a few days ago, Lindsay wrote, “ Would you post or share you technique for pin stitching. Needles, setting, fabric and lace prep, thread, machine, etc.?”  So this post is dedicated to Lindsay and her inquiring mind.~~~~~

Some time ago, I promised a tutorial post on pin stitch and now it’s time to address this question.  In my humble opinion, few machine-made embellishments for classic clothing have as much aesthetic impact as the most common hemstitches, pin stitch and entredeux.  So, for those of us who love to create such garments, it is important to know about these two machine made hem stitches.

Since this is a very broad topic, this post will deal only with pin stitch.  As a matter of fact, it will take two posts for pin stitch. Some time later, I will talk about entredeux.

Also known as point de paris  and Parisian hem stitch, is a stitch made by both hand and machine.  This discussion deals only with machine made hem stitches.


First let me give you a brief overview of this stitch.  Much of this information is taken from Carol Ahles’ excellent reference book, Fine Machine Sewing.

DESCRIPTION: Pin stitch is described by Carol as a stitch pattern that resembles the letter “L”  (or when mirror imaged, a reversed “L”) repeating the vertical stitches and on some machines, the horizontal stitches.

It looks like this in the machine stitch menu.  On several machines I have used, this requires 8 stitches for each hole, which appears at the left end of the horizontal stitch.  A good starting point for settings is W. 2.5 and L. 2.5.  Don’t be tricked into using a stitch that has two horizontal stitches.  Those are usually for applique’ and will not give the same look as a genuine pin stitch. Continue reading

Antique Lace Galloons

Sometimes, it seems that all my posts overlap.  This is one of those times.

When I blogged about the shadow smocked Easter dress for my granddaughter, I mentioned that I would tell you about the lace I used.  And I will.

As I was gathering my thoughts, it occurred to me that the most interesting thing about the lace is the use of the galloon as insertion.  So I want to tell you about that and other galloons I have used for both insertion and edging.


galoon FI

French Val galloon, with two decorative edges, 1-3/4″ wide


The antique lace I used for my granddaughter’s Easter dress was purchased at a veritable once-in-a-lifetime estate sale where I still sometimes shop when I am in Dreamland.  The creamy French Val lace is a beautiful ivory color, achieved by age rather than dye. Two  bolts of a classic pattern available yet today came home with me.


French Val edging, 1-1/4" wide

French Val edging, 1-1/4″ wide


I found the intricacy of  the pattern in combination with the gentle color to be very pleasing.  But I needed insertion for the skirt.

If you look carefully at the scalloped edges on the galloon, you will see how easily it converted to an insertion.  Without the perfectly straight lines of traditional insertion, the galloon requires a little more care when it is stitched to the flat skirt fabric.  But it certainly passed.   The soft curve of the scallops make this do-able. More dramatically curved edges would have been a major challenge.

galloon used as insertion

galloon used as insertion


I’ve used galloons in other garments.

Continue reading

Shadow Smocking How-to

shadow-dress


My granddaughter’s shadow smocked Easter dress was inspired by Kay Guiles’ article in Sew Beautiful, Easter, 1998.  In fact, the dress is nearly identical to one of the sample garments shown in that article.  I take no credit whatsoever for the design or technique.


SB pic


The only changes made to Laurel’s dress are the addition of lace insertion in the skirt and the substitution of a different embroidery design that included both silk ribbon and DMC floss.

Shadow smocking is a very unique technique and not at all difficult.  But I learned a lot that I would like to share with anyone considering such a project. Continue reading

AG Doll Bishop with Centered Embroidery

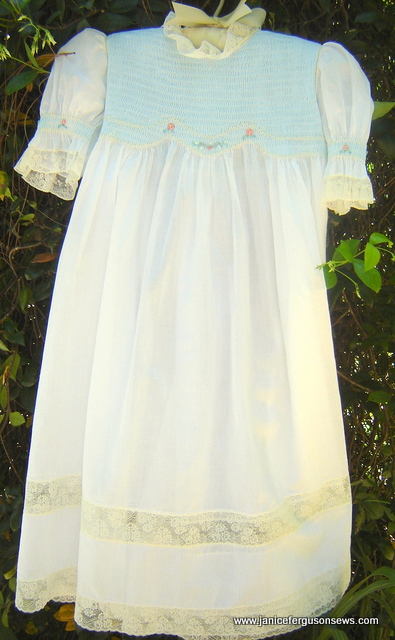
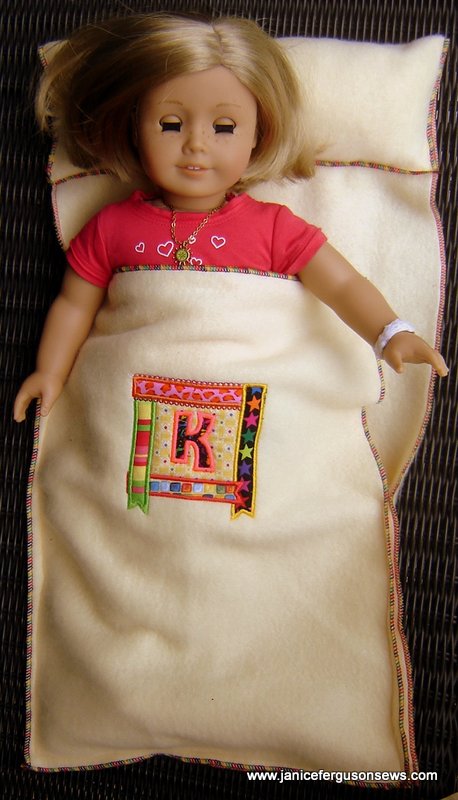
American Girl doll Marie Grace in her Valentine nightie

For Valentine’s Day, I am making my 7 year-old granddaughter a smocked bishop nightgown and this matching one for her American Girl doll.  If these hadn’t been cut out and pleated up before I got Custom Keepsakes  Sweet Dreams collection, I would be making nighties from that set.  But these have to be finished.

I wanted something a little more interesting than a standard bishop and decided centered embroidery would be a fresh look.  More than once, I have flattened the pleats at center front for embroidery or a tab and never found it to neither difficult nor problematic.

Doing this on a doll sized bishop gave me some unexpected disappointments.  I’d like to share with you what I learned on this little project.

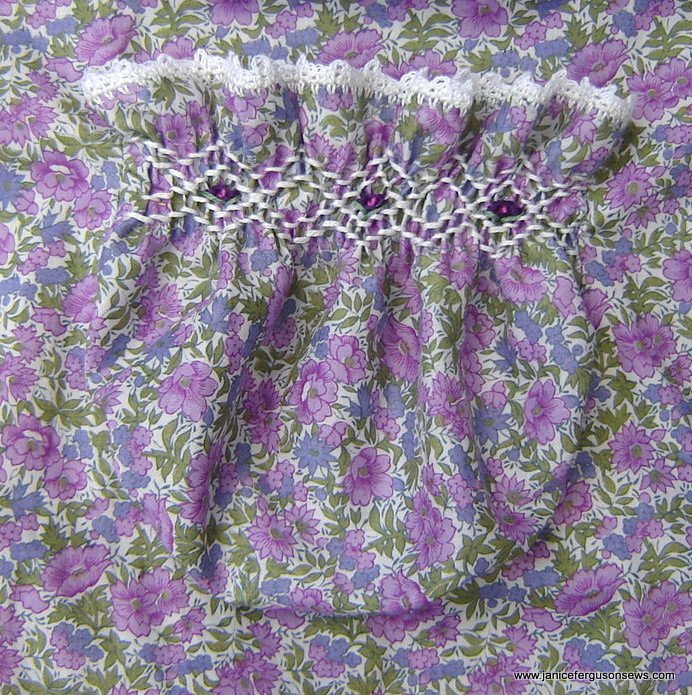
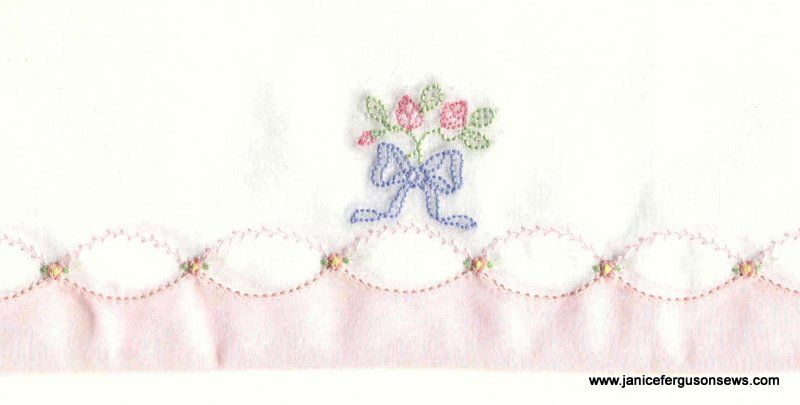
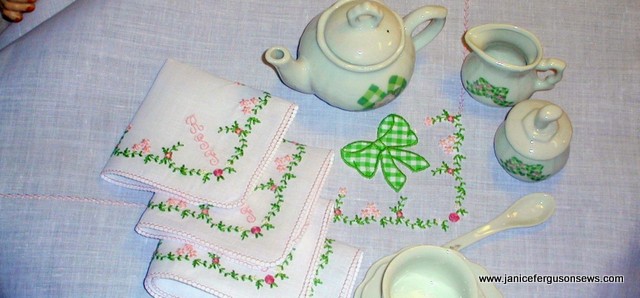
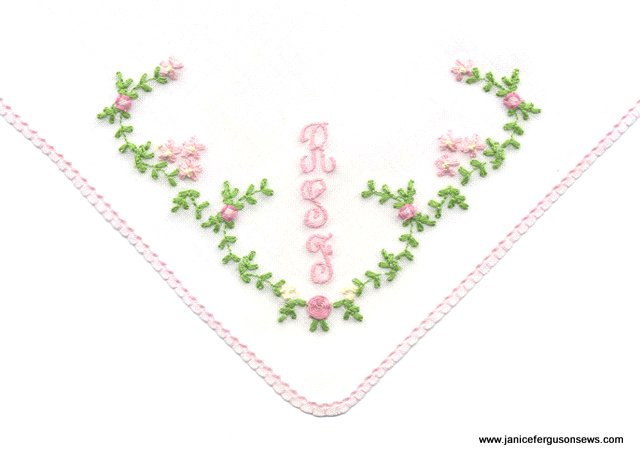
But here are the particulars of the nightie.  The smocking is a design I just made up as I went along,  the fabric is Imperial batiste and the pattern is one I drafted. The embroidery is from Martha Pullen’s Little Pleasures  collection, though it is slightly rearranged.  Laurel’s gown will have the fil tire’ heart for embroidery.

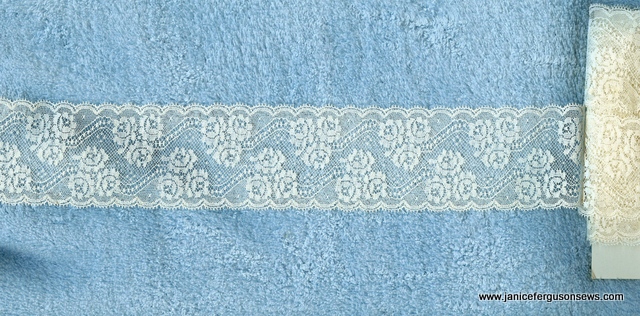
The smocked sleeves were trimmed with French lace and embellished with French knot flowers, a cluster of three in the center and a single knot on either side.

Frankly, this is all nit-picky stuff and probably isn’t worth worrying about on a doll nightgown.  But I wanted to figure out just what went wrong.  If you don’t care, take a quick look at the pictures and move on!  The internet is full of fabulous blogs with interesting, fun posts.

First, in response to Jo’s question, just how do you prepare a bishop with center front embroidery?

  • Pleat the bishop as usual, but with extra long threads and with the center front marked.
  • Pull up each pleating thread at that center mark and cut.  Be sure to pull up enough thread that you can easily tie a hefty knot.
  • Remove the threads from enough pleats to accommodate the embroidery design.
  • Knot each of these cut ends.
  • See a flat center with a vertical row of knots on either side.

The problem I ran into was the neckline and binding.  First, in order to correct the inevitable dip in the hemline at center front, I always draft (or use patterns) with a straight neckline. Here is how I do it and then you will see what I should have considered for a doll pattern. FYI, I always use 1/2″ seam allowance at the neckline which I adjust on patterns that have a smaller seam allowance.

  •  After cutting out the pieces, I fold the front in half, with the fold running down the center front from neckline to hem.
  • Then I mark a dot 1/2″ below the top edge on the fold.
  • With a rotary ruler and cutter, I cut from the dot on the fold to the seam line of the front shoulder.  This removes a folded wedge from the neckline, making it 1/2″ shorter at center front.  The gentle taper causes no difficulty with pleating.
  • After sewing the pieces together, I run a machine sewn 3.0 length gathering stitch 1/4-3/8″ from the raw edge.
  • The bishop is pleated with the first pleating thread 1/2″ below the neck edge, which puts it right on the seam line.

So far, so good.  Then for center embroidery, I remove the pleating threads from that area as detailed above.

So what is the problem?  The neckline.

1.  The flat, embroidered section, 1-1/4″ wide has very little curve to it.  If there had been pleats there, the slight taper of neckline would have been greater at the center front.

As I thought about it, I recalled that approximately 3″ of flat fabric pleats up to 1″.  So the center 1-1/4″ of binding would have used up  3-3/4″  of fabric that had been tapered.  That leaves the center front much straighter.

I’ll have to check with my husband, the engineer, to figure out just how that could be corrected.  But I know it should have been a deeper curve.

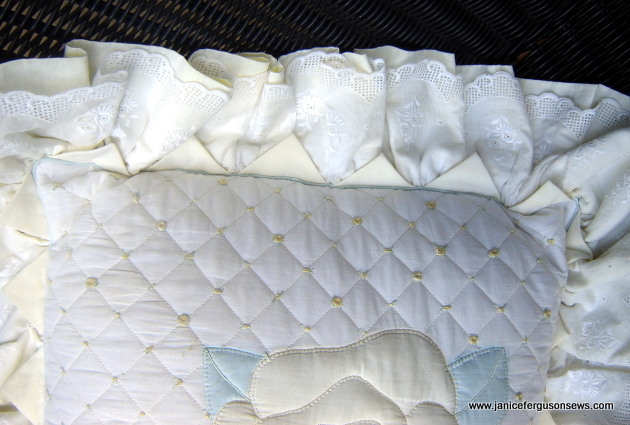
2.  The flat, embroidered section has no bulk to fill the bias binding.  I don’t recall this being a problem with earlier flat center bishops, but maybe I wasn’t as picky  then.

As I was applying the binding and came to the flat section, I discovered that I had two choices, neither of which I liked.  The first was to fold the bias over just as I had on the smocked section.  That left the bias much wider, because it had nothing to wrap around.

The same amount of bias could wrap around thick pleats and measure 3/16″ in width while the flat section had nothing to fill it and measured 1/4″.  Does that make sense to anyone who has plowed through this minutiae?

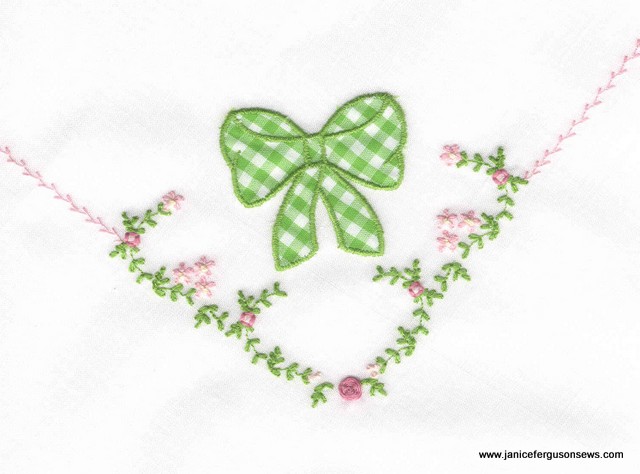
The other option, was to wrap the bias over the same distance, and then stitch the excess width further down on.  But it shadowed through.  I chose this option as the lesser of two evils.  In retrospect, I probably could have just twisted a narrow strip of batiste to use as filling.

You can see the excess bias shadowing through the batiste above the embroidery.

Well, I could go on about how I wish I had lowered the embroidery and/or smocked fewer rows in the front, but this is more than anyone wants to read.  And it’s more than I want to write about.  I still have Laurel’s nightie to smock so I will move on to that.

Are you sewing/smocking/embroidering any Valentine’s gifts?  Tell us about it.


This is my post for Freckled Laundry and Pink Saturday.

Doll Sleeping Bag–Kid Sew

AG-sleeping-bagwKit


Grandchildren Robert, 5, and Laurel, 7, spent Friday night and all day Saturday with us.  As usual, it was a busy time with both children requesting a sewing project with me and shop time with their grandfather.

Bob finished a shop project with Robert, but Laurel is training for a children’s triathalon and asked him to “train” with her.  In Florida’s scorching July heat, they jogged and biked and twice went swimming with Robert.  Bob is a real trooper, but time (and energy)  ran out before he and Laurel made it into the shop.

I managed to do some machine embroidery with the little guy which I will post later.  The major sewing project was Laurel’s, this doll sleeping bag.

Once again, at our house, Laurel’s American Girls doll Kit was forced to spend the night in the nursery crib because the little doll cradle at the foot of Laurel’s bed is too short for the 18″ dolls.   Laurel lamented  the doll bedding shortage everywhere.  At her home, she has the sweet AG doll bed decked out with bedding I made for her first doll, Molly .  But now that Kit has joined the family, “She has to sleep on the floor, Nana!”  Outrageous!

Last month, at our cabin, Kit again had to sleep on the floor, just as she had at a recent sleepover.  So Laurel thought this would be a very useful accessory for her new doll.


AG-sleeping-bag-LKit2

Continue reading

Smocked Pocket Pattern

smocked-pocket-finished

Life certainly has gotten in the way of the Liberty sundress I am making for Laurel. (UPDATE: But it is finally finished! Click here.) Fortunately, with all of our Florida sunshine, the dress is likely to be worn 9 months of the year. But my 89 year-old aunt seems to be failing at an alarming rate and has needed more attention than usual. Then I discovered that all but two of my SAGA magazines are missing, either lost in the hurricanes or lost in the garage. Fortunately, I remembered that I had copied the pattern and was able to retrieve it. So finally, progress is being made.

The smocked pockets were just the touch this little dress needed. The Florence Roberson pattern, published in The Smocking Arts, date unknown, is unlike anything else I’ve seen and makes up so sweetly. Though the no-show attachment to the dress is a little tedious, the puffy pocket is worth the effort.

The pattern is included below.

SmockedPocketpatt

Because of the filet crochet yoke I am using, I decided to crochet a little edge on the top of the pockets. But I have no proficiency at this needleart, so it took me a while and the results are hardly worthy to be included on a garment with the beautiful yoke. Still, as Martha Pullen once said, “If something is worth doing, it’s worth doing poorly until you get good at it.” I like that—and hope to be good at it some day. Continue reading

Make a Girl’s Pouch Purse

purseLll2


When Laurel and Robert arrived for a two day visit,  my little granddaughter was wearing the ladybug dress I made recently. While she was here, we made a matching “purse.”

This  is a nice little sewing project for a child, as the purse foundation can be a ready made handkerchief requiring just 4 lines of straight stitch to be finished.   Or it can be more elaborate, like a square with lace edging or bias binding and machine embroidery.  Note:  I attached the bias binding but Laurel did  the remainder of the sewing.

Regardless of your choice, you begin with a finished square.  Large squares make large purses, smaller squares make smaller purses.  Nothing tricky here. Continue reading

Yellow Rose Heirloom Pillow

zyellowrosewholeBRITE
 
It’s hard to predict just what sort of things will speak to a child. From toys to food, their tastes differ and often surprise both parents and grandparents.
 
Laurel loves this pillow. It is her special treat to sleep with it when she spends the night. Frankly, neither side pressed against the sweet cheeks of a 5-year old would seem to make for pleasant dreams. With a galaxy of French knots on the front and pearl buttons on the back, it would be far less comfortable than the pima cotton pillowcases in the children’s room.
embclose


But she loves it and asked me if she could have it when she is grown up. I expect she will own it long before that.

Featured in an article in the Heirloom Quilting series I wrote for Creative Needle magazine. Portions of that article are included in this post. In order to keep this post to a reasonable length, I have left out detailed instructions for piping, sharks’ teeth and the ruffle. Continue reading

Dirty Laundry

I’ve mentioned my good friend Sue Lord and all of her talents before (www.suelord.com).    Her ever -flowing creative ideas and strong influence on my sewing projects require that I give her credit and thanks yet again.

Sue designed the dirty laundry bag project. It was featured in one of the machine embroidery magazines and is included in her embroidery collection Gifts for Women.  This collection has something for everyone and is just fabulous.

Sue, ever the Southern gentlewoman, stitched her dirty laundry bag in feminine pastels. But the text is just suggestive enough to make me think of black lingerie.

The bag is made from ivory polished cotton with black doubleface satin ribbon running through the casing.  I almost always prefer ivory over white.  On this project, it softens the harshness of the black stitching.  Continue reading

Machine Shadow Embroidery~ Baby Pillow

shadmadpilo


This sweet little baby pillow was a joy to stitch and makes such a pretty and practical baby gift.  With its shadow embroidery,  featherstitching and Madeira applique hem,  it looks delicate and delightful.

Made of good quality domestic cotton batiste, it needs no lace or trim to complete its tender look.

In my humble opinion, shadow embroidery is one of the prettiest embellishments that can be added to a project.  For babies, children, ladies or linens, its delicacy is stunning.  Much as I have always enjoyed doing it by hand, I was absolutely enthralled when my friend Suzanne Hinshaw developed her techniques for achieving the identical look with machine embroidery.


machineshadmadhem

The technique is so simple that it’s hard to go wrong.  You simply hoop up a very sturdy water soluble stabilizer with no fabric and then stitch the portion of the design that, when done by hand, would have been on the back of the fabric.  Think of it as the fill pattern.

Then, after placing strips of double sided tape around the embroidered design, you press sheer to semi-sheer fabric to the stabilizer such as batiste or even light weight linen.  Of course, you would have marked where you want the design to be so you can position the design perfectly.   And Suzanne’s instructions make it clear just when the fabric is placed on the stabilizer.  In fact, all of her directions are very clear.

The next step is to stitch on the fabric.  The design is sized such that the underlay portion of the design which is stitched only on the stabilizer is just ever so slightly larger than the outlining stitches that are worked on the fabric itself.  The top stitches catch the underlay stitches which create the shadow effect.

Finally, you remove the piece from the hoop and gently peel the stabilizer away from the linen where the double sided tape has held it in place.  Cut away as much of the remaining water soluble stabilizer away as possible.  Then immerse the piece in water and let the stabilizer dissolve away.  When all signs of stabilizer are gone, let it dry and then press.

When it is finished, you will have shadow embroidery so credible that no one would even think to examine the back side.  And if they did, they would be hard pressed to recognize the slight difference in the look.

In subsequent posts, I will have more shadow embroidery, some by hand and more by machine using Suzanne’s gorgeous designs.  I might even persuade her to make her designs available again.