Category Archives: techniques

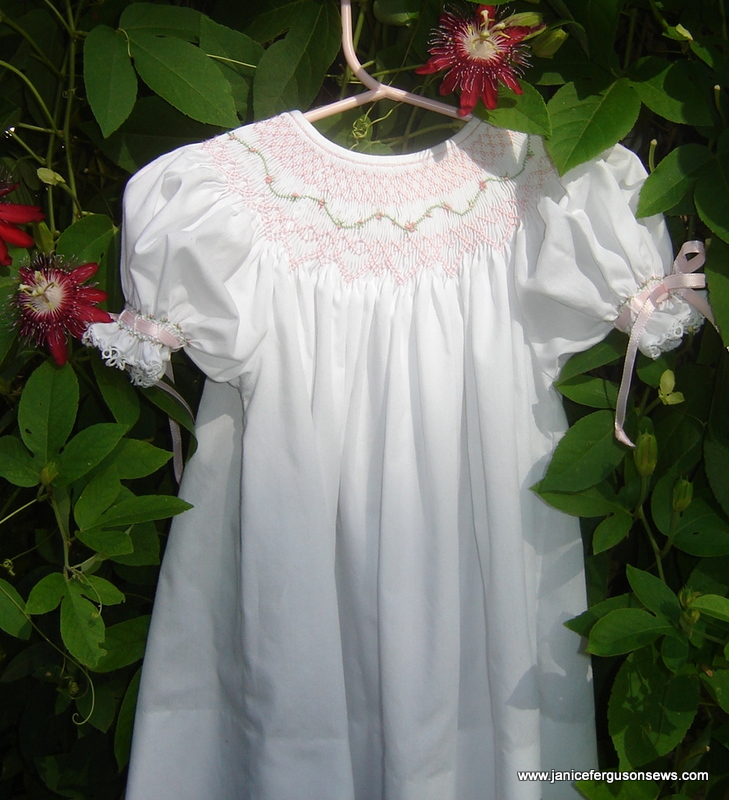
Alysha’s Birthday Dress

happy-mothers-day

Happy Mother’s Day to each and every one of you who has mothered a child of your own or a child of another. (Frankly, I cannot imaging anyone who sews or reads this blog who has not reached out to children and grandchildren of their own and/or others.) The love and attention showered on our precious children is the best use of our precious time.

I’m at that happy time of life when I can enjoy my beloved adult children as well as the beloved grandchildren they have given us. My daughter Rebecca and daughter-in-law Shelly are both incredible, wonderful mothers whom I admire and love dearly. I wish each of you a happy day filled with appreciation from and for your loved ones.

Around here it has been busy, busy, BUSY!!!! We’ve been blessed with almost back to back and overlapping visits from our four grandchildren and even more happy chaos.  In a future post I’ll tell you all about Laurel’s luau 9th birthday party, new fleece blankets for each grandchild and the progress of our newly tamed feral cats and the kittens.

So once again, I am rerunning an old post, though I do have a few new thoughts and plans.  I hope  to make a very similar dress for new granddaughter Vivian Rose before her first birthday.  FYI, Alysha is almost 5, adorable and the apple of her grandparents’ eyes.

~~~~~~~~~~~~~~~~~~~~~~~~~~~~~~zAlyshabdbishop2

Continue reading

Pin Stitch~~ Part II

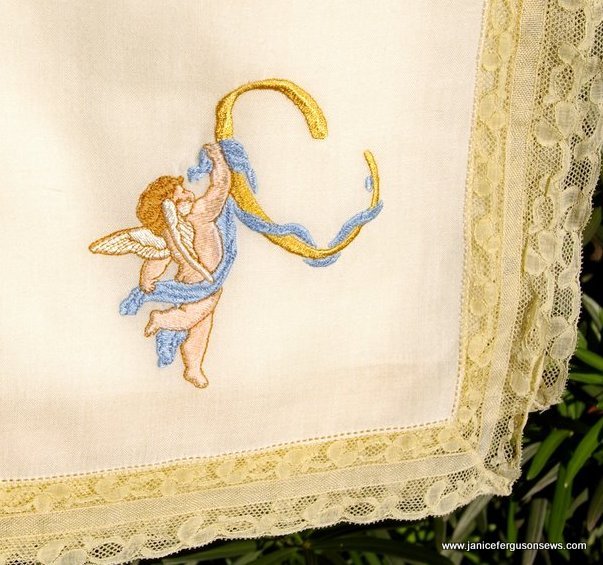
angelwatchcorner

In the previous post, Pin Stitch…What’s it all about? basic information was given about fabric, needle, thread, foot and fabric preparation. There was more, because pin stitch is one of my favorite techniques. And my writing style can be summarized as why-say-in-a-sentence-what-could-be-said-in-a-paragraph? But I bet you already knew that.

This is part II with how-to details and applications for this classic stitch. I hope it is more useful than boring.

NITTY GRITTY HOW TO–After reading all this background and materials preparation info, you are probably wondering  HOW DO YOU DO IT???? Finally, we get down to it.

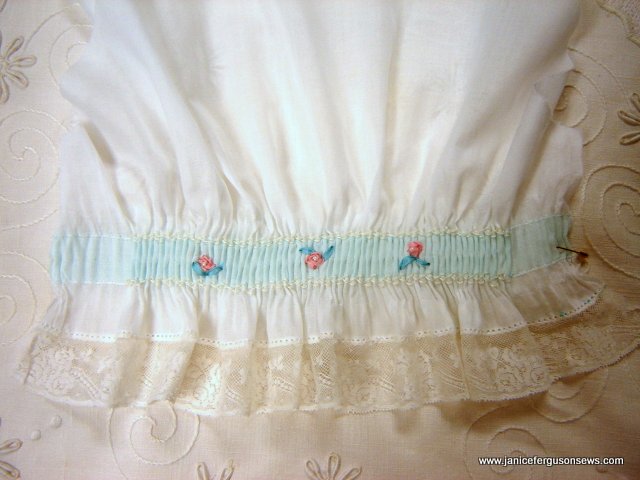
shadsmock-sleeve-2

Lace edging is pin stitched to the sleeve of a shadow smocked dress, as detailed a few posts ago.

Pin stitch is almost always connecting one thing to another, like lace to fabric on the sleeve to this shadow smocked dress or the angel blanket above. Continue reading

Pinstitch~~What’s it all about?

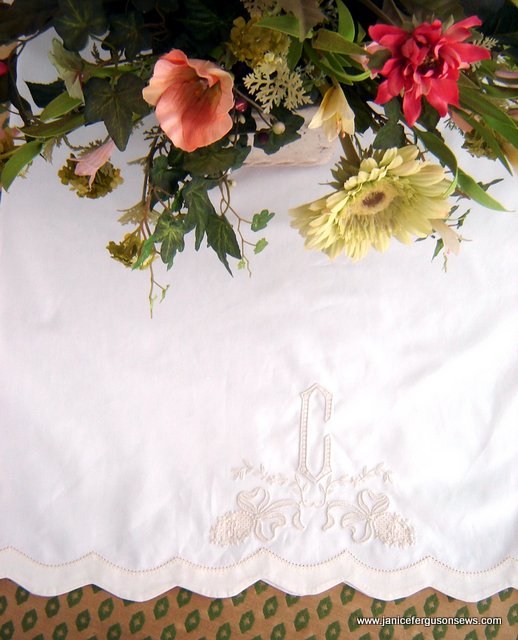
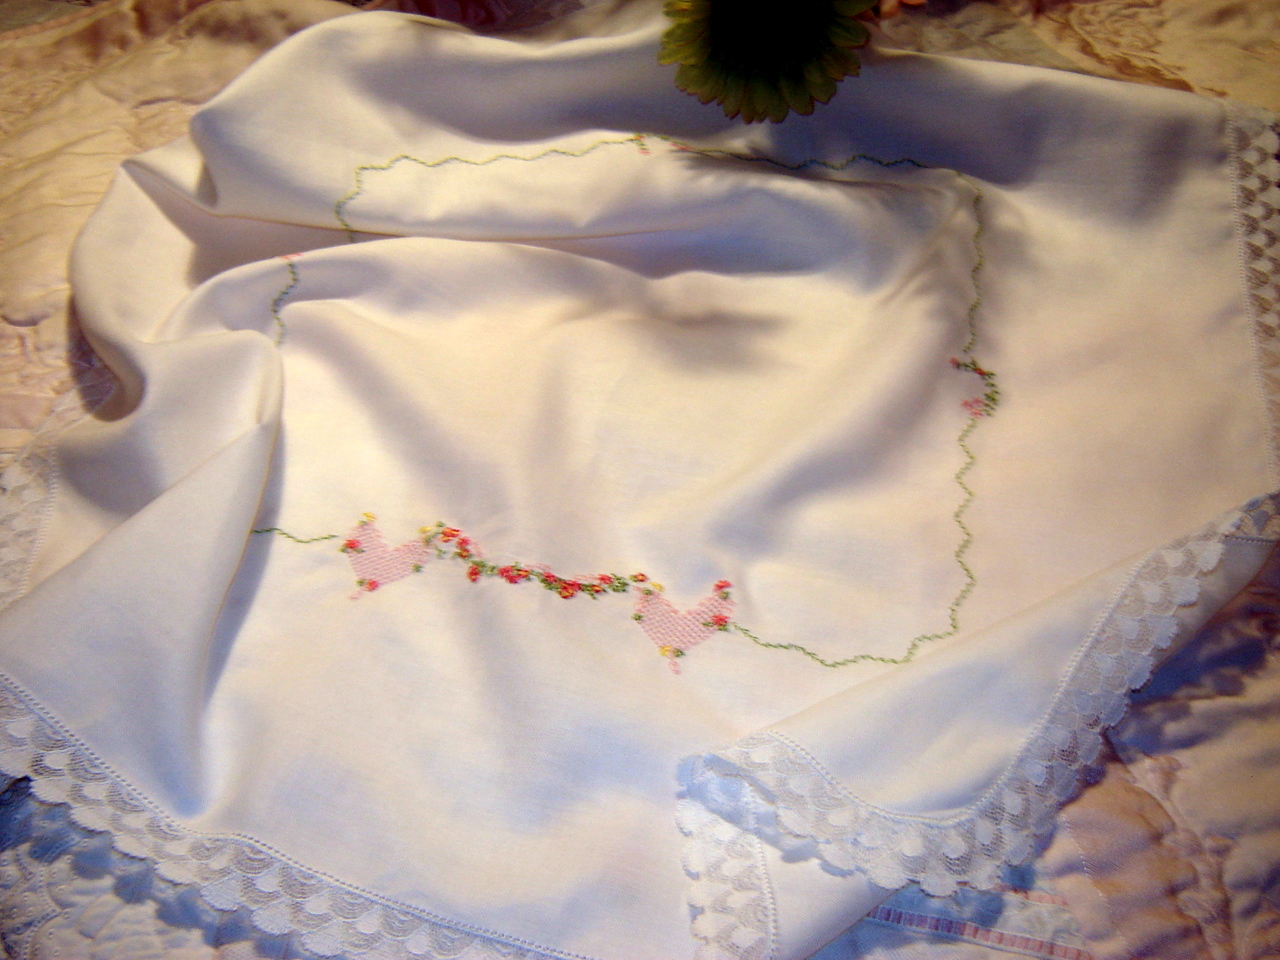
monogrammed-birthday-pc3A

pin stitched Madeira pillowcase hem

Just a few days ago, Lindsay wrote, “ Would you post or share you technique for pin stitching. Needles, setting, fabric and lace prep, thread, machine, etc.?”  So this post is dedicated to Lindsay and her inquiring mind.~~~~~

Some time ago, I promised a tutorial post on pin stitch and now it’s time to address this question.  In my humble opinion, few machine-made embellishments for classic clothing have as much aesthetic impact as the most common hemstitches, pin stitch and entredeux.  So, for those of us who love to create such garments, it is important to know about these two machine made hem stitches.

Since this is a very broad topic, this post will deal only with pin stitch.  As a matter of fact, it will take two posts for pin stitch. Some time later, I will talk about entredeux.

Also known as point de paris  and Parisian hem stitch, is a stitch made by both hand and machine.  This discussion deals only with machine made hem stitches.


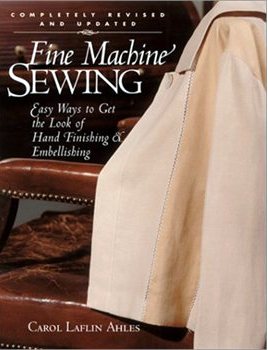
First let me give you a brief overview of this stitch.  Much of this information is taken from Carol Ahles’ excellent reference book, Fine Machine Sewing.

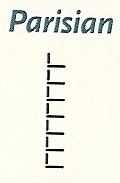
DESCRIPTION: Pin stitch is described by Carol as a stitch pattern that resembles the letter “L”  (or when mirror imaged, a reversed “L”) repeating the vertical stitches and on some machines, the horizontal stitches.

It looks like this in the machine stitch menu.  On several machines I have used, this requires 8 stitches for each hole, which appears at the left end of the horizontal stitch.  A good starting point for settings is W. 2.5 and L. 2.5.  Don’t be tricked into using a stitch that has two horizontal stitches.  Those are usually for applique’ and will not give the same look as a genuine pin stitch. Continue reading

Antique Lace Galloons

Sometimes, it seems that all my posts overlap.  This is one of those times.

When I blogged about the shadow smocked Easter dress for my granddaughter, I mentioned that I would tell you about the lace I used.  And I will.

As I was gathering my thoughts, it occurred to me that the most interesting thing about the lace is the use of the galloon as insertion.  So I want to tell you about that and other galloons I have used for both insertion and edging.


galoon FI

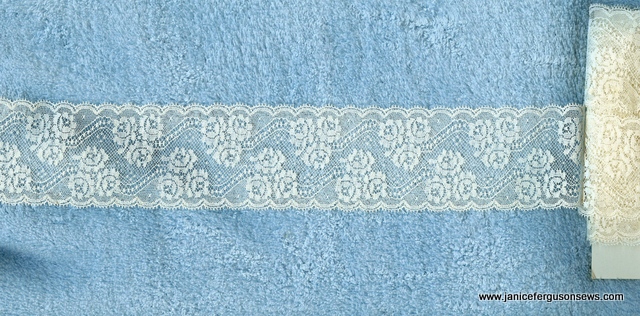
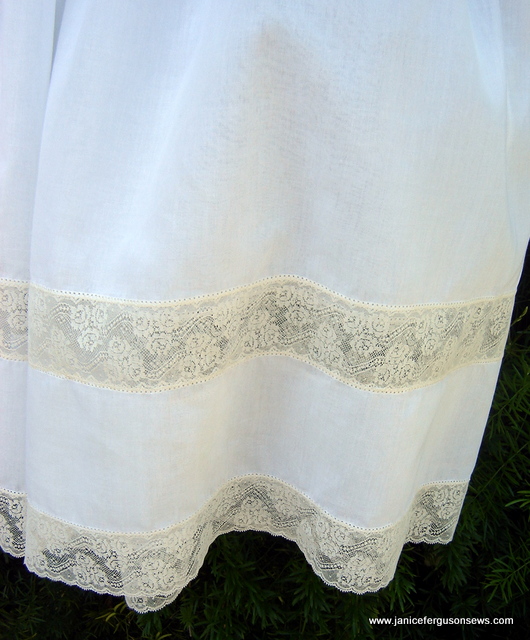
French Val galloon, with two decorative edges, 1-3/4″ wide


The antique lace I used for my granddaughter’s Easter dress was purchased at a veritable once-in-a-lifetime estate sale where I still sometimes shop when I am in Dreamland.  The creamy French Val lace is a beautiful ivory color, achieved by age rather than dye. Two  bolts of a classic pattern available yet today came home with me.


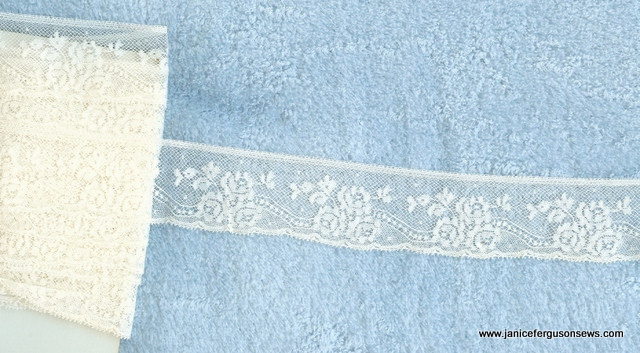
French Val edging, 1-1/4" wide

French Val edging, 1-1/4″ wide


I found the intricacy of  the pattern in combination with the gentle color to be very pleasing.  But I needed insertion for the skirt.

If you look carefully at the scalloped edges on the galloon, you will see how easily it converted to an insertion.  Without the perfectly straight lines of traditional insertion, the galloon requires a little more care when it is stitched to the flat skirt fabric.  But it certainly passed.   The soft curve of the scallops make this do-able. More dramatically curved edges would have been a major challenge.

galloon used as insertion

galloon used as insertion


I’ve used galloons in other garments.

Continue reading

New Brother Quattro! New SmockingTechnique!

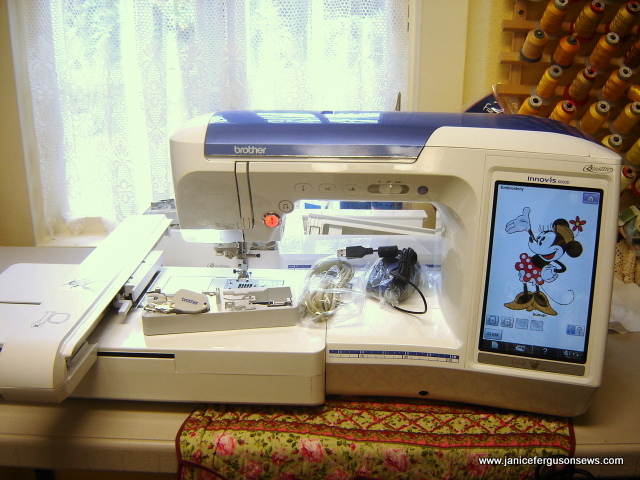
my new baby!

my new baby!


NEW MACHINE!!!  If you have heard happy shouts and contented purrs coming from central Florida, it’s just me.  I am beside myself with delight over my new Brother Quattro!  After my disappointment over the misplaced design on a collar for my granddaughter, I knew that wouldn’t have happened if I had been sewing on the Brother Quattro.  So now, this big Brother lives in my sewing room!  Hurrah!

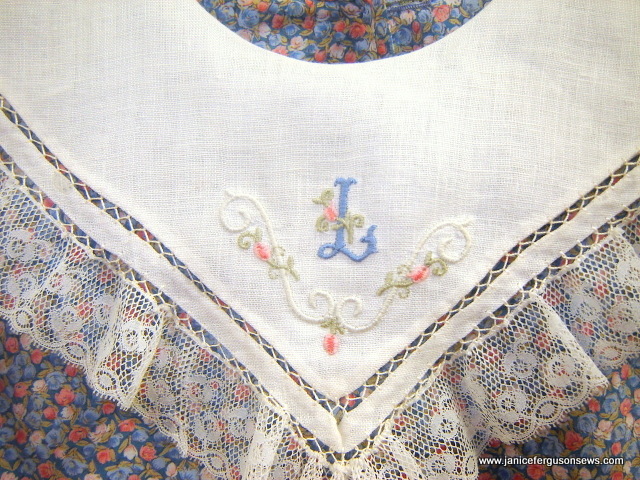
When I stitched that design on my Brother Duetta, I had hooped heavy water soluble stabilizer, applied spray adhesive and placed the “V” shaped collar in place.  In fact, I had centered the design properly, with the needle penetrating the absolute center of the design.  But the linen collar was not absolutely straight,  north and south, east and west.  This caused the “V” design to lean to the east.


collar-close


The Brother Duetta stitched it perfectly, but my operator error caused the misplacement.

This slight misalignment would not have been so noticeable had the collar been round or square or if it had been stitched on a yoke.  But with the echoed “V” so near, it was very obvious.

The Quattro has a built in camera.  With this incredible feature, the  camera locates the cross hairs of the “snowman” sticker that is placed at the very center of my design area.  The camera perceives even slight placement inaccuracies and makes the correction by rotating the design however many degrees are necessary.  Is that not wonderful and amazing?

We are in the “getting to know you” mode right now and the more I read, the more awestruck I am.  Edge sewing, print and stitch, huge embroideries…… The list goes on and on.  I can’t wait for Quattro and me to become BFF’s!

NEW TECHNIQUE!!! My granddaughter’s Easter dress seemed to be an appropriate first project to help us get acquainted.  Pictures of “shadow smocking,”  posted on Pinterest caught my eye.  Note: If you don’t know about Pinterest, check it out here. Continue reading

Baby Bunny Bubble

It’s time to get started on Easter outfits for the grandchildren. In fact, I woulda/shoulda started before now but I am busy working up a design and embroidering tee shirts for Robert and Laurel’s Odyssey of the Mind competition next week.

I’m especially grateful for the 1000 stitches per minute that my Brother Duetta puts out.  The shirts are pretty ugly, but beautifully embroidered (film at 11, or after the competition).  There are other must-do’s but very soon I MUST at least have a plan.

For sewing mothers and grandmothers, there is no greater thrill than to see their little darlings decked out in their most elaborate and special garments, created with love in every stitch.

Those of us who have labored long and hard on these very special holiday garments often find that specific recollections of each Resurrection Sunday are tied more closely to the Easter outfits made that year than to the calendar year. Continue reading

Delicious Doll Bedding

In light of the interest in the free fil tire’ heart design for machine embroidery,   I thought a rerun of this earlier post might be of interest. ~~~

“Nothing’s as mean as giving a little child something useful for Christmas.” ~Kin Hubbard

dollbedpicsm

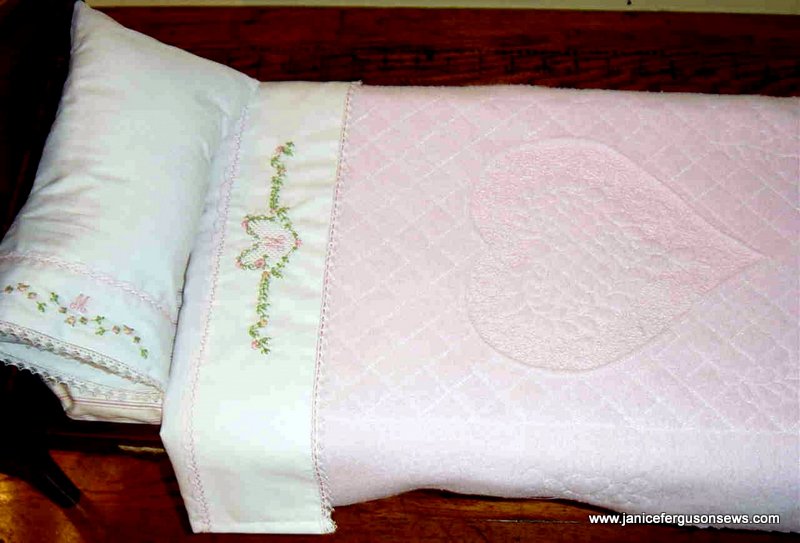
No one can accuse a doll bed of being useful. This was a Christmas gift for my granddaughter, Laurel.

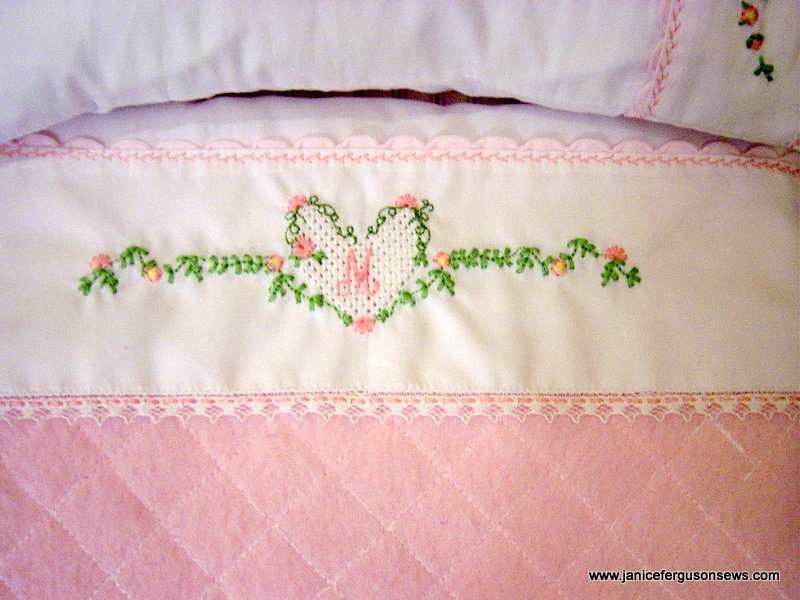
The top sheet and pillow case are made from combed cotton batiste and trimmed with bias scalloped pink batiste, English lace edging, feather stitching and machine embroidery. If embellishments were made of sugar, these bed linens would qualify as a dessert. I think the bed looks delicious.

deliciousdollsheetpilo

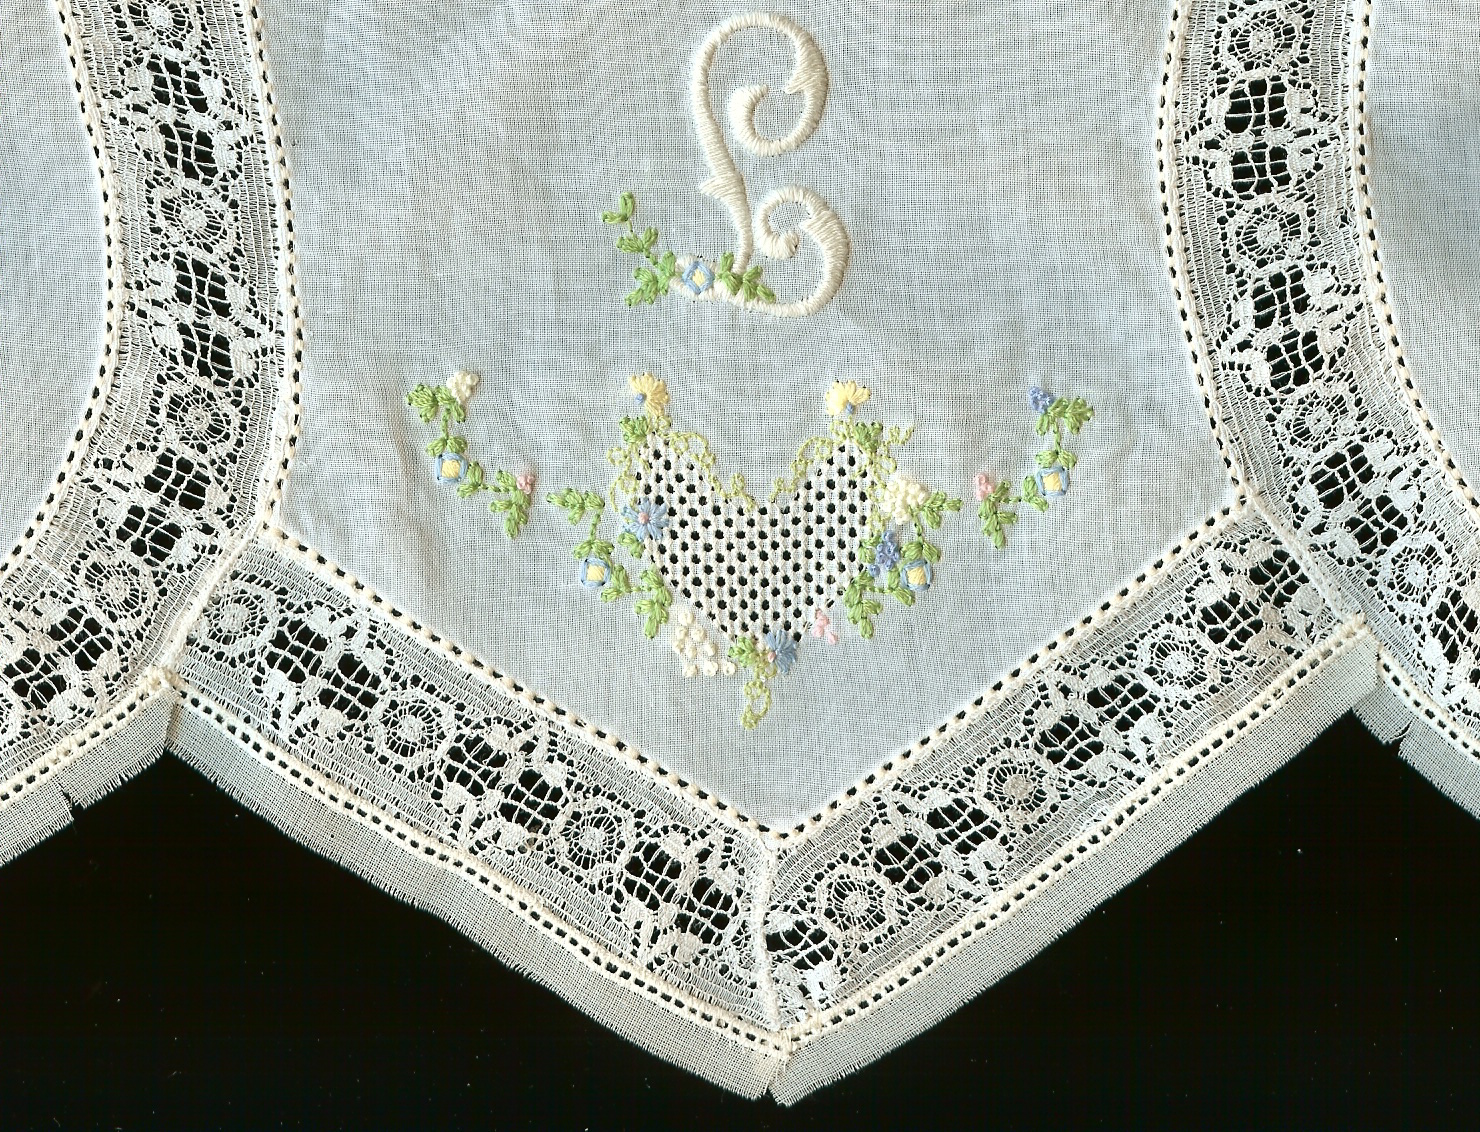
Laurel will receive the American Girls doll of my era, Molly. Thus, the “M” monogram, from my favorite alphabet in Brother’s PE-Design. The fil tire’ heart and floral spray  which brackets the monogram are from two of the Fil Tire’ and Fancywork machine embroidery collections by Suzanne Sawko and me.

deliciousdollpilscalop1-1024x440

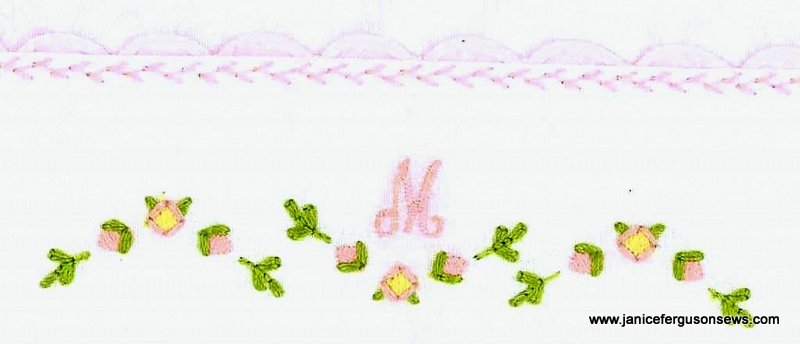
pillowcase embroidery and bias scallop trim

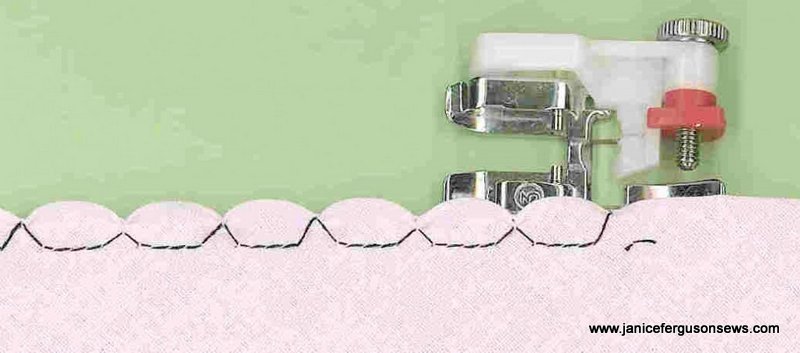
The bias scallop trim is one of my favorite techniques. It is worked with a blind hem stitch and thread matching the color of the fabric.

deliciousdollscallopmake-1024x452

This photo shows the stitches in black so you can see how the stitch works. In order to get best results, you must use a bias strip of fine (thin, not necessarily expensive) fabric and practice a bit before getting the effect you desire.

The tiny 1/4″ English lace is another of my favorites. It has holes in the header that look so much like entredeux that the effect of that expensive and time consuming feature was achieved by simply tiny zig zagging this lace to a finished edge. For added detail, I have woven pink embroidery floss through the holes.

Polar fleece is a fabulous, sturdy, versatile textile. I wanted the effect of a whole cloth quilt and sought to achieve that look with the fleece. The biggest challenge was transferring the quilting design to the fleece. After much experimentation, I had success by tracing the design onto tissue paper. The fleece was very lightly sprayed with adhesive and the tissue quilting pattern patted in place on the fleece.

Using the walking foot for straight lines in the cross hatching and free motion for the curved, feathered hearts, my beloved Brother ULT was threaded with pink 80 wt. Madeira Cotton thread in both the needle and the bobbin. After quilting, the tissue is pulled away. The spray adhesive makes it difficult to remove all tissue, but gentle laundering removes the remaining bits.

The edges of the fleece were finished with the same blind hem stitch that created the bias scallop trim. The unusual fleece weave allowed the raw edges to scallop satisfactorily, but not as nicely as the bias cut cotton.

When using tissue in this and similar projects, I first wad up the paper tightly and then iron it flat again. This breaks down the stiffness and makes it easier to tear away after stitching. When the 8″ Stitch N Ditch is wide enough, I use that.

One of the neatest features of this set is a technique I developed out of necessity when my daughter went off to college and was assigned to the top bunk. Like Rebecca’s bedding, Laurel’s doll bed linen has at the foot of the sheet, buttonholes which are partnered with small buttons sewn to the underside of the fleece “quilt.” With these two elements of the bedding joined in this manner, a little housekeeper or chambermaid can make the bed with ease and some degree of respectability.

The rope bed came with no mattress, so I covered a piece of 1″ foam with pink candy stripe polished cotton, to suggest ticking. Laurel and I have talked about how beds used to be made and then looked at a few old feather pillows I have that are made of standard blue ticking.

I doubt the educational use of the bed makes it “useful.” Instead, I think it looks delicious, just the kind of bed on which I would like to rest my weary head.

O bed! O bed! delicious bed!
That heaven upon earth to the weary head.
~
Thomas Hood, Miss Kilmansegg – Her Dream

AG Doll Bishop with Centered Embroidery

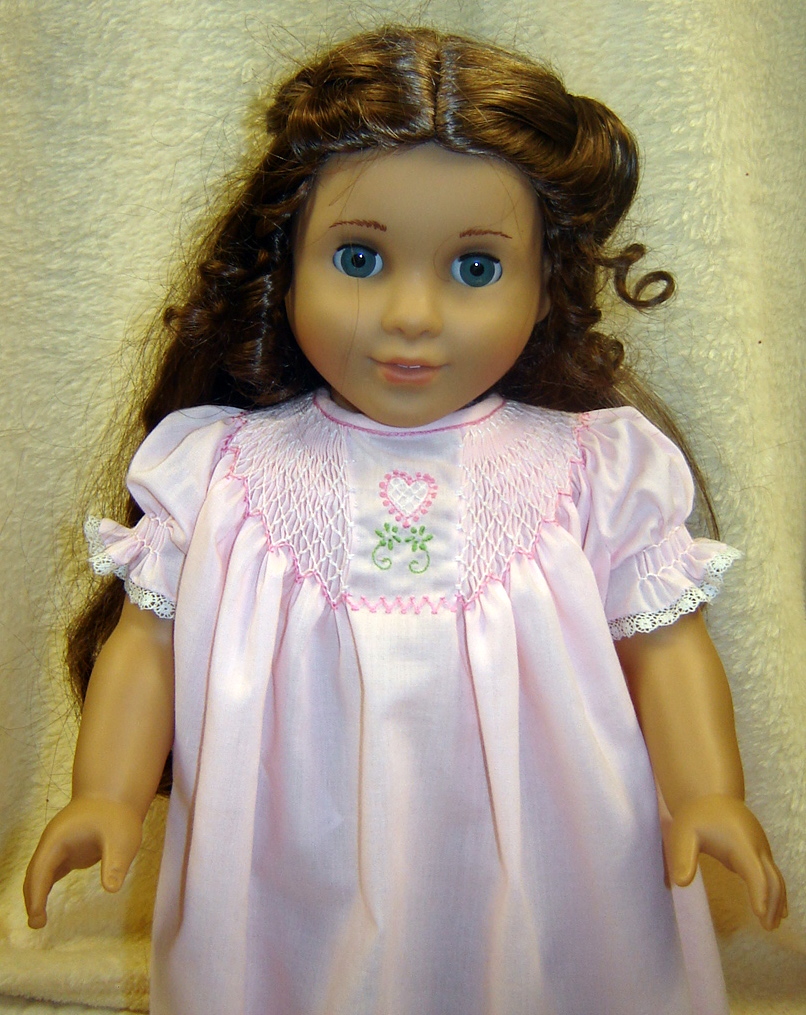
American Girl doll Marie Grace in her Valentine nightie

For Valentine’s Day, I am making my 7 year-old granddaughter a smocked bishop nightgown and this matching one for her American Girl doll.  If these hadn’t been cut out and pleated up before I got Custom Keepsakes  Sweet Dreams collection, I would be making nighties from that set.  But these have to be finished.

I wanted something a little more interesting than a standard bishop and decided centered embroidery would be a fresh look.  More than once, I have flattened the pleats at center front for embroidery or a tab and never found it to neither difficult nor problematic.

Doing this on a doll sized bishop gave me some unexpected disappointments.  I’d like to share with you what I learned on this little project.
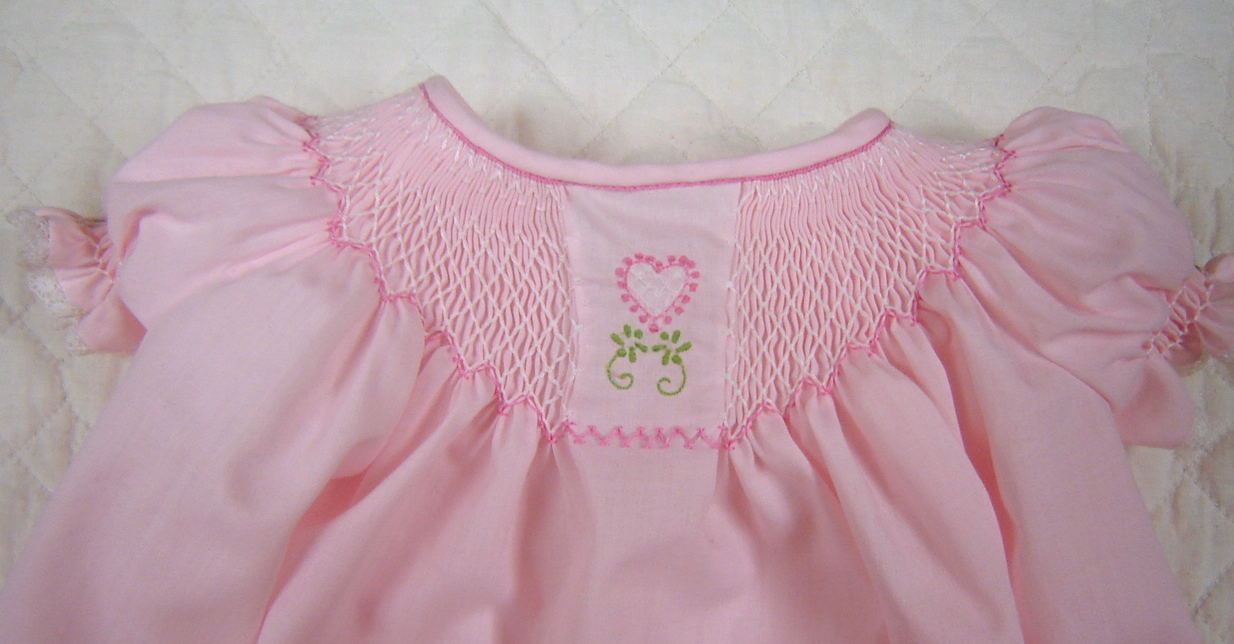
But here are the particulars of the nightie.  The smocking is a design I just made up as I went along,  the fabric is Imperial batiste and the pattern is one I drafted. The embroidery is from Martha Pullen’s Little Pleasures  collection, though it is slightly rearranged.  Laurel’s gown will have the fil tire’ heart for embroidery.

The smocked sleeves were trimmed with French lace and embellished with French knot flowers, a cluster of three in the center and a single knot on either side.
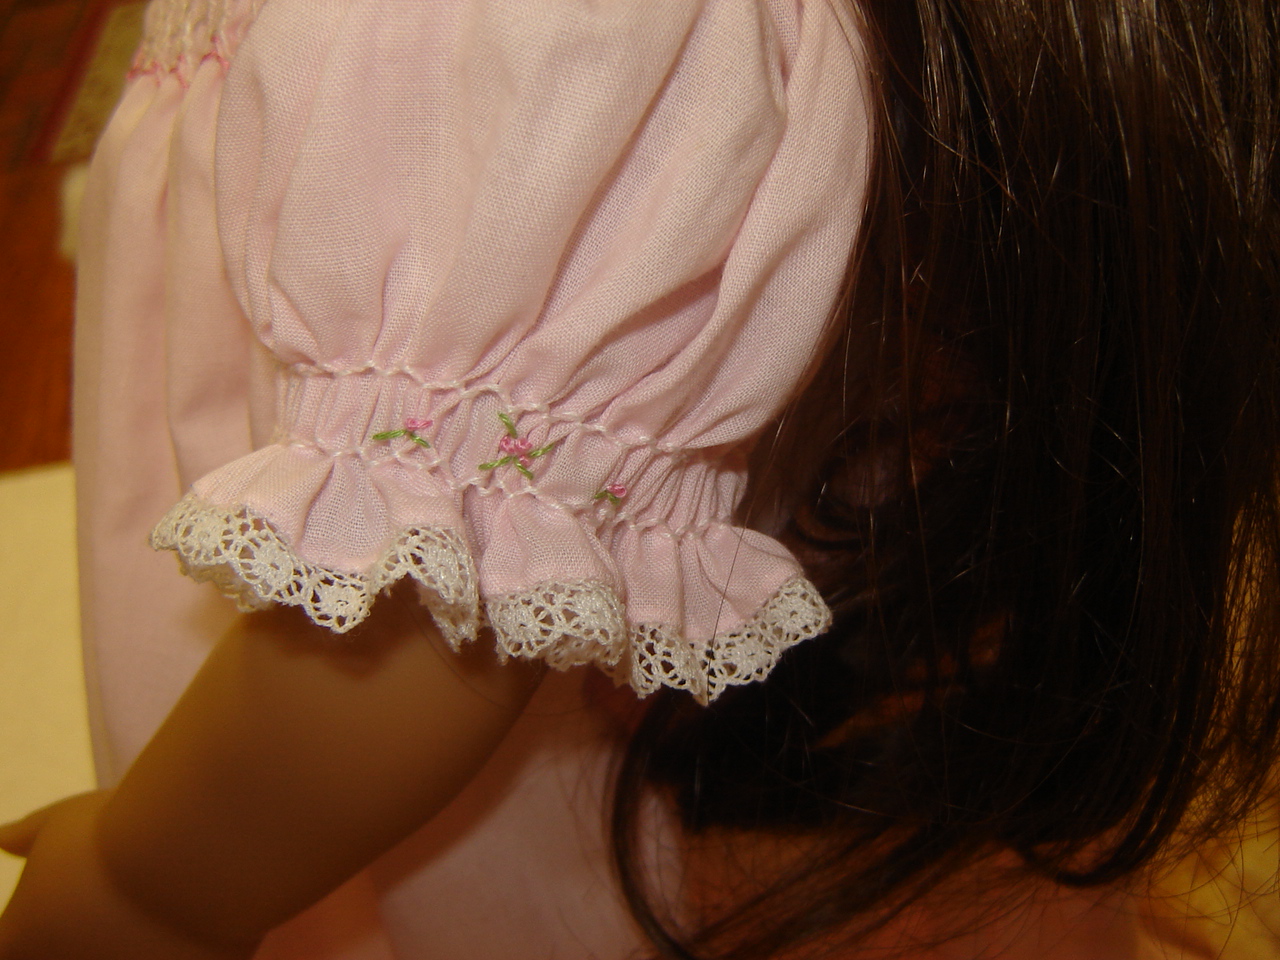
Frankly, this is all nit-picky stuff and probably isn’t worth worrying about on a doll nightgown.  But I wanted to figure out just what went wrong.  If you don’t care, take a quick look at the pictures and move on!  The internet is full of fabulous blogs with interesting, fun posts.

First, in response to Jo’s question, just how do you prepare a bishop with center front embroidery?

  • Pleat the bishop as usual, but with extra long threads and with the center front marked.
  • Pull up each pleating thread at that center mark and cut.  Be sure to pull up enough thread that you can easily tie a hefty knot.
  • Remove the threads from enough pleats to accommodate the embroidery design.
  • Knot each of these cut ends.
  • See a flat center with a vertical row of knots on either side.

The problem I ran into was the neckline and binding.  First, in order to correct the inevitable dip in the hemline at center front, I always draft (or use patterns) with a straight neckline. Here is how I do it and then you will see what I should have considered for a doll pattern. FYI, I always use 1/2″ seam allowance at the neckline which I adjust on patterns that have a smaller seam allowance.

  •  After cutting out the pieces, I fold the front in half, with the fold running down the center front from neckline to hem.
  • Then I mark a dot 1/2″ below the top edge on the fold.
  • With a rotary ruler and cutter, I cut from the dot on the fold to the seam line of the front shoulder.  This removes a folded wedge from the neckline, making it 1/2″ shorter at center front.  The gentle taper causes no difficulty with pleating.
  • After sewing the pieces together, I run a machine sewn 3.0 length gathering stitch 1/4-3/8″ from the raw edge.
  • The bishop is pleated with the first pleating thread 1/2″ below the neck edge, which puts it right on the seam line.

So far, so good.  Then for center embroidery, I remove the pleating threads from that area as detailed above.

So what is the problem?  The neckline.

1.  The flat, embroidered section, 1-1/4″ wide has very little curve to it.  If there had been pleats there, the slight taper of neckline would have been greater at the center front.

As I thought about it, I recalled that approximately 3″ of flat fabric pleats up to 1″.  So the center 1-1/4″ of binding would have used up  3-3/4″  of fabric that had been tapered.  That leaves the center front much straighter.

I’ll have to check with my husband, the engineer, to figure out just how that could be corrected.  But I know it should have been a deeper curve.

2.  The flat, embroidered section has no bulk to fill the bias binding.  I don’t recall this being a problem with earlier flat center bishops, but maybe I wasn’t as picky  then.

As I was applying the binding and came to the flat section, I discovered that I had two choices, neither of which I liked.  The first was to fold the bias over just as I had on the smocked section.  That left the bias much wider, because it had nothing to wrap around.

The same amount of bias could wrap around thick pleats and measure 3/16″ in width while the flat section had nothing to fill it and measured 1/4″.  Does that make sense to anyone who has plowed through this minutiae?

The other option, was to wrap the bias over the same distance, and then stitch the excess width further down on.  But it shadowed through.  I chose this option as the lesser of two evils.  In retrospect, I probably could have just twisted a narrow strip of batiste to use as filling.
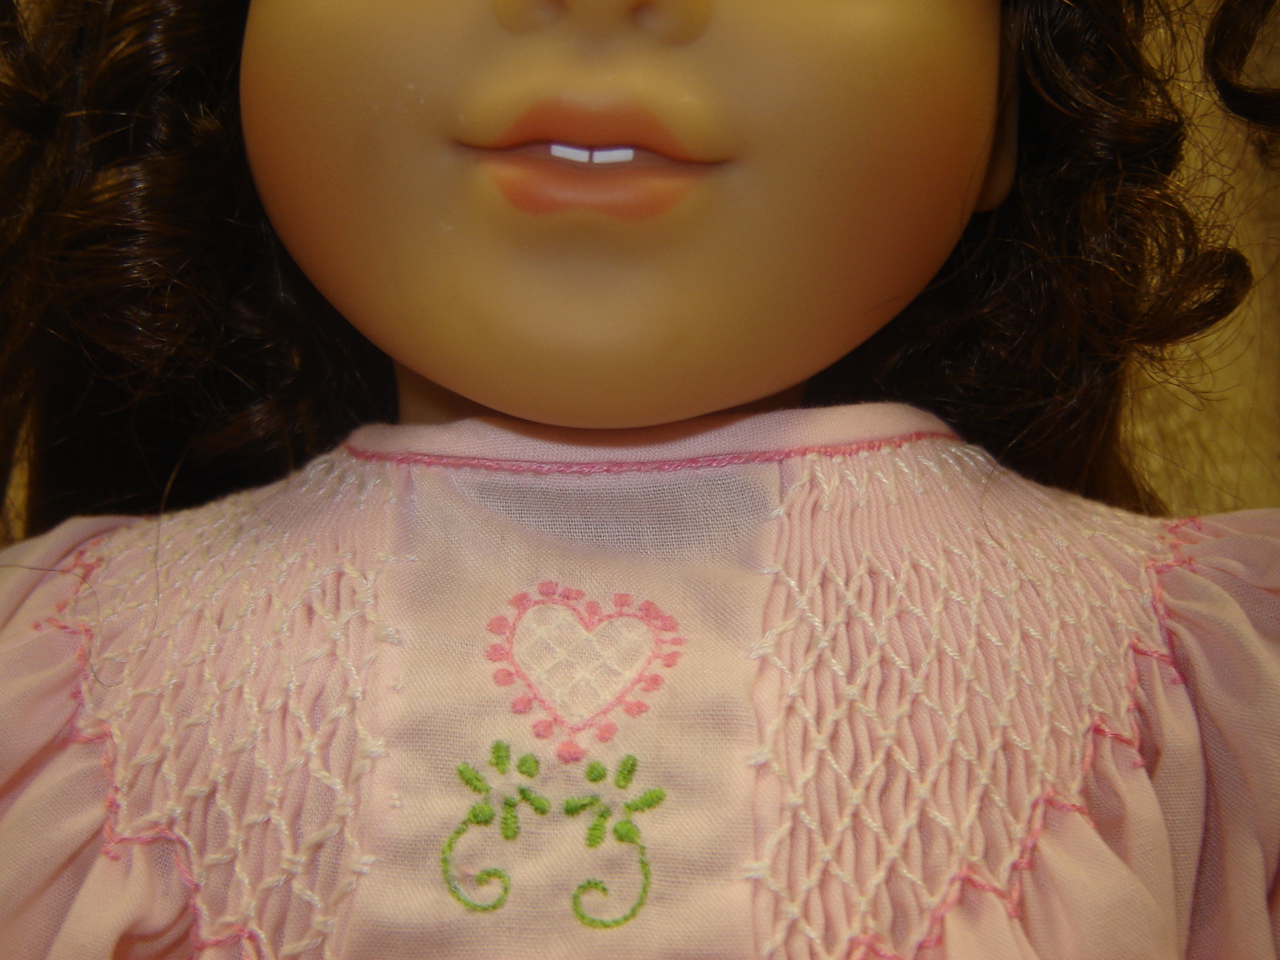
You can see the excess bias shadowing through the batiste above the embroidery.

Well, I could go on about how I wish I had lowered the embroidery and/or smocked fewer rows in the front, but this is more than anyone wants to read.  And it’s more than I want to write about.  I still have Laurel’s nightie to smock so I will move on to that.

Are you sewing/smocking/embroidering any Valentine’s gifts?  Tell us about it.


This is my post for Freckled Laundry and Pink Saturday.

Free ME Fil Tire’ Heart Design

To receive the free machine embroidered heart design, state your request as a comment at the end of this post. The .pes design will be e-mailed to you.

fil tire’ hearts on Swiss flannel baby shawl

The previous post which showed Judy Day’s Valentine outfits for her granddaughters reminds me that this celebration of affection is just around the corner.

For Laurel, my 7 year-old granddaughter, I am smocking a pink bishop nightgown with a matching one for her AG doll.  But I have left a small section at the center front with no pleats.  Machine embroidered in this area is the fil tire’ heart.


I’ve used this design several times for Laurel, most recently on last year’s Easter dress.

My overly ambitious plan was to have these nighties finished by now, feature them in this post and offer the design free to readers.  I thought this might give you enough time to use it on some Valentine project.

This is just a very small token of my gratitude for those of you who read this blog, those who have made purchases to help me in my de-stashing efforts, and those who have offered your friendship.  I do so appreciate each one of you.

Well, neither gown is done but ….tick*tock*tick*tock…time passes by.  So I am re-running this  Pink Diamond Baby Pillow post and a photo above from the Heart Swag Baby Shawl post to show you what the heart looks like.  It also includes detailed instructions for stitching it out.

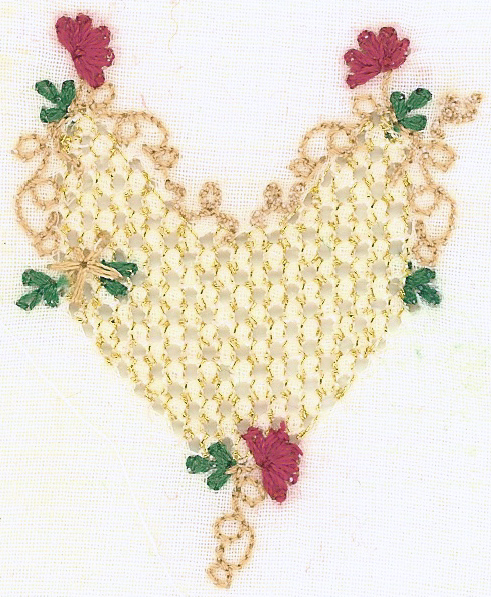
fil tire’ heart in winter colors, 1.56″ x 1.92″

So, Dear Readers, happy Valentine sewing to you.  Just leave a comment requesting the design and I will e-mail it to you in .pes format. Continue reading

Vintage Rick Rack Lace and Free Patterns

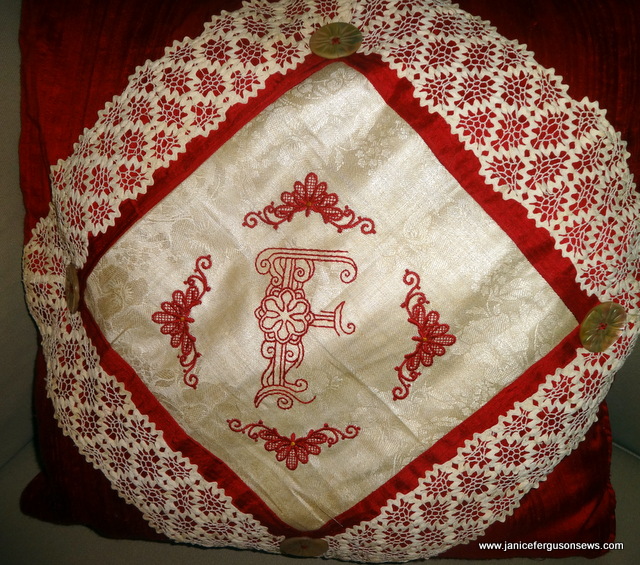
1-rick rack pillow

The pillow is red silk dupioni trimmed with vintage rick rack lace and antique buttons. The center panel with monogram was stitched on an antique linen damask napkin.

I’ve always been enchanted by old textiles, laces in particular.Rick rack lace is one of the most unique and intriguing in my collection.

RickRackLace blue

It sounds so tacky! Certainly it can be and undoubtedly some good-taste challenged lady in the 40’s or 50’s created some unattractive yardage using this technique.But it can be so charming, if not delicate.

RickRackLace green

Rick rack lace seems to have been very popular for towel and pillowcase edgings.In fact, I have a length of it in red and white that was obviously used on a pillow slip. The sturdiness of this trim makes it very suitable for heavily laundered items.

RickRackLace yellow

This white length is my favorite. I would love to have enough to edge a baby blanket, but instead will have to settle on using it for trim on doll dresses for granddaughter Laurel’s American Girl Molly. She was a miss of the 40’s so her time frame is appropriate for its use. I envision it around the raised waist of a velveteen dress. The texture contrast would be very pleasing, I think.

RickRackLace white crop

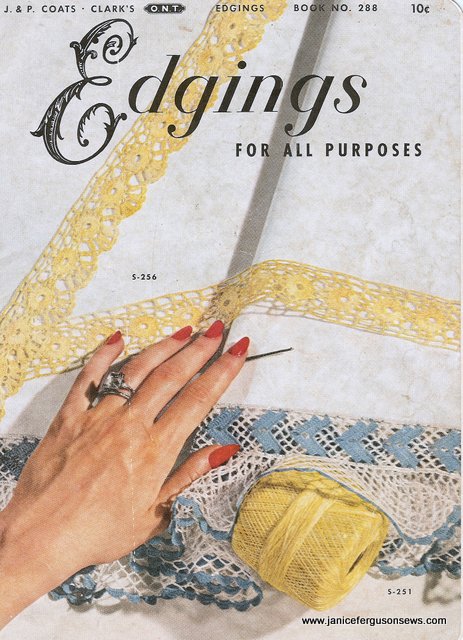
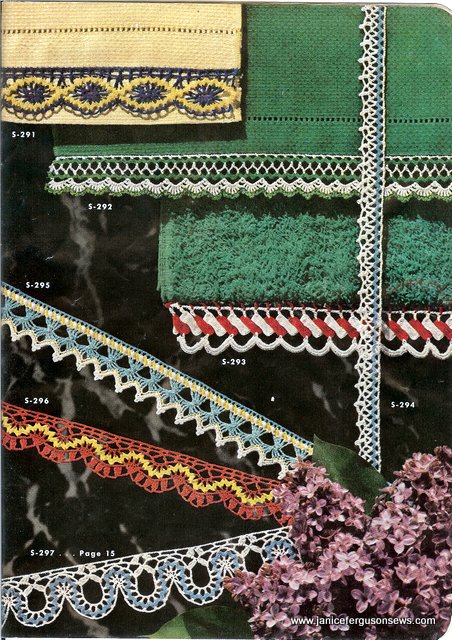
This 1952 needlework book includes several patterns/directions for making rick rack lace.

RickRack Lace booklet

While the photo showing styles is certainly representative of the popular color waves of that time, the lace is very intricate and would be beautiful, I think, in neutrals or pastels.

rickrack lace book pics

If I could really crochet, I’d try making some lengths of one or two patterns. I wish one of you readers would make some and let us know how it goes.

UPDATE: I found this site with wonderful pictures of rick rack lace.Check it out.

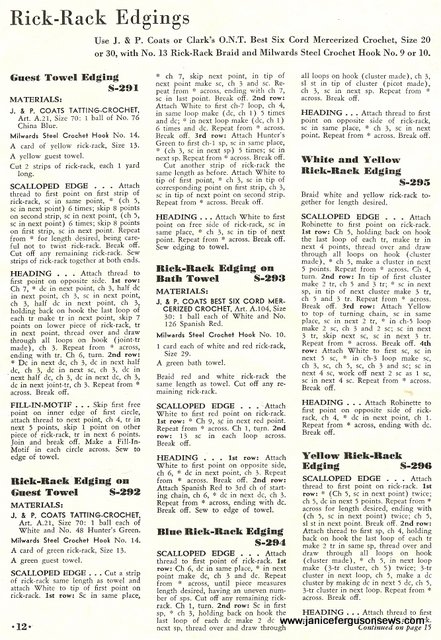
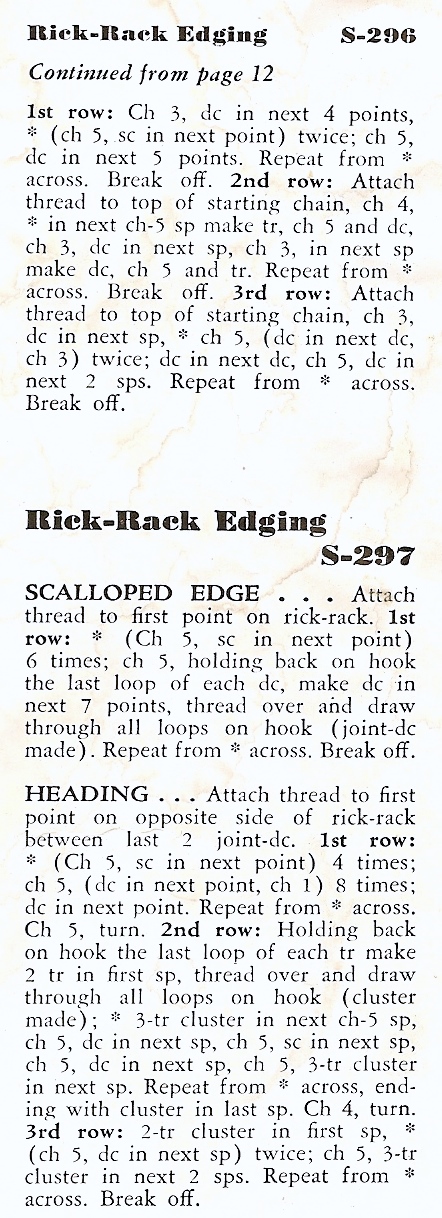
Here are the directions. If you are unsuccessful in copying the image, post a comment requesting me to e-mail it to you.

This is my White Wednesday post at Faded Charm.

RickRack Lace dir1